In this video, I try out a newly-received H8 computer and build a speech synthesizer for it using the SP0256A-AL2 IC:
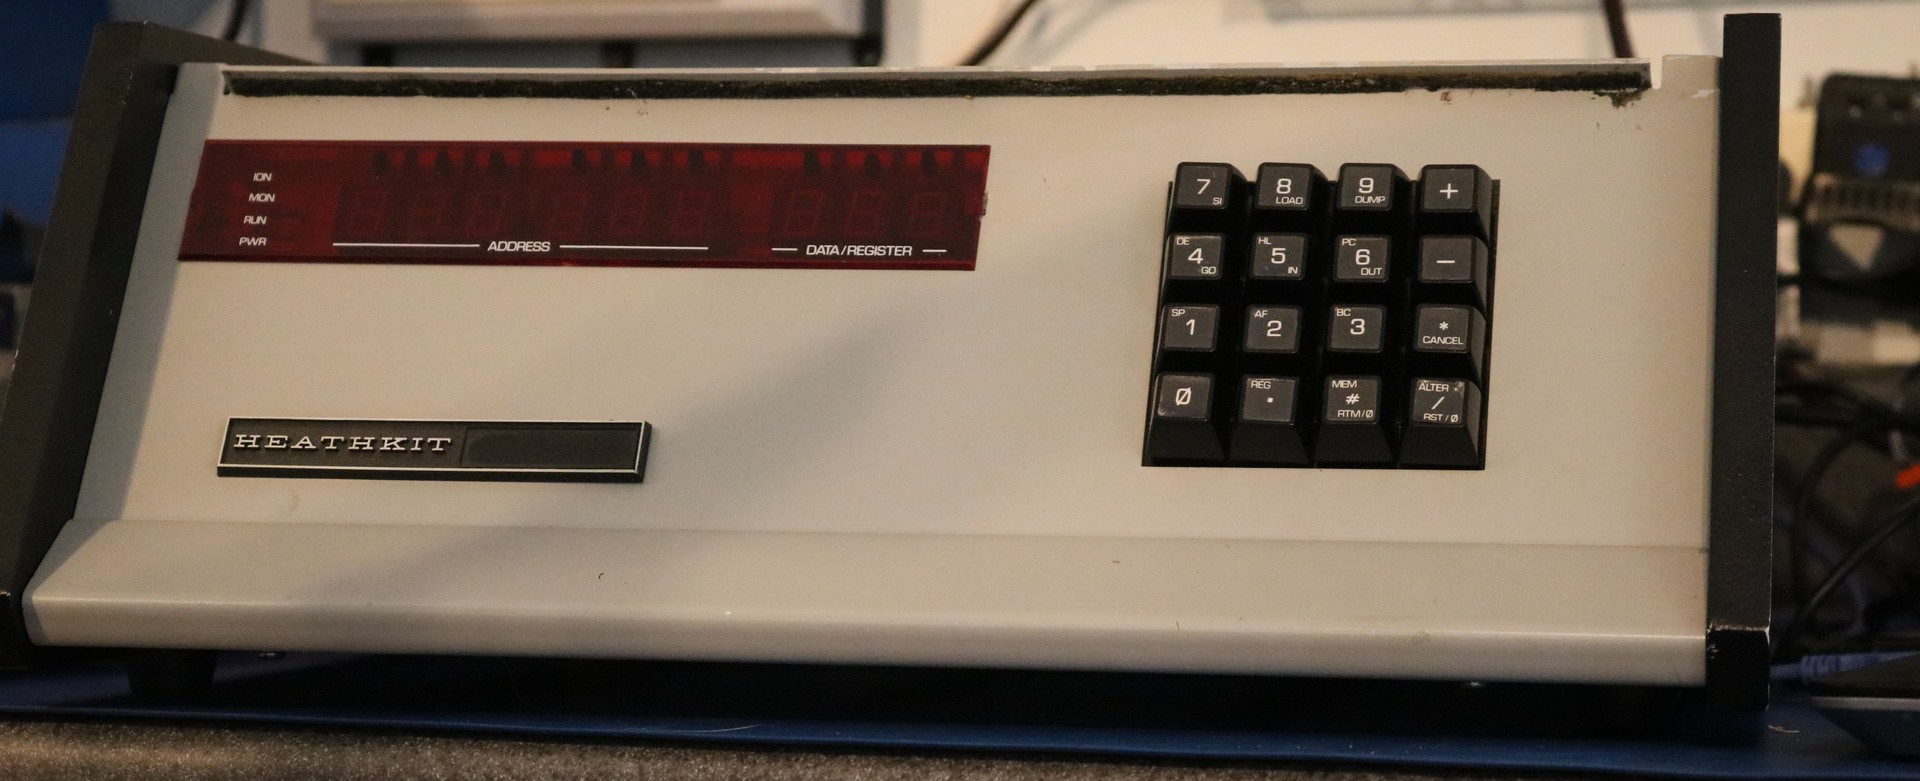
My new H8 Computer
A fellow member of SEBHC, Glenn, hooked me up with a good deal on an H8 starter system. It was actually exactly what I was looking for — an H8 that had almost no upgrades, using the original 8080 CPU board and the original tape board.

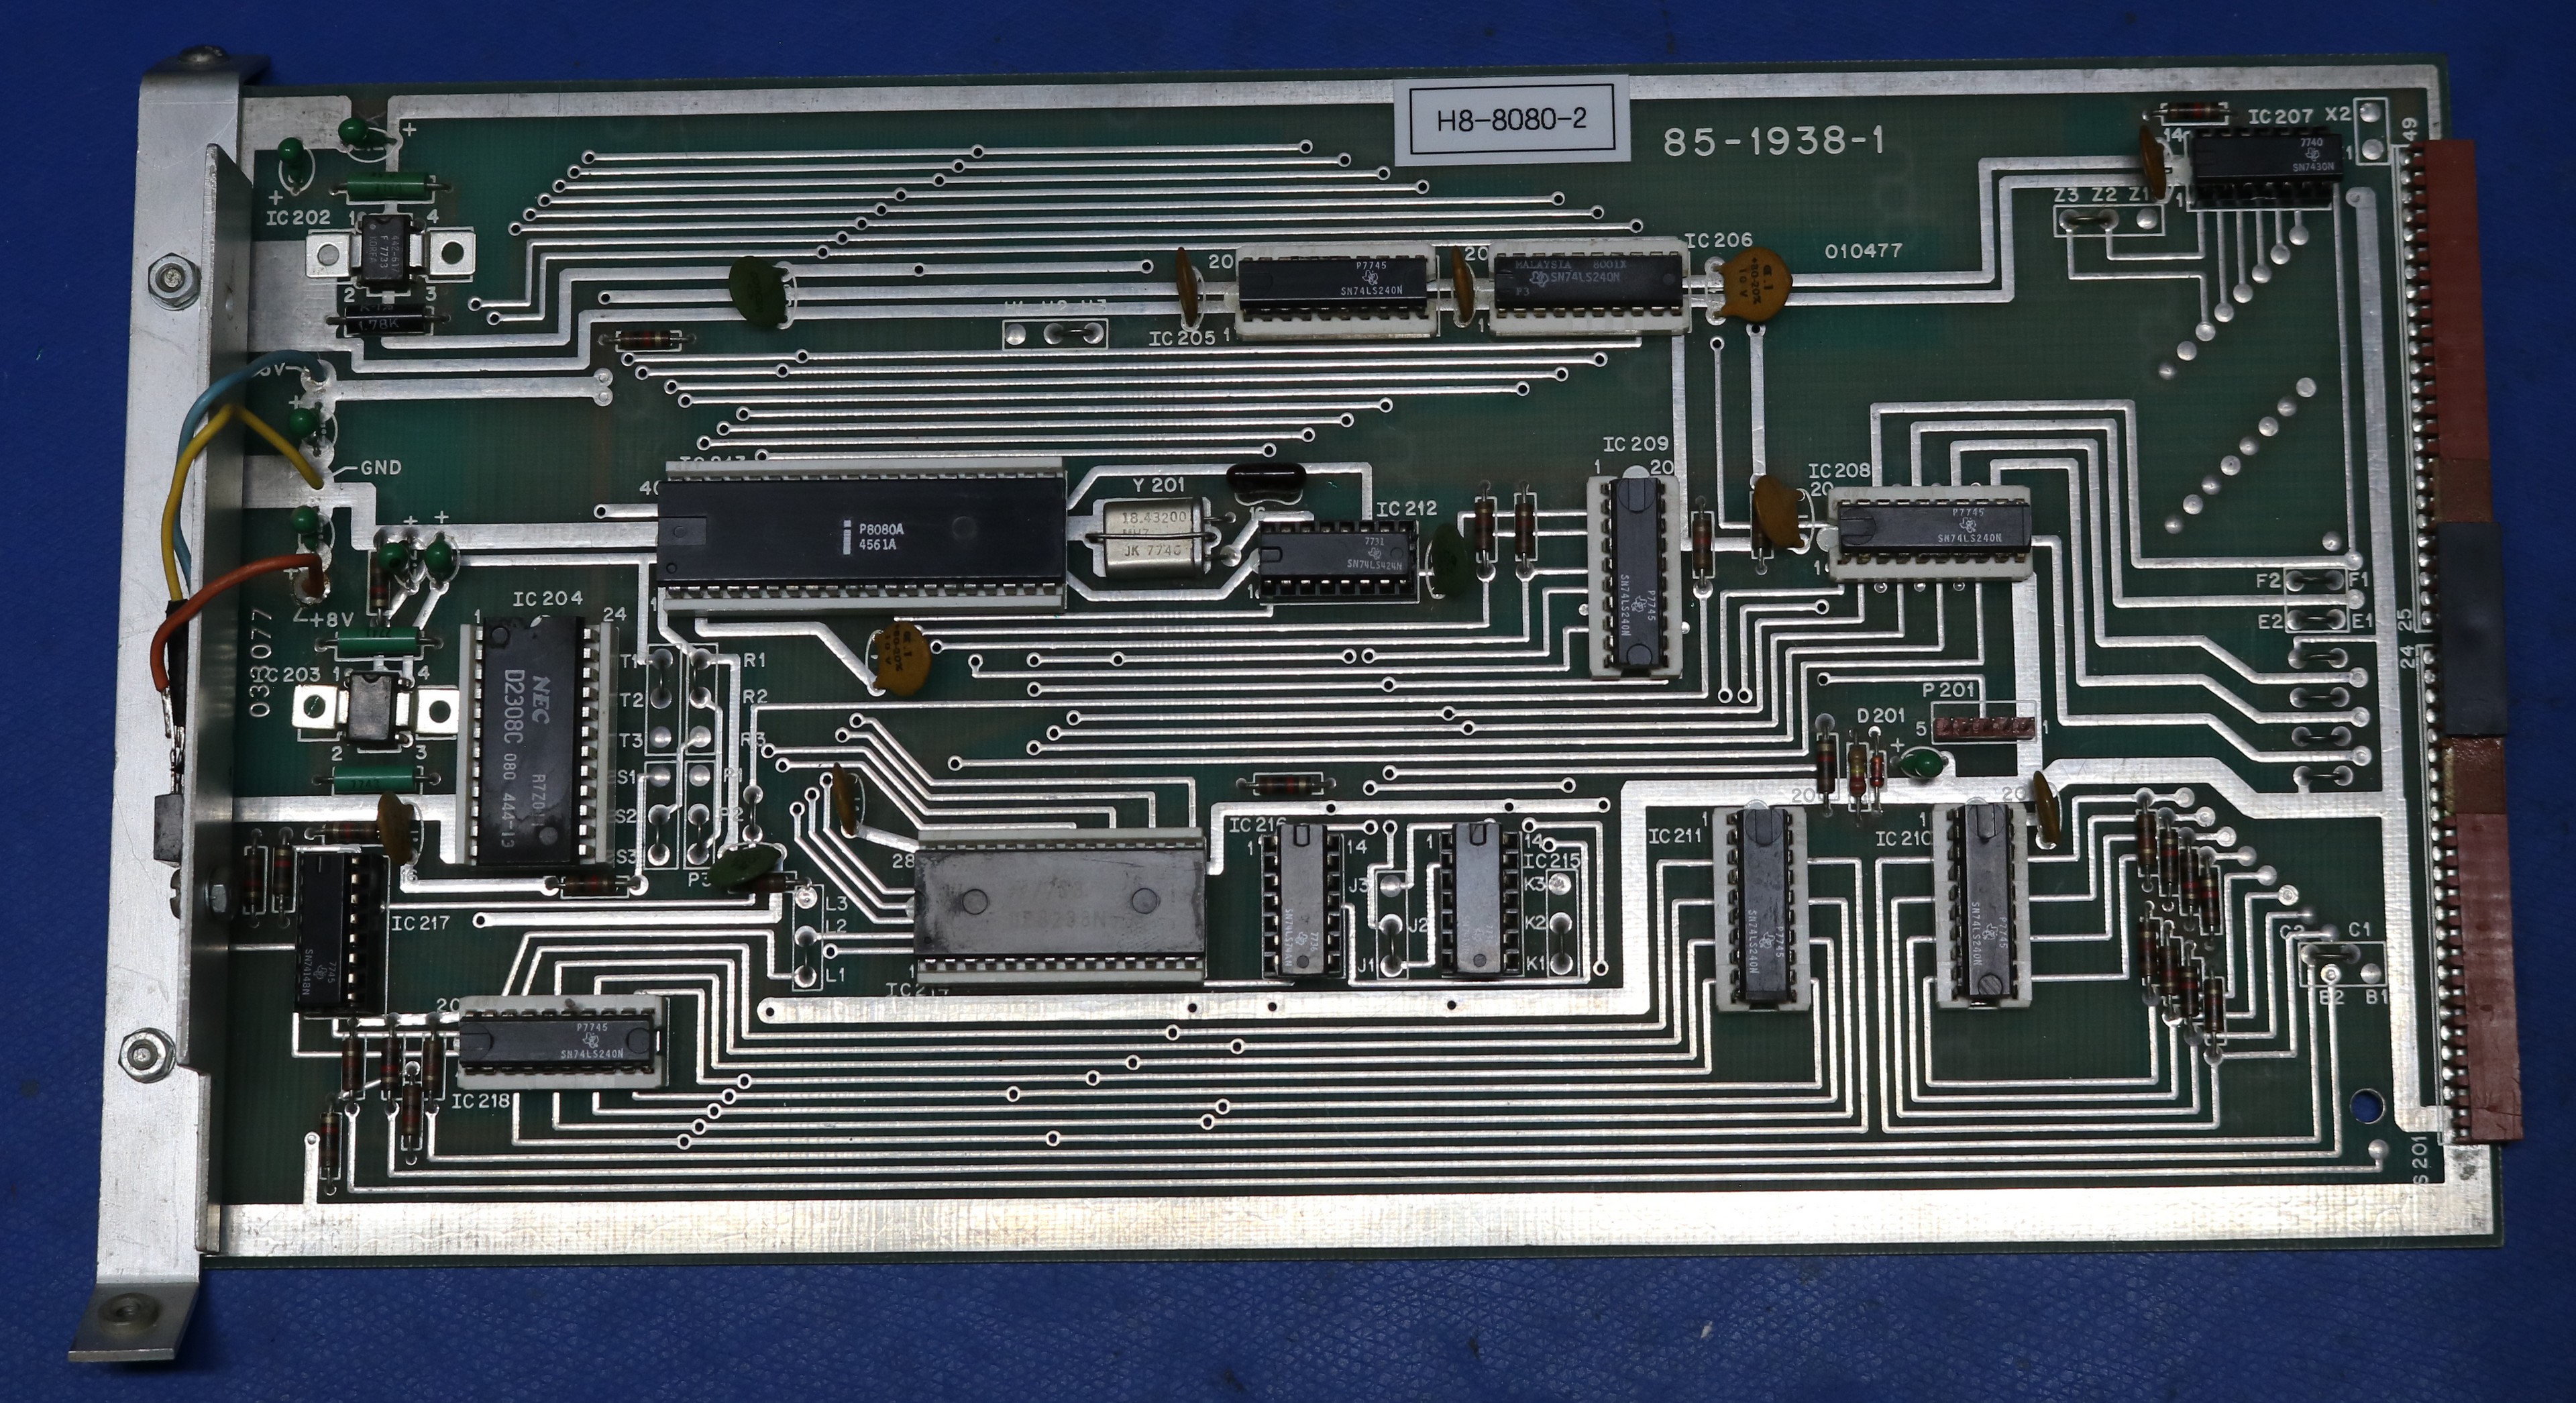
As equipped, the computer included an 8080 CPU board:
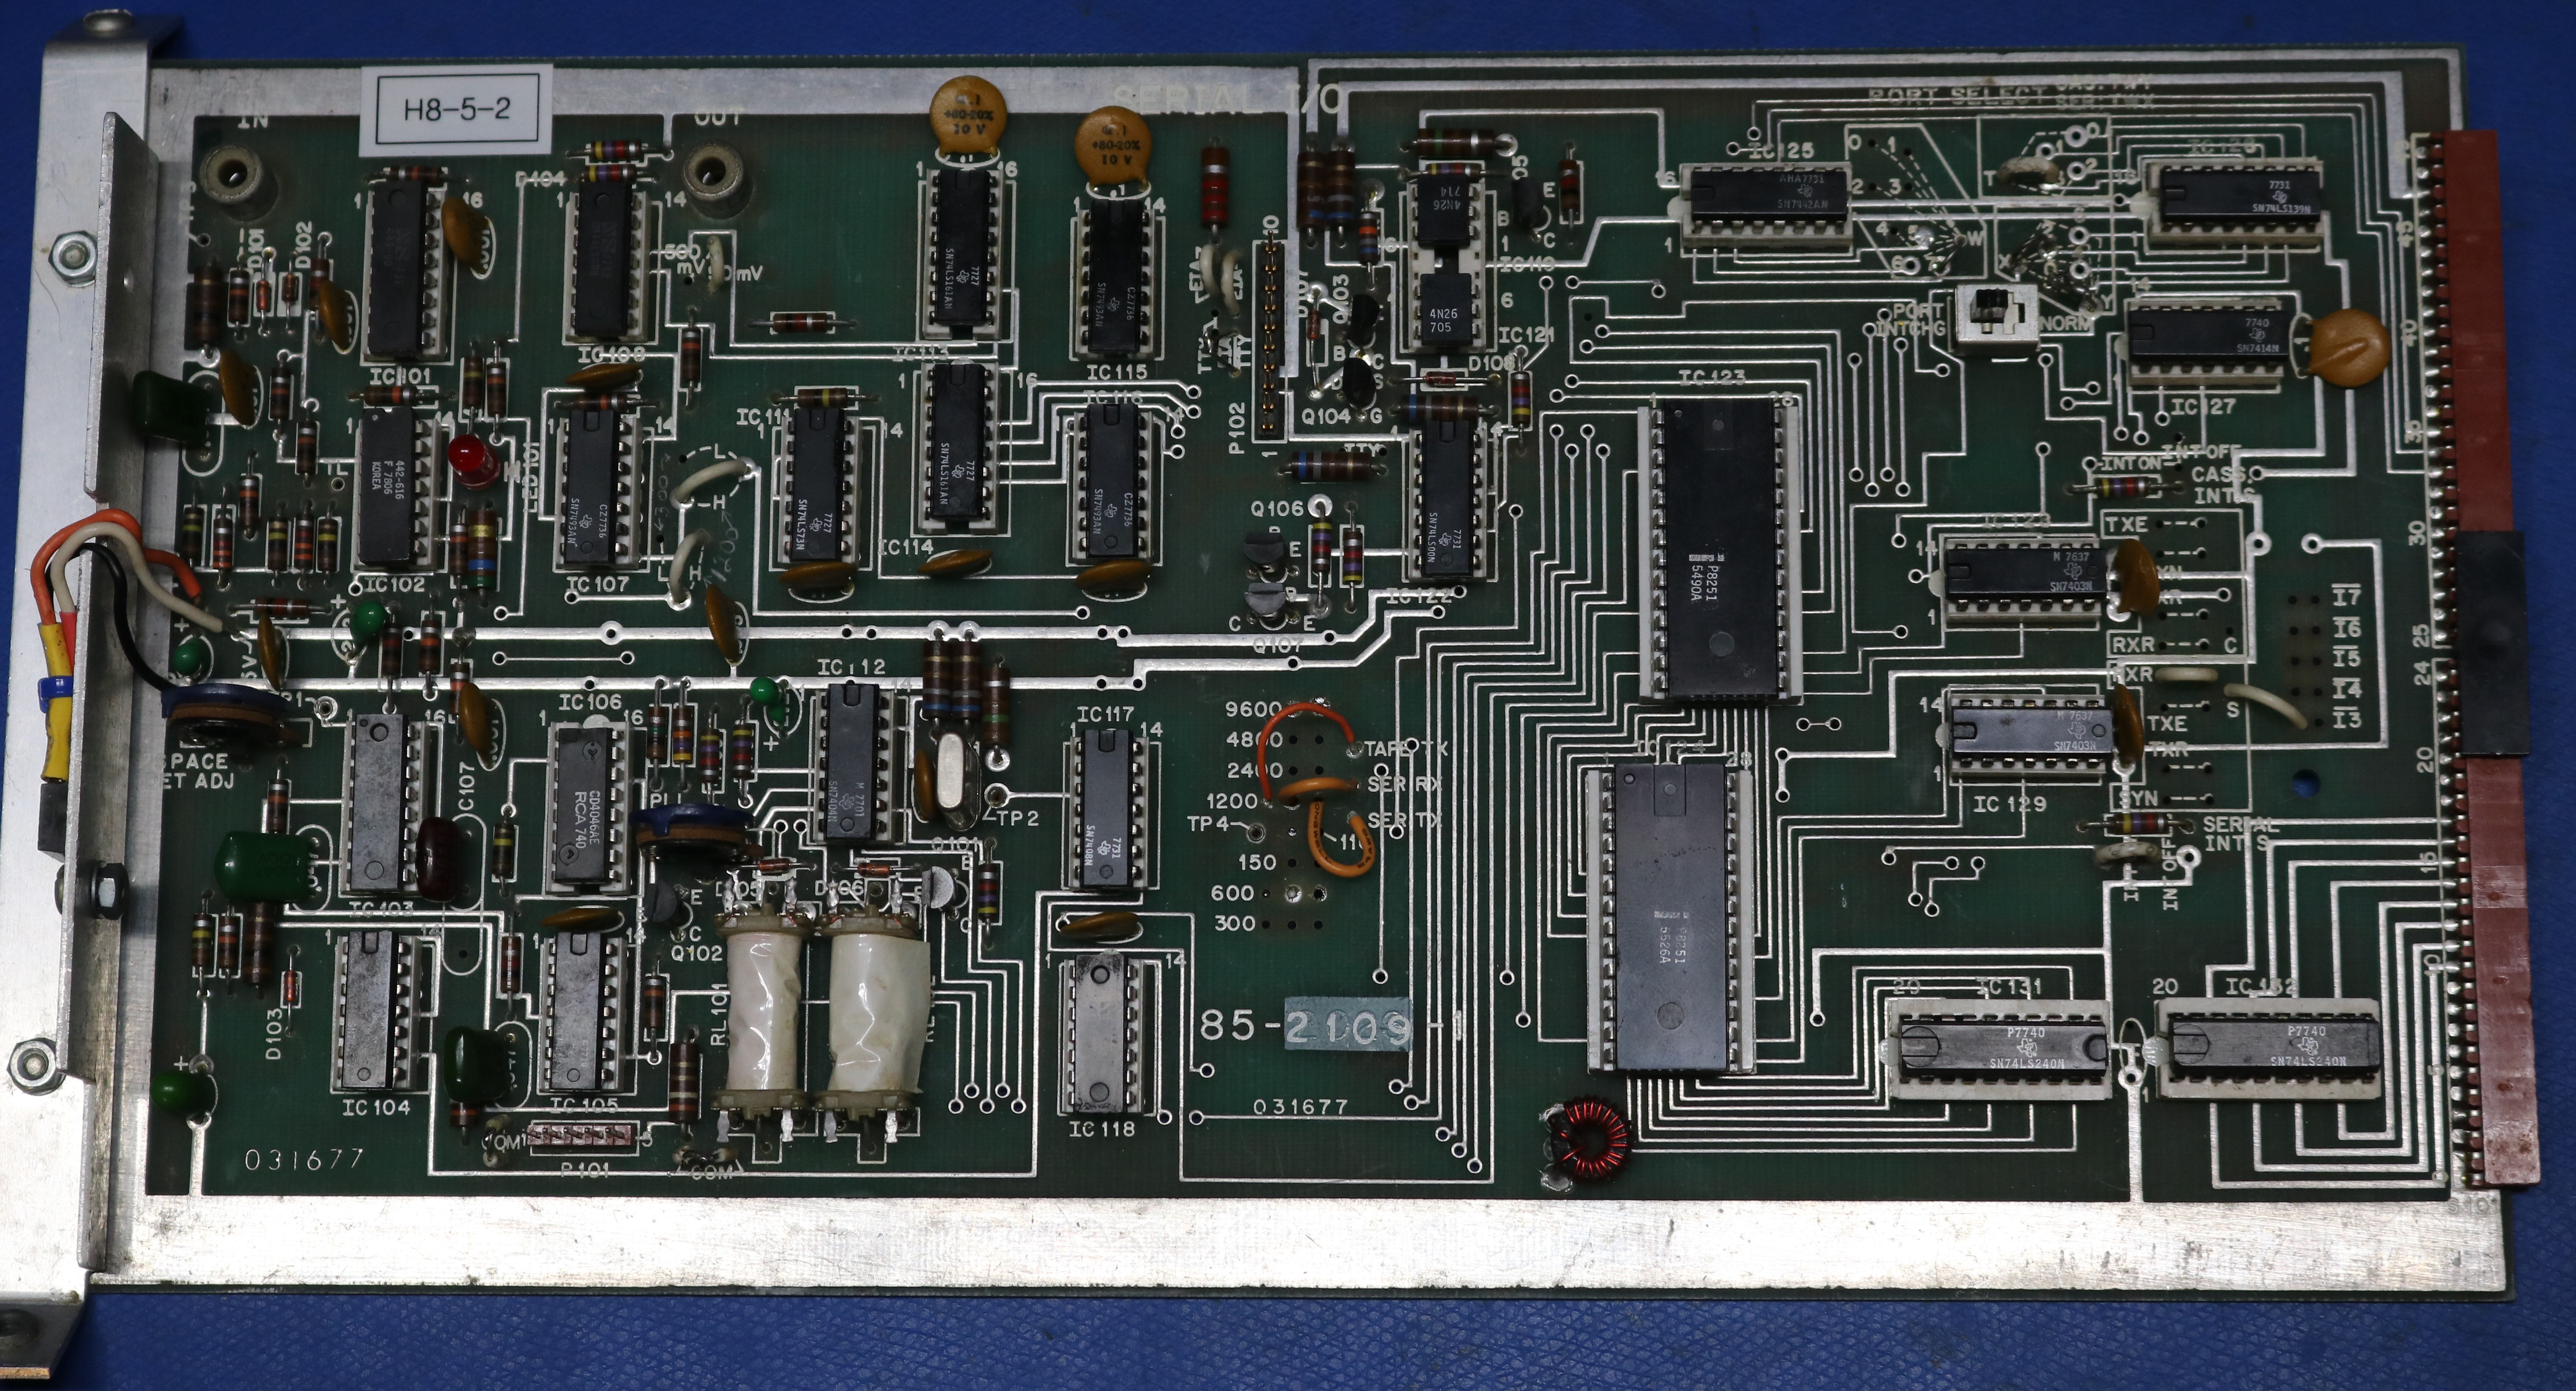
… and an h8-5-2 tape and serial board:
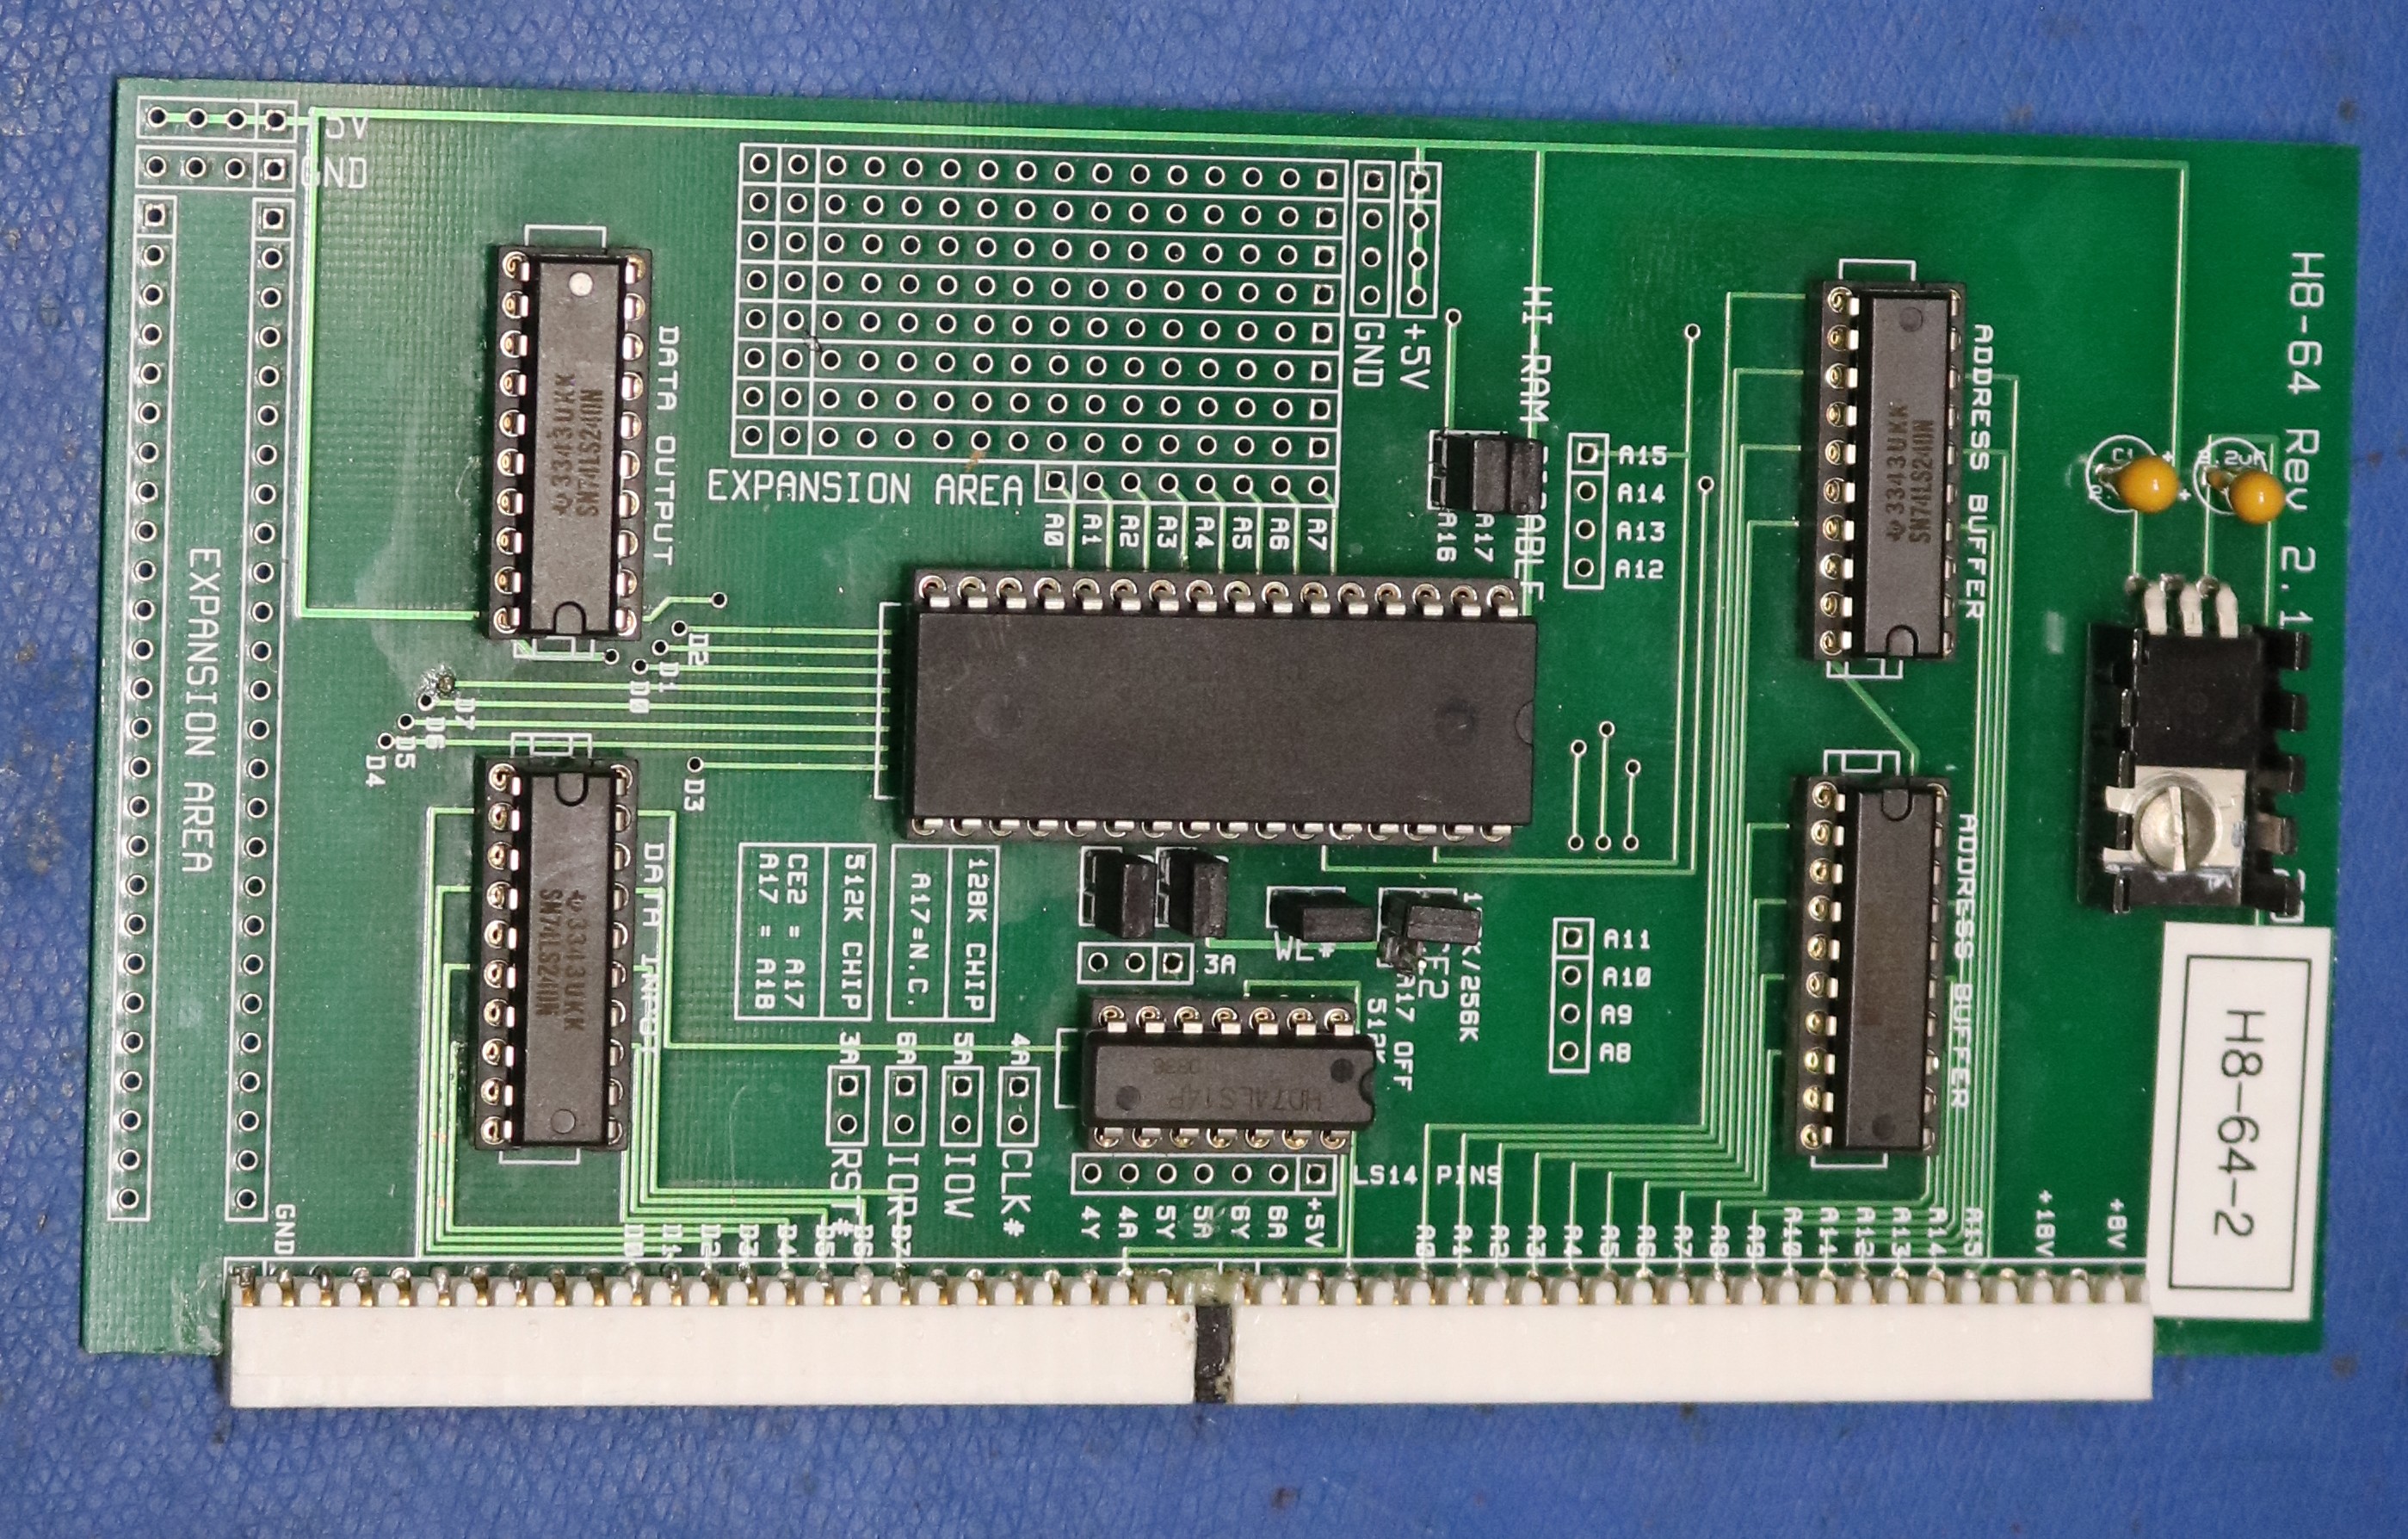
Glenn did not have the original RAM boards to go with it, but he did include an H8-64 memory board:
Glenn and Norberto and other members of SEBHC were quite helpful, helping me get acclimated with the computer and working through any difficulties I had, particular related to tape load. Norberto in particular has designed a wide range of modern H8 cards. During the video, I built a new RAM board that Norberto suggested.
My first experience with Benton Harbor Basic
It took me a little while to get BASIC up and running on the H8. The H8 does not have BASIC in ROM; it has to be loaded, either from disk or cassette. My H8 did not come with a disk controller, so it came down to using the cassette interface. Unfortunately, I had no cassettes, but I did find at the sebhc github some binaries of the basic interpreter. These binaries had to be converted to WAV files so I could play them as audio. I used a tool called “KCS” to do this. Once I had created the WAV files, I had to play them
- My windows laptop. Despite several attempts, the H8 would not recognize the audio output from the windows laptop at all. I tried various volume settings. The LED on the tape board did blink, but there was no indication the H8 was recognizing the tape.
- Raspberry Pi. My second attempt was to use the audio output from a raspberry pi. This was recognized, but led to occasional checksum errors. I estimated the error rate to be somewhere between one in a thousand and one in two thousand. The error rate was low enough that I occasionally was able to get a clean load.
- iPad. A suggestion from Glenn was to try using my iPad. I emailed the WAV files to myself and downloaded them to the iPad. With the iPad’s volume at approximately 90%, the tapes were both recognized and fully loaded without checksum errors, 100% of the time.
I don’t have a good explanation for the differences in playback devices, other than that perhaps there is some audio processing intended to enhance sound quality or auditory experience that is messing with the audio signal sufficiently to cause errors. It would be interesting to dive into the problem deeper.
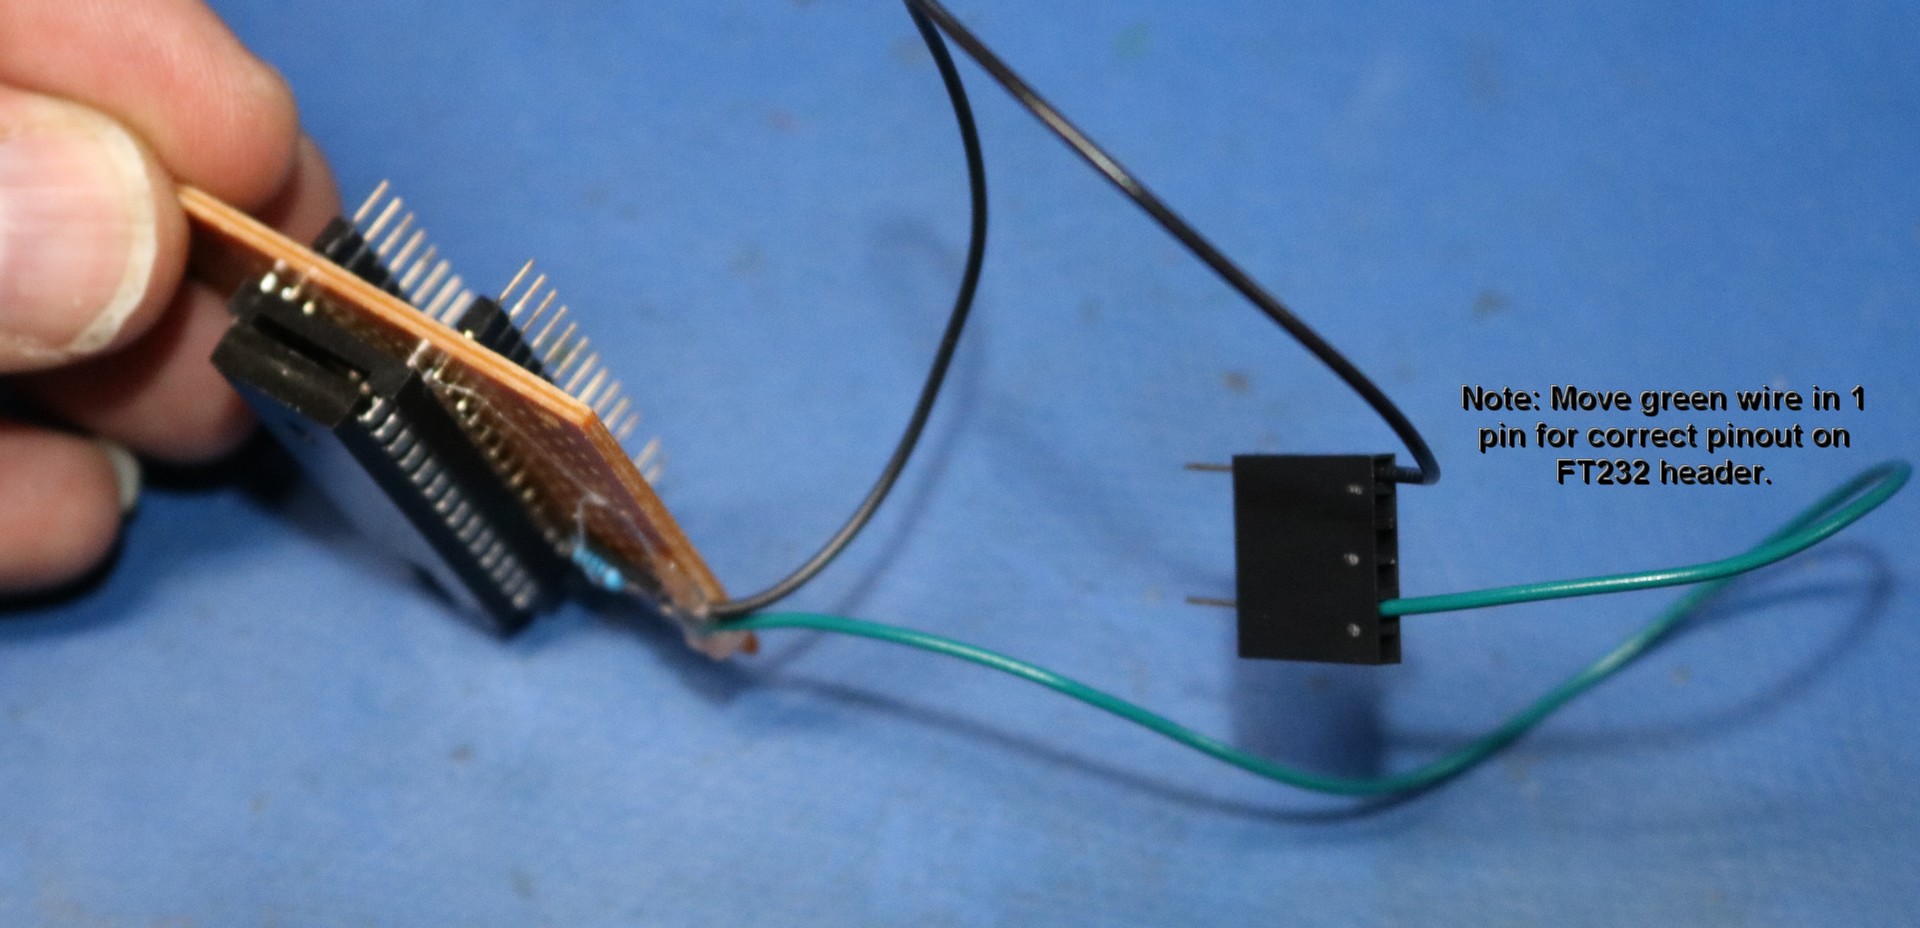
I also learned that it’s possible to inject a serial stream into the tape board’s UART directly. You merely need to disconnect pin 3 of IC123 and inject a 1200 baud TTL serial signal into the 8251. This can be done using a TTL-serial adapter, such as an FTDI cable. I constructed a tiny piggyback board to do this:
Anyhow, using either the piggyback board, or using the iPad is sufficient to get Benton Harbor Basic online. This was a necessary prerequisite, as I intended to demo my speech synthesizer using my typical small BASIC program.
Speech Synthesizer Design
Below is a schematic of the speech synthesizer:
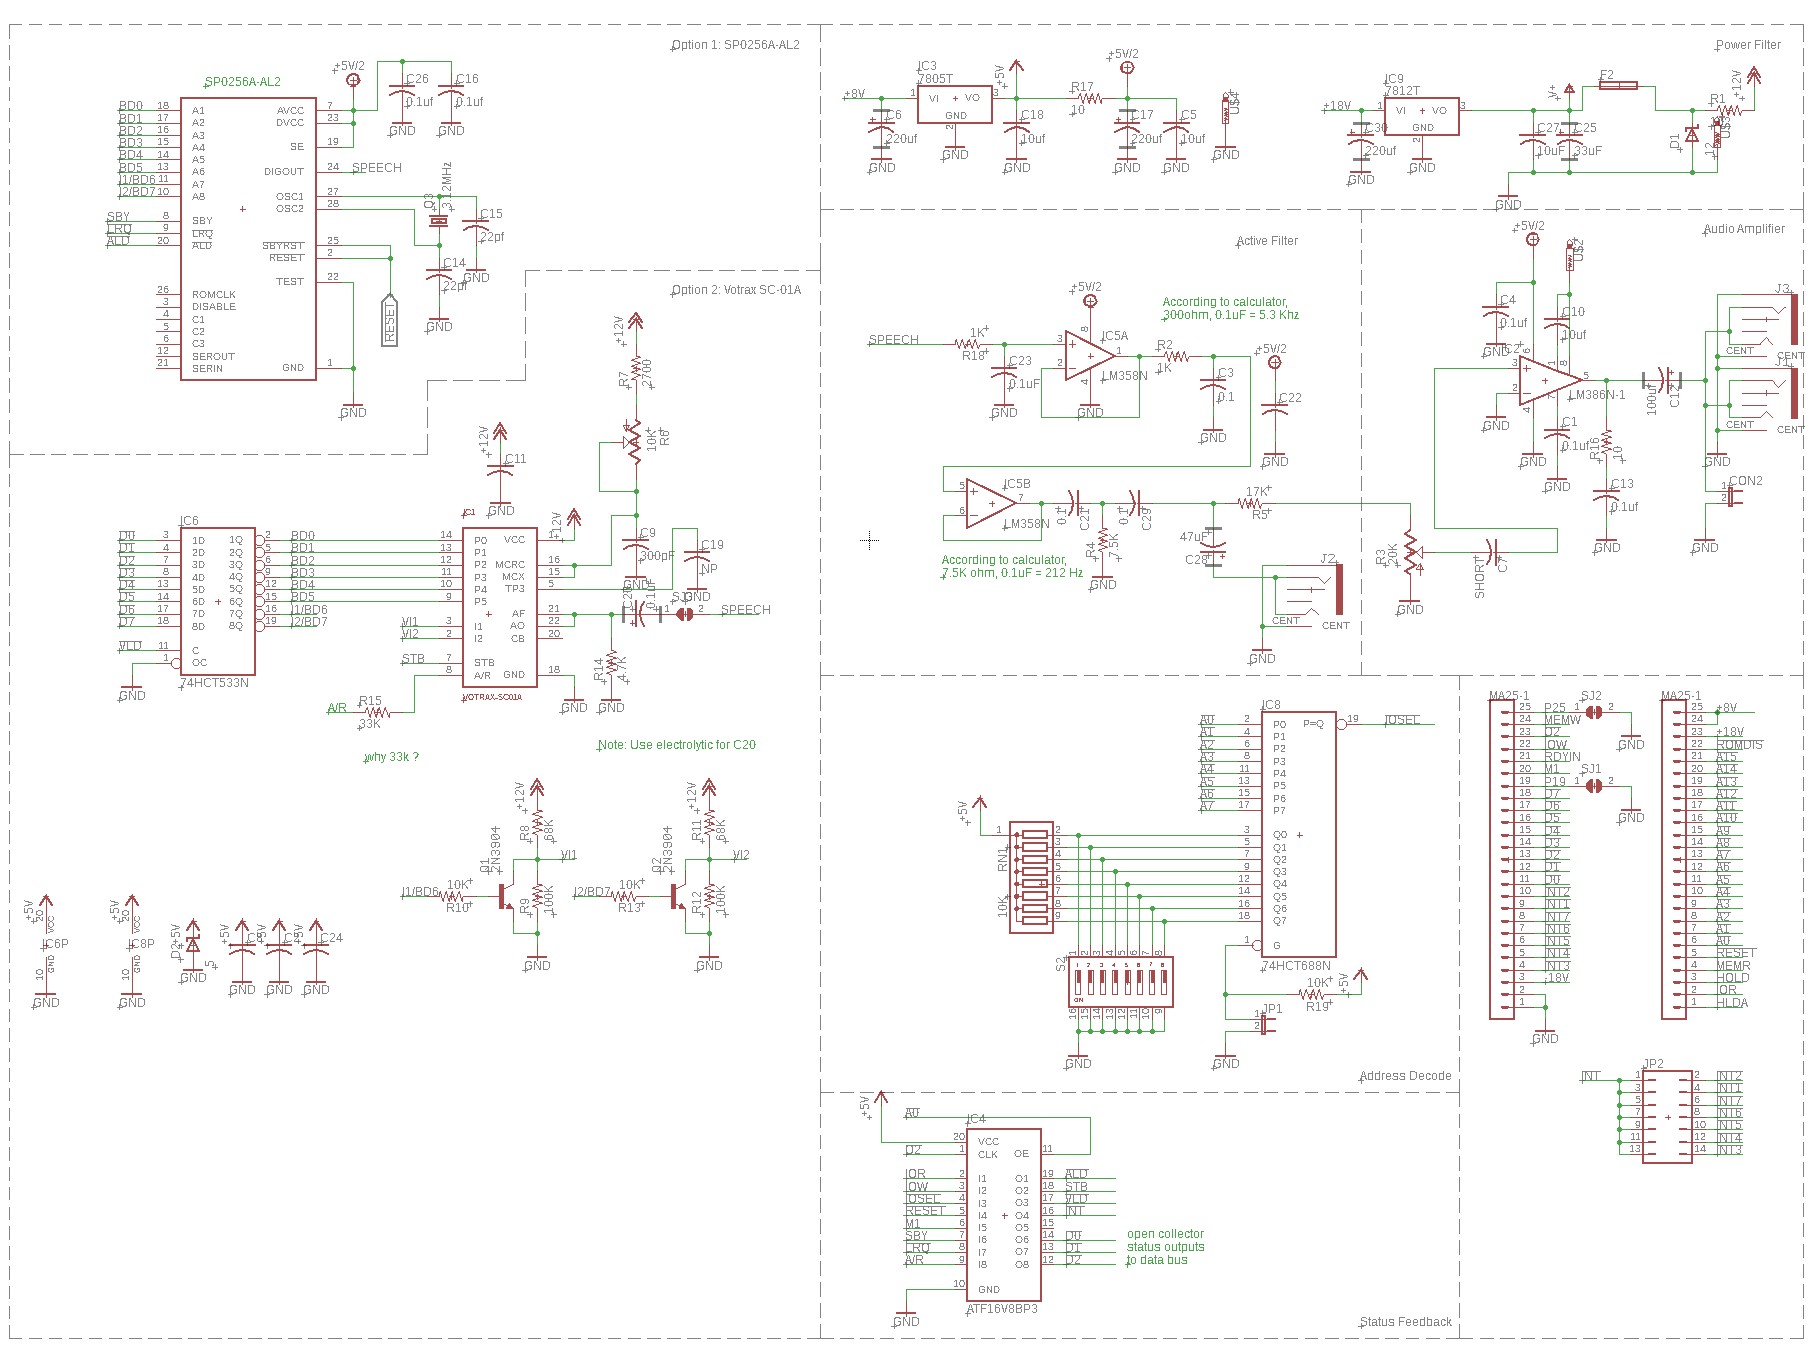
The board is designed to use either the Votrax SC-01A or the GI SP0256A-AL2 phonetic speech synthesizer IC. Please don’t populate both. The Votrax would likely sound better, but is much rarer, difficult to find, and expensive. I have not tested the Votrax support — I only implemented the prototype board using the SP0256A-AL2.
The H8 bus is in the lower right. It’s a fairly typical 8-bit bus with few surprises. Notable,
- IOR and IOW are IO read and write strobes. Note that they’re active high, while most people are likely used to active low.
- D0-D7 and A0-A15 are the data and address buses. Note that these are inverted, because inverting drivers are used on the CPU board. It’s necessary to invert the signals again for use on a peripheral board.
IO decoding on the speech synthesizer is straightforward using a 74HCT688 IC. I set the dipswitches to address 074Q (“74 octal”). This will cause !IOSEL to only be asserted when the address is on the address bus.
I used an ATF16V8B to perform the tasks of some glue logic. It does the following two things:
- Asserts STB, !ALD, and VLD when a write occurs to the speech synthesizer port (i.e. when !IOSEL and IOW are both asserted).
- Propagates SBY, LRQ, and AR to the database when a read occurs from the speech synthesizer port (i.e. when !IOSEL and IOR are both asserted). The ATF16V8B is capable of putting its outputs into high impedance, and the D0-D2 outputs are set to high impedance whenever a speech synthesizer read is not occurring.
I used a 74HCT533 inverting latch supply data to the speech ICs. Use of a latch rather than a buffer is necessary because the SC-01A does not internally latch its inflection pins. Since the 74HCT533 is inverting, this fixes the issue with the H8’s data bus being inverted.
Audio processing uses a LM358N configured as a filter together with a LM386 as an audio amplifier. Jacks are provided for line-out and speaker-out.
Speech Synthesizer Implementation
Below is a picture of the completed board:
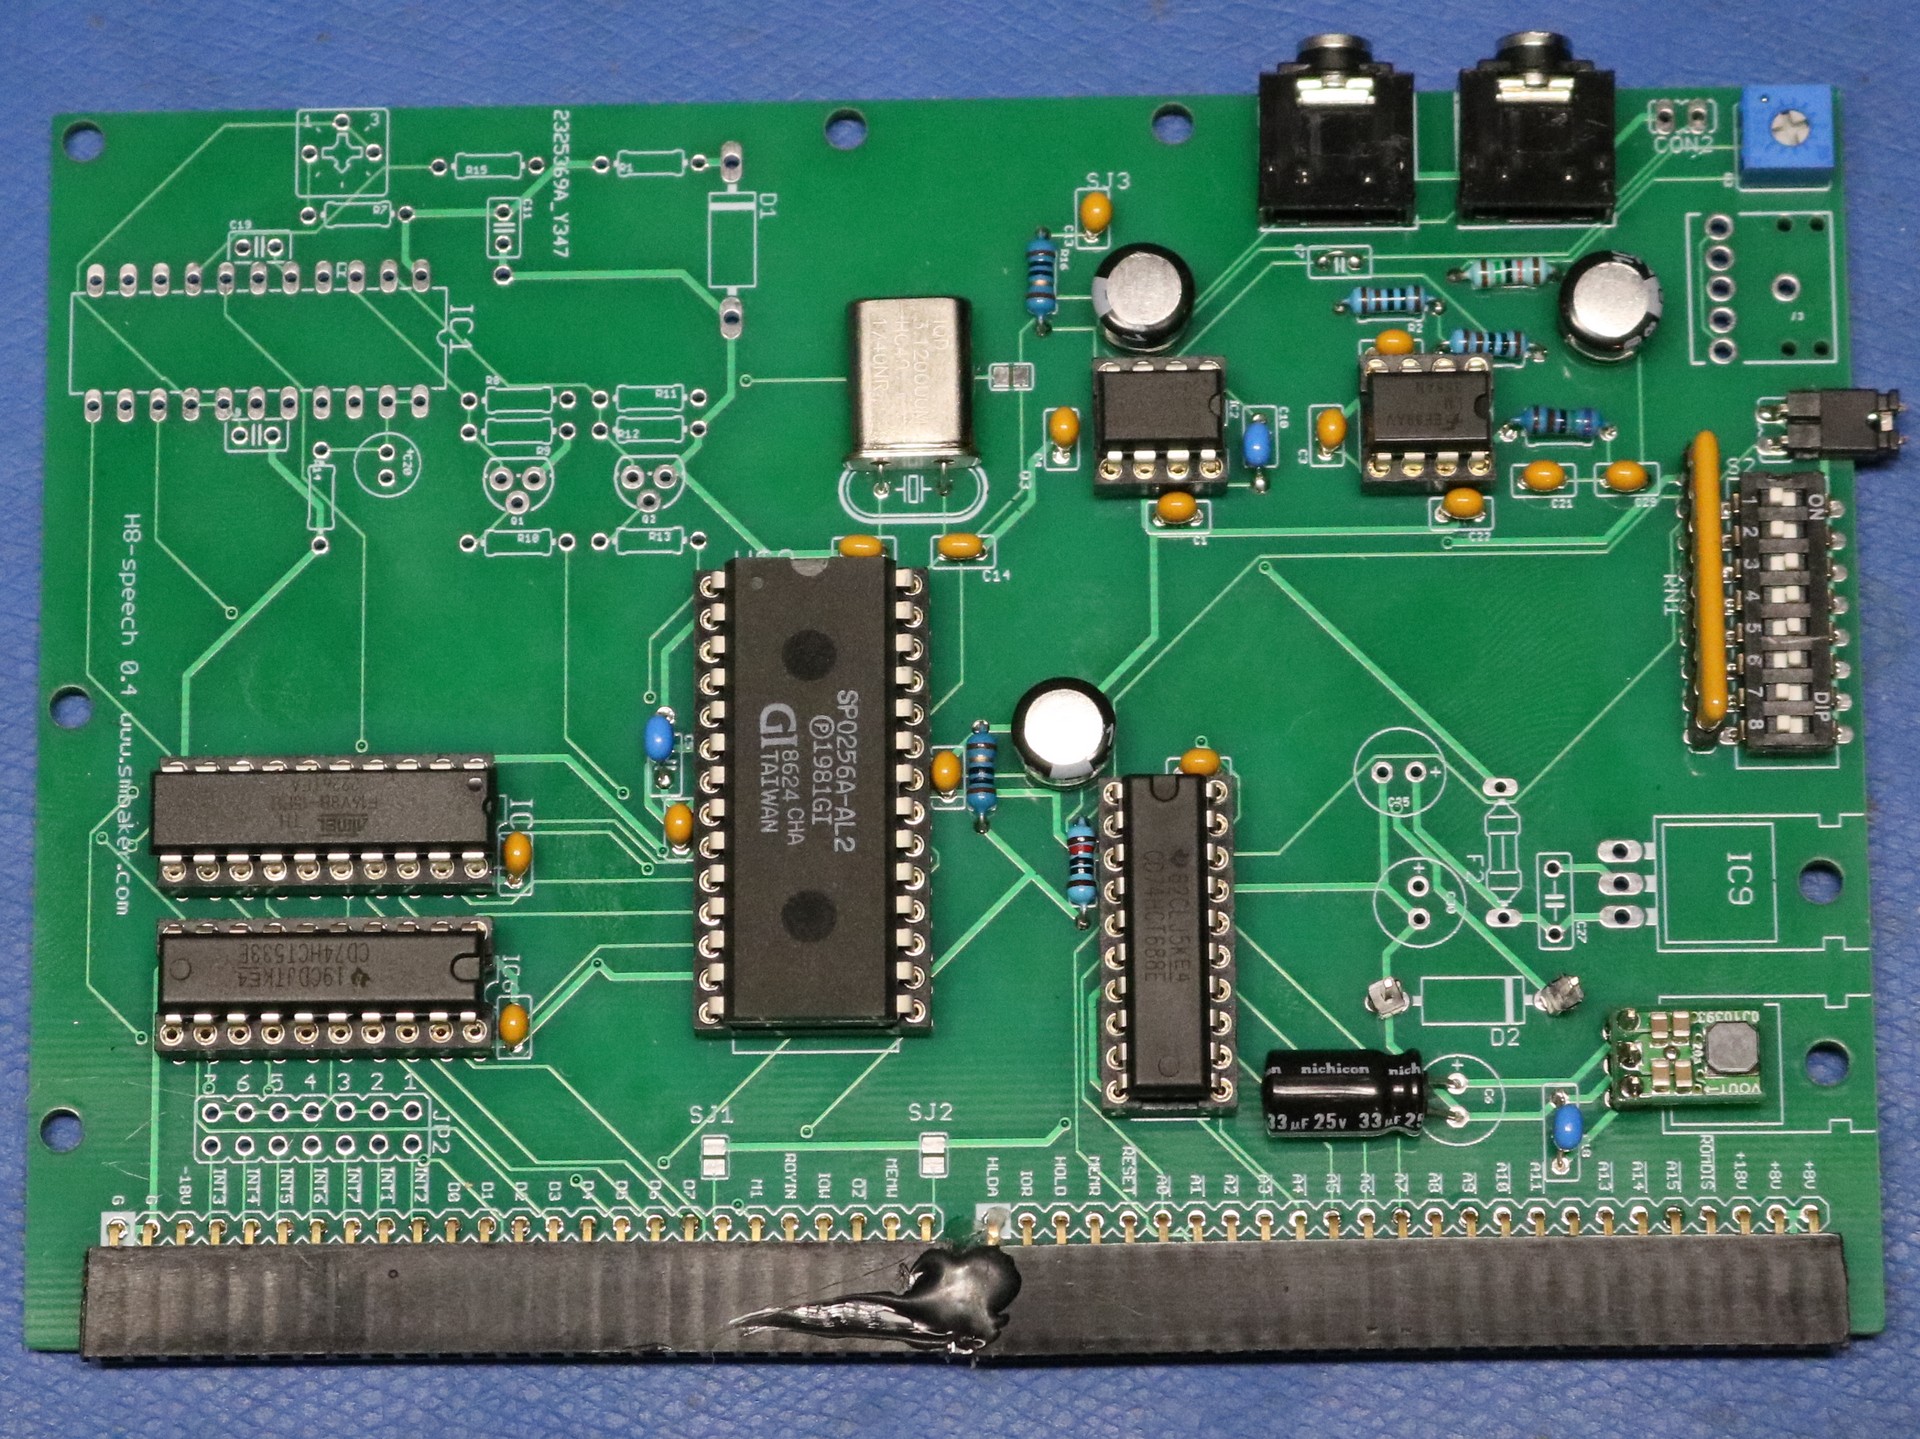
As you may notice, I only populated the SP0256A-AL2, not the Votrax SC-01. Testing out the votrax support is reserved for a future date.
A small pololu 5V buck-boost converter is used to provide 5V to the board. The H8 supplies +8V on the bus.
Address 074Q (“74 octal”) is configured on the switch as off-off-on-on-on-on-off-off. Note that the switch reads from LSB (near the audio jacks) to MSB (near the regulators). This is somewhat counterintuitive and backwards, and I may fix it if I respon the board.
Resources
TODO: Check in code, schematics, and gerbers to github.