In this video, I have not one, not two, but three boards: Standalone Bubble Basic Computer, RC2014 Bubble Board, and RC2014 SCC Board:
Background
In a previous post, I described by Bubble Memory board for the Heathkit H8 Computer. I thought it would be fun to build the minimum possible computer that supported Bubble Memory storage, and so I developed a small Z80 computer with Bubble Memory, running BASIC as the programming environment. The board was easily ported to be used on the RC2014 computer.
What is bubble memory?
Bubble memory is an early nonvolatile storage technology, circa the 1970s and early 1980s. Bubble memory predated the flash technologies that we have now. It works by placing magnetic bubble domains on a substrate and moving them around in a loop. You can “duplicate” a bubble to read it, and you can “swap” a bubble to replace it with a different one. The magnetic domains give us our ones and zeros. There are no moving parts; this is all accomplished by subjecting the bubble memory device to an alternating magnetic field. This is a very basic description of the technology, and I encourage you if you’re interested to seek out more background such as my previous video, or Craig Andrews’s numerous bubble memory videos.
Designing a single board computer
Everyone who has designed or built a single board computer in the last decade or so has heard of the RC2014 and/or of Grant Searle’s Z80 computer. The RC2014 in its most basic for is a simple Z80 computer with 32K of RAM and up to 32K of ROM. Other combinations are possible, 48K RAM with up to 16K of ROM, or even paged RAM/ROM configurations offering a megabyte or more of combined storage. RC2014s can run BASIC, CP/M, Fuzix, or a few other options.
To design my single board computer, I followed a similar approach:
- CPU: Z80. Allows us to use RC2014 BASIC as an operating system and programming environment.
- RAM: 32KB. Half of the Z80’s addressing space.
- ROM: 32KB. The other half of the Z80’s addressing space. I actually only need about 10KB for the Bubble Basic interpreter, but it’s easiest to just cut the address space in half.
- IO: Z8530 SCC, of Z80 SIO/2. The SCC features two serial ports and a built-in baud rate generator. The SIO/2 also has two serial ports, but does not have the built in baud-rate generator. The baud rate generator is a really nice feature.
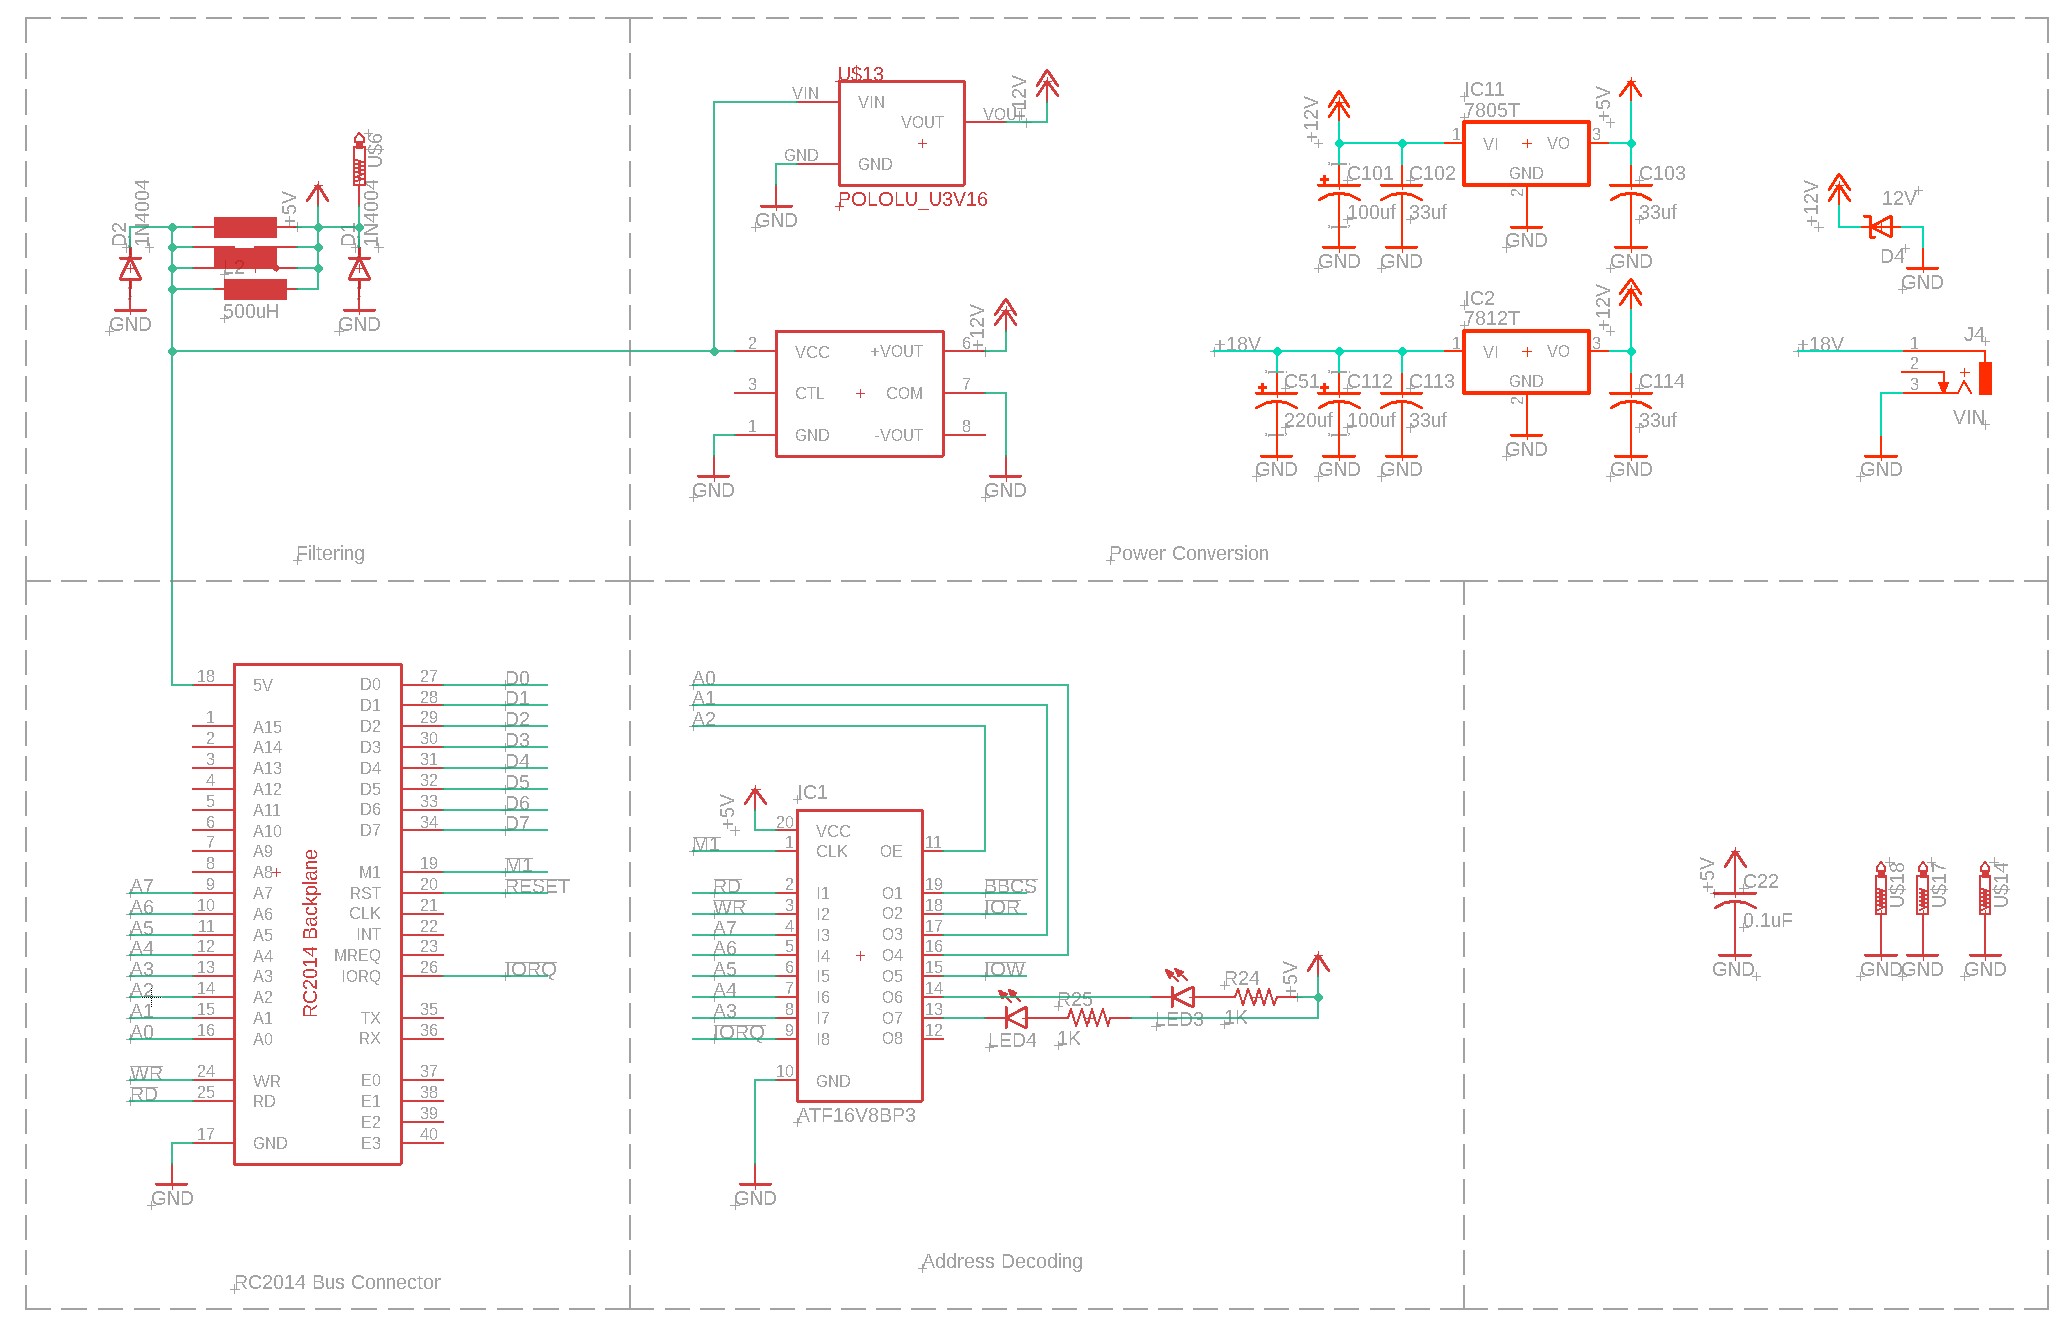
Single Board Computer Schematic
Below is a schematic of the Basic Bubble Single Board Computer. It’s divided into three pages: CPU, Bubble, and the optional RS232 serial port.
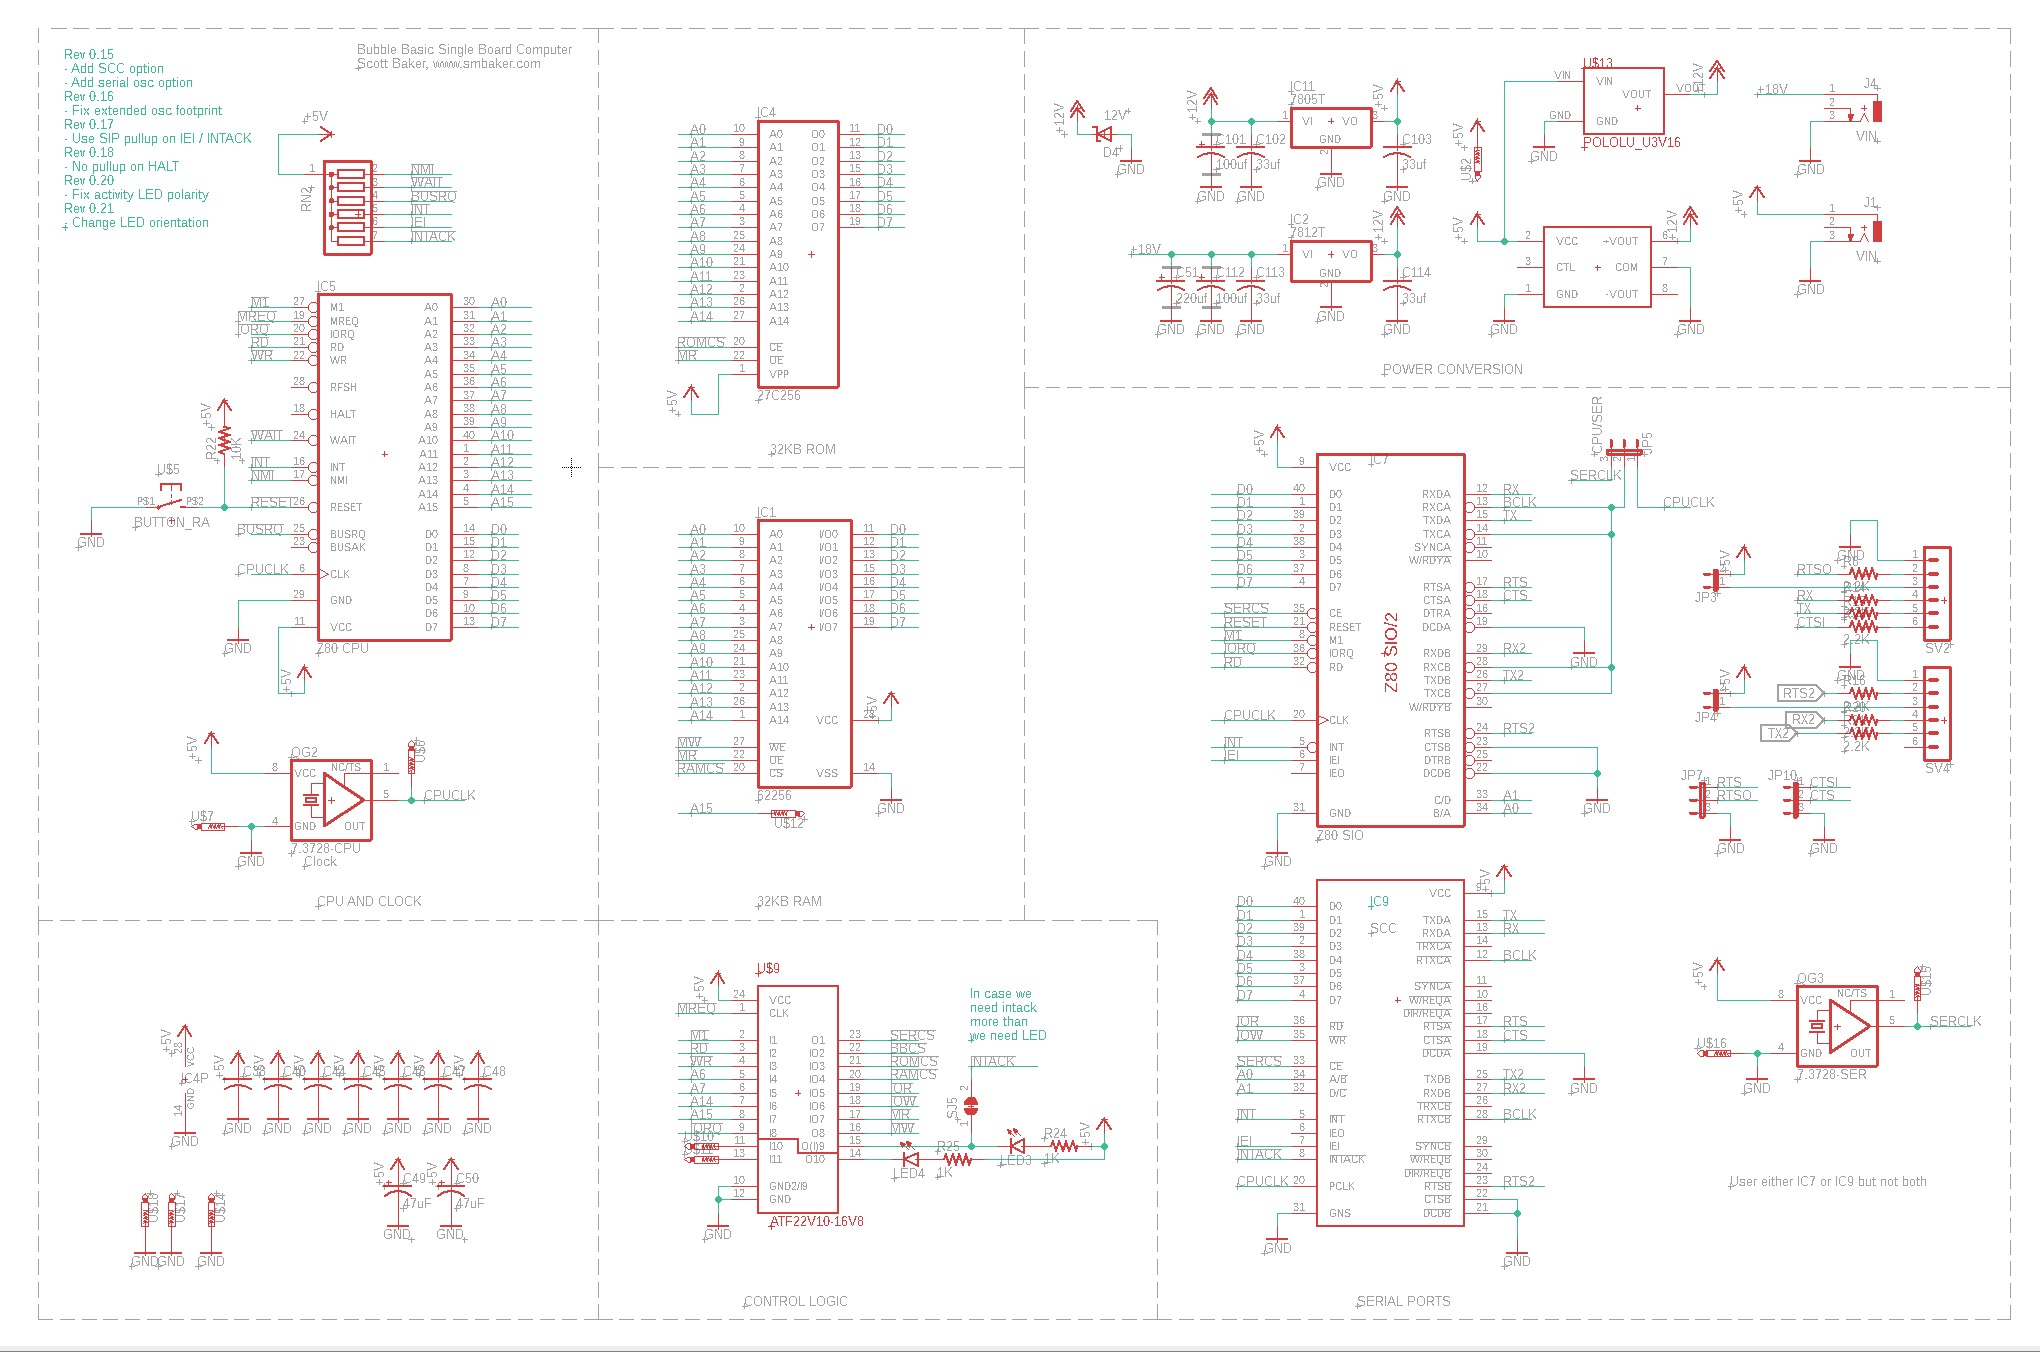
The CPU schematic features a Z80 CPU, 62256 32KB Memory, 27C256 EPROM or 28C512 EEPROM, and either an SIO/2 or SCC for serial I/O. There is a GAL22V10D (or ATF22V10) that handles all of the various glue logic functions such as decoding addresses.
The board requires both 12V and 5V. Several different options are presented for regulating the voltage. In order of recommendation:
- Supply 15V or more, and use regulators to regulate down to +12V and +5V. You can use 7812 and 7805 (with heatsinks) or suitable polulu or ezsbc switching regulators, or
- Supply 12V, wire across the 7812 footprint, and regulate down to +5V. Make sure to use a decent +12V power supply and a decent power cable, or
- Supply 5V, and regulate up to +12V. A footprint for a pololu boost converter is provided. This is probably somewhat taxing on the 5V supply.
The next page is all the bubble stuff:
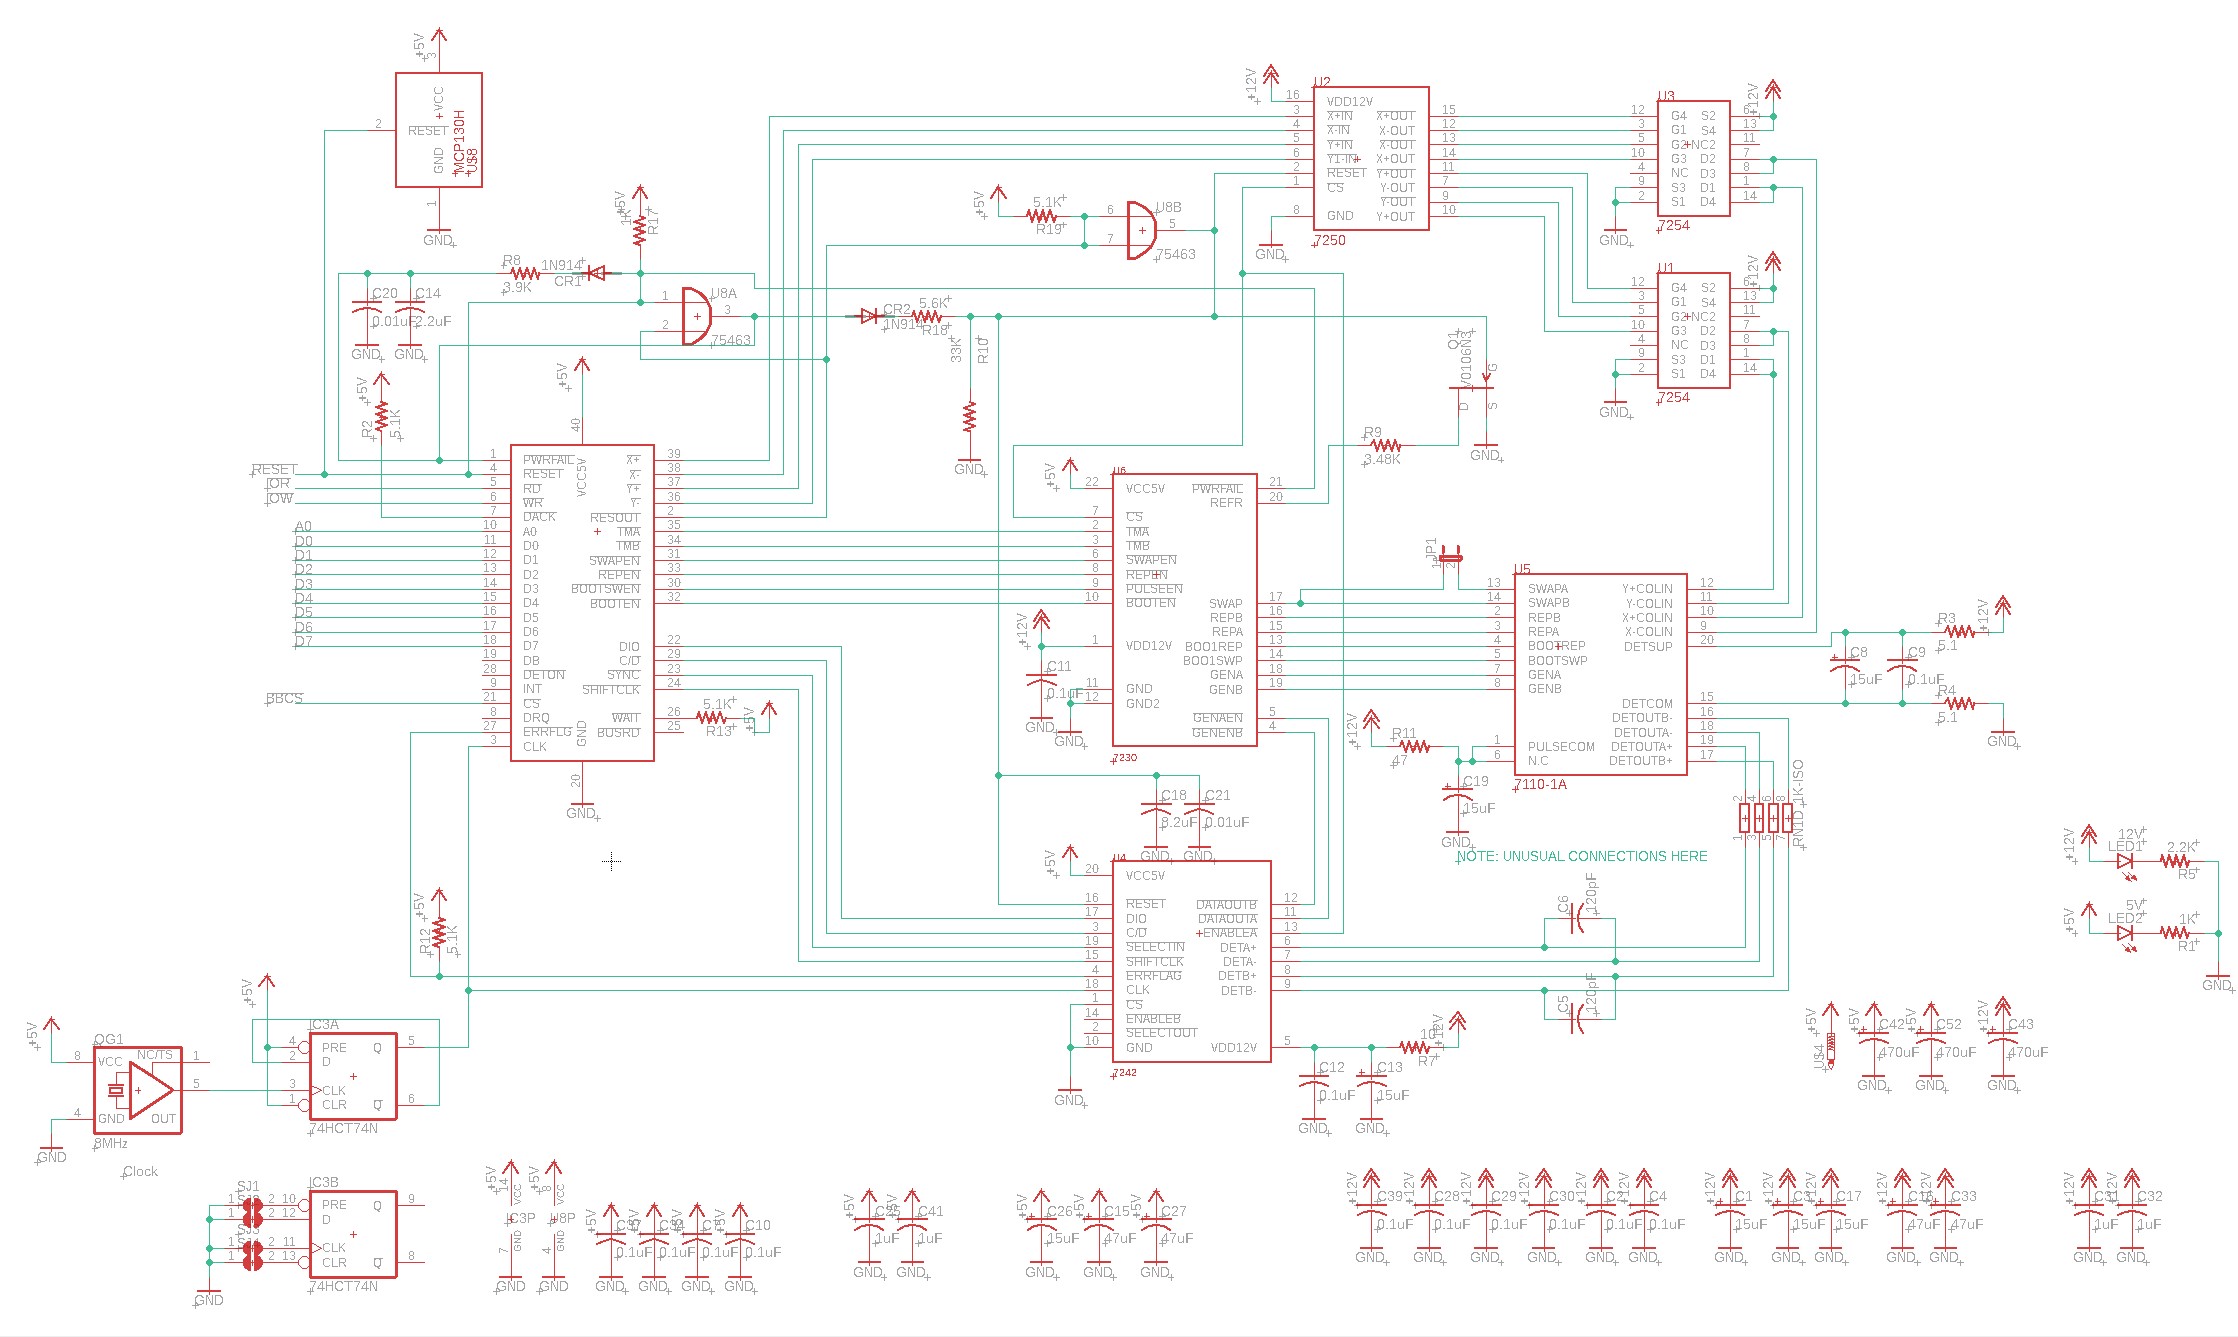
The above is straight out of the Bubble Memory Design Handbook. You can also consult Craig’s SBC85 schematic for a similar circuit. It’s also what just about every Bubble Memory circuit based on the 7110 Bubble Memory uses.
Finally we come to the optional serial port:
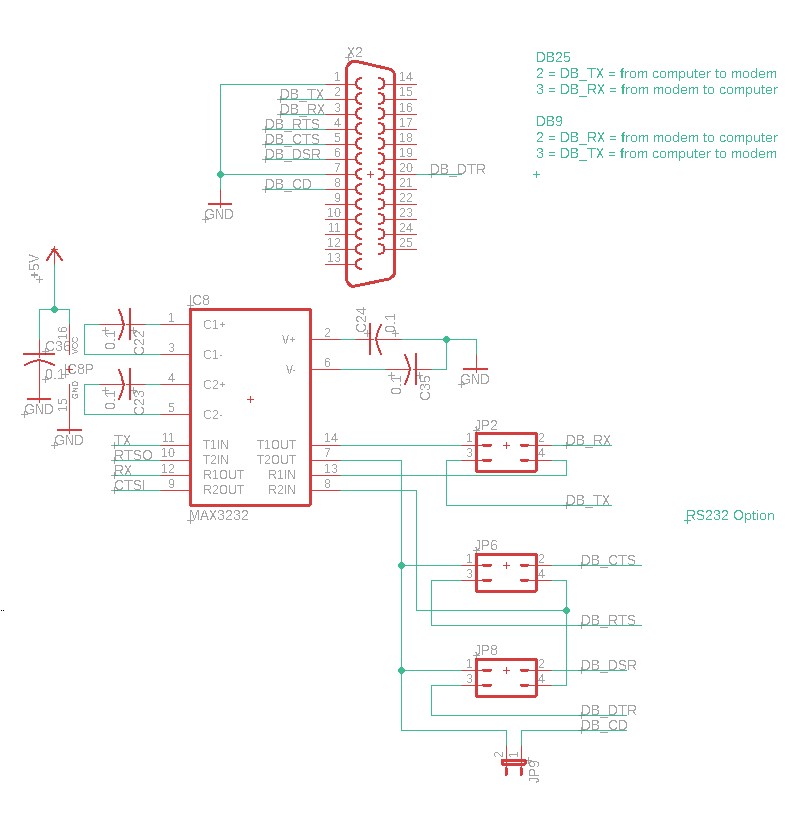
For my vintage projects, I often like to include a “real” serial port that is appropriate to the time. For this time period, that would have been a DB25. This is optional — you can include the real serial port, or you can just plug an FTDI cable up to the appropriate headers on the CPU board.
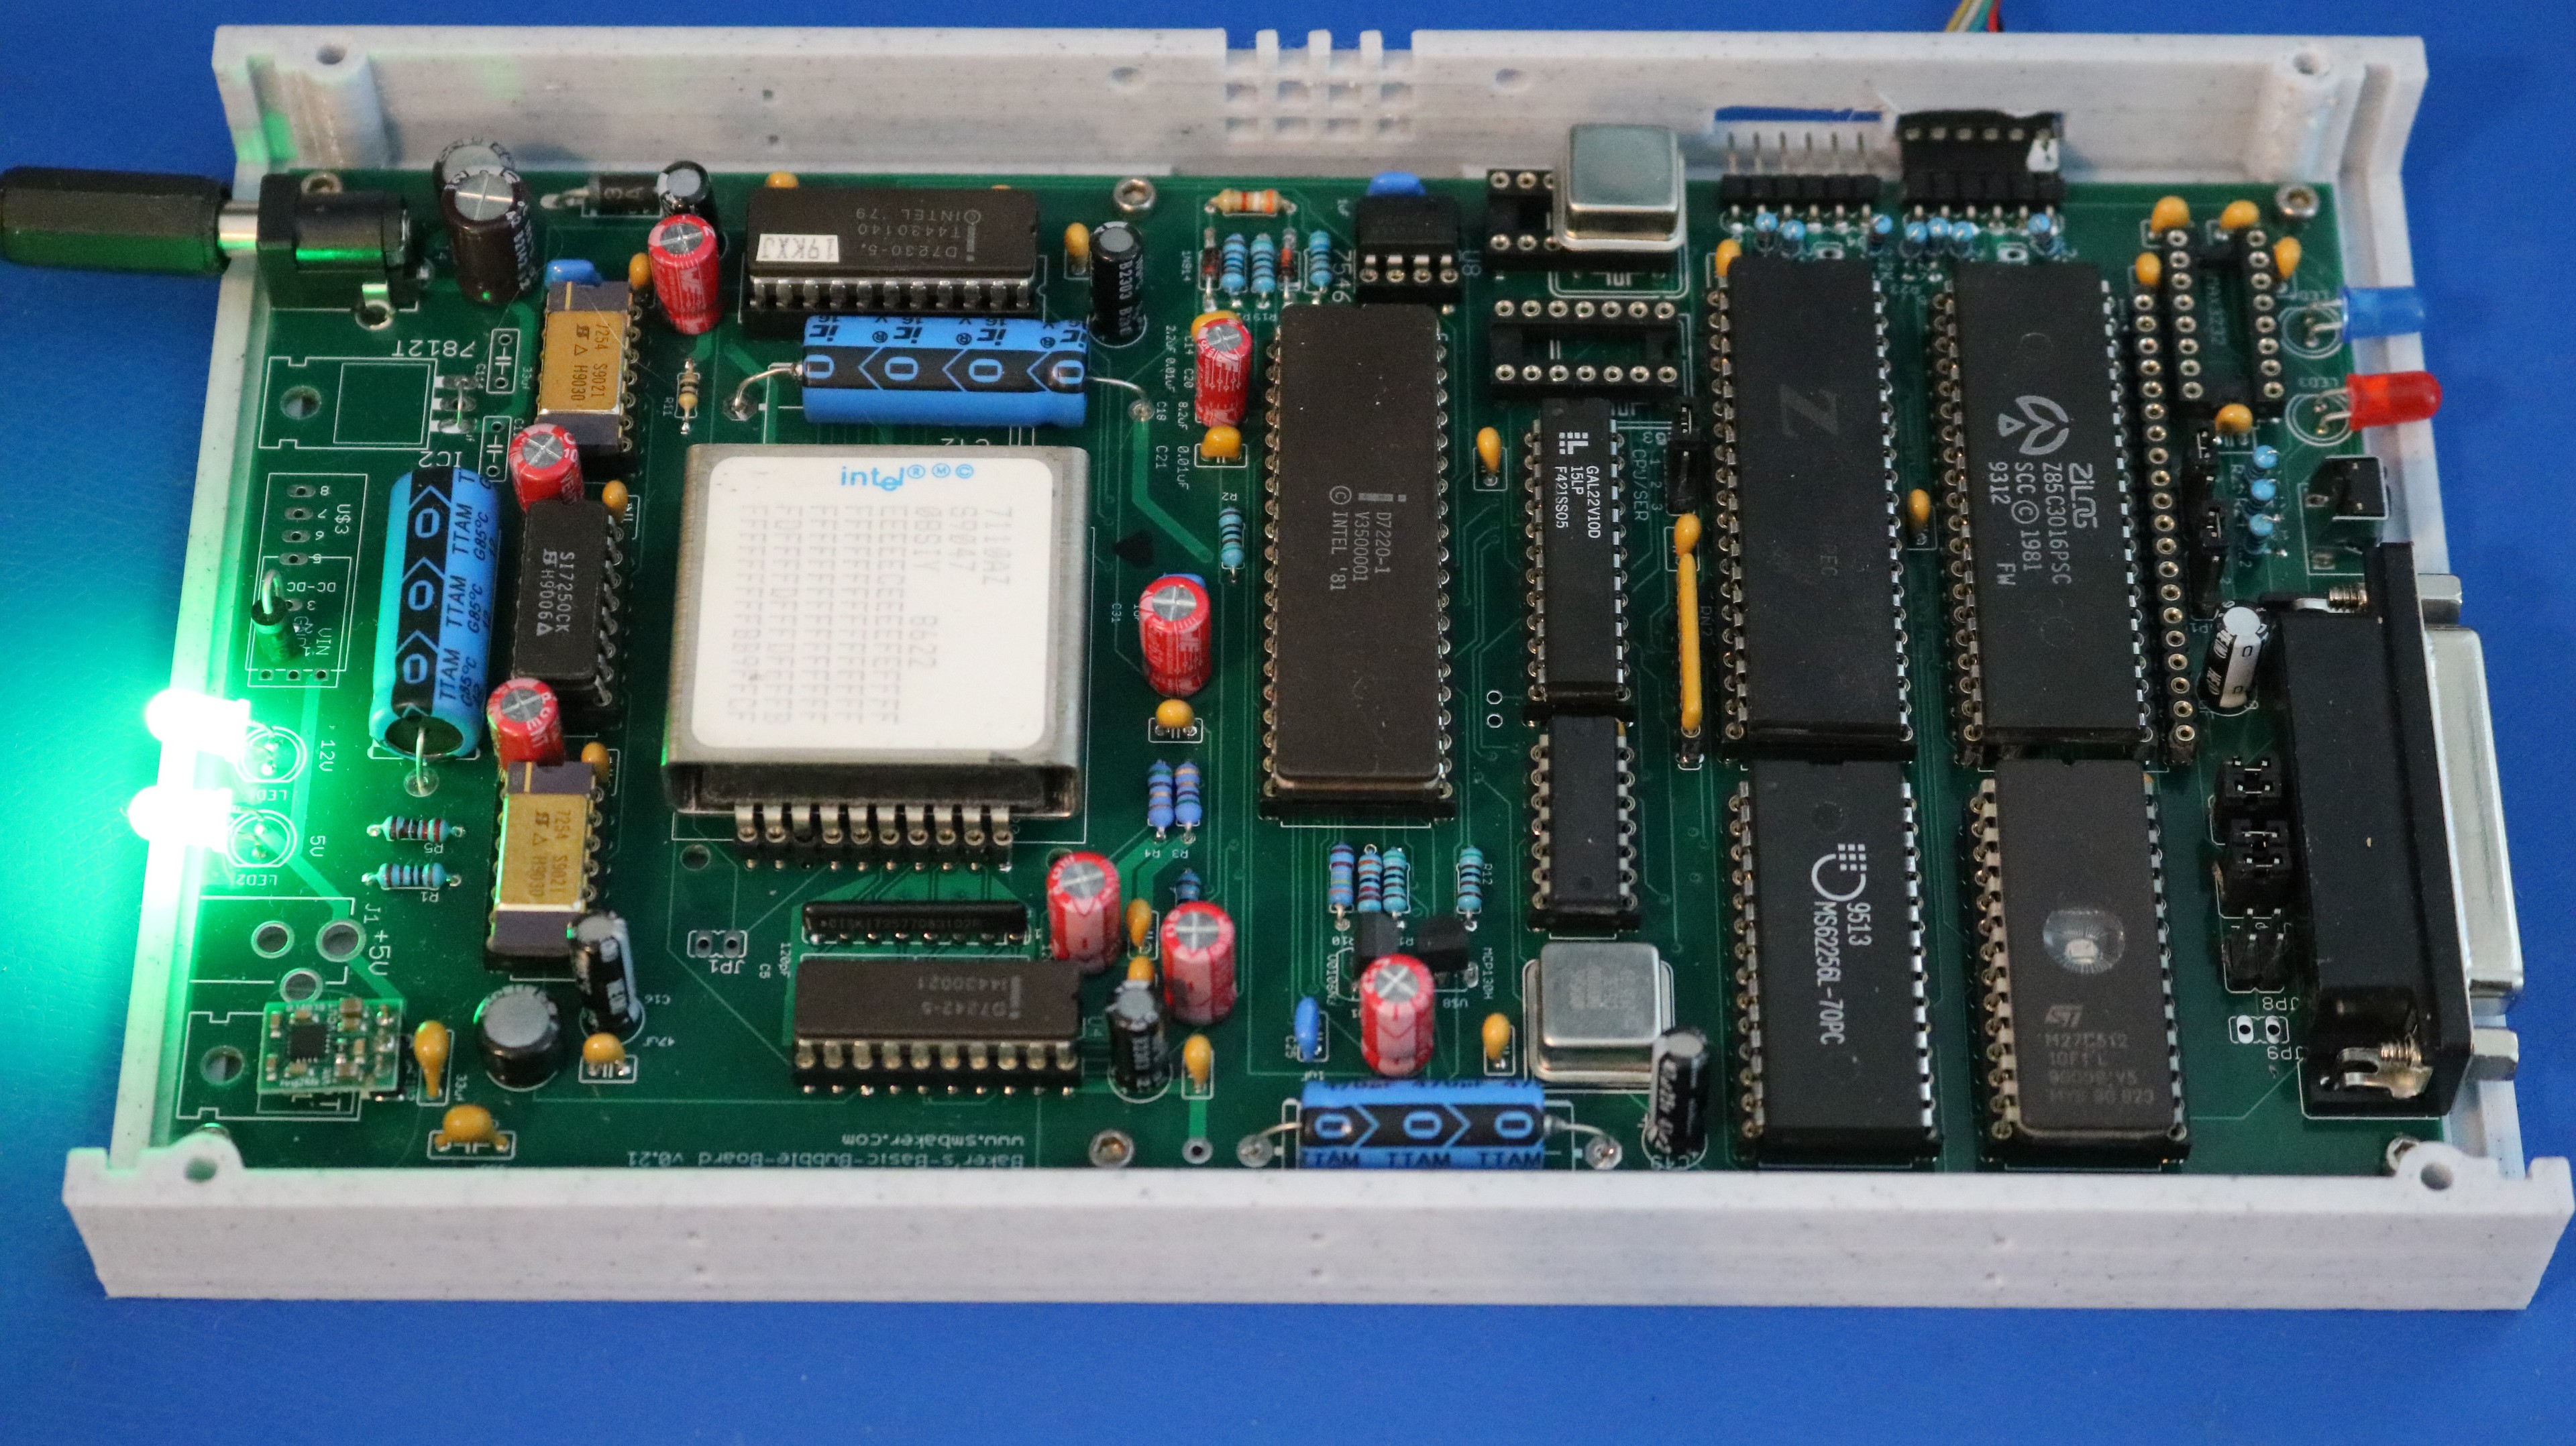
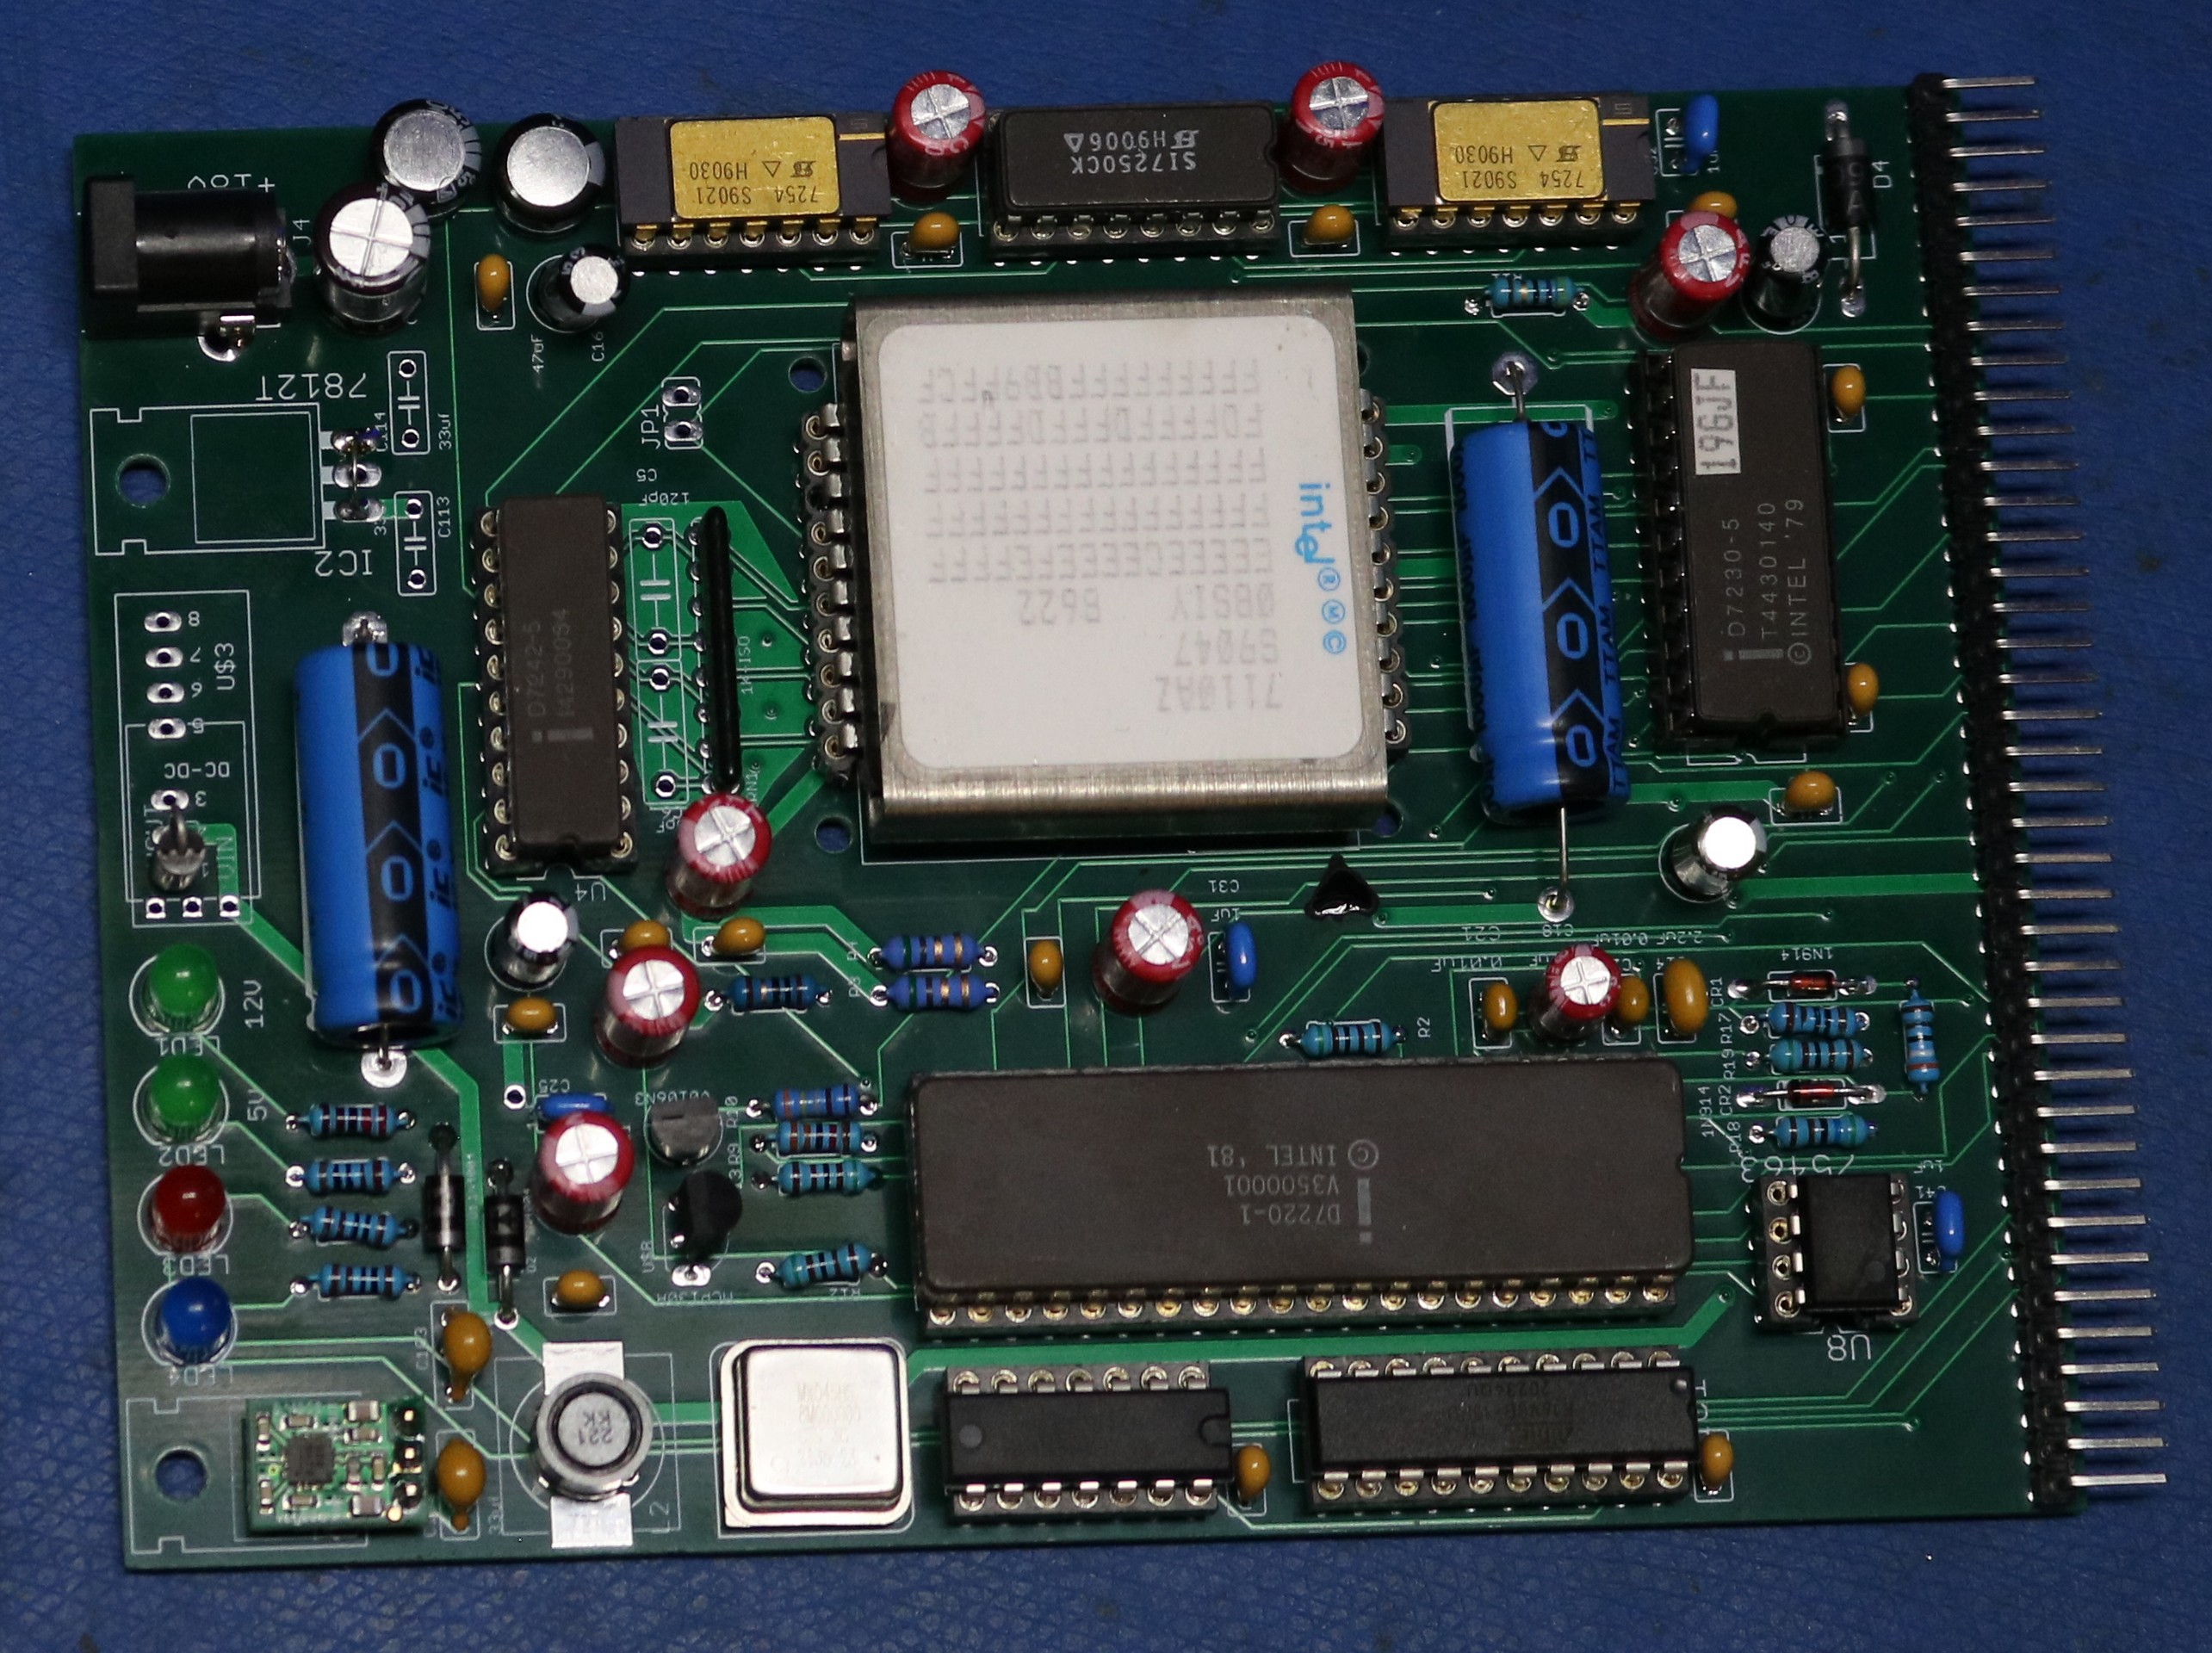
Single Board Computer, Implementation
Below is a picture of the SBC:
Now, let’s repeat the process for the RC2014
The bubble schematic is actually the same as the SBC. However, we drop the SBC parts (RAM, ROM, CPU, etc) and in its place we add the RC2014 bus connector and some slightly different decoding logic:
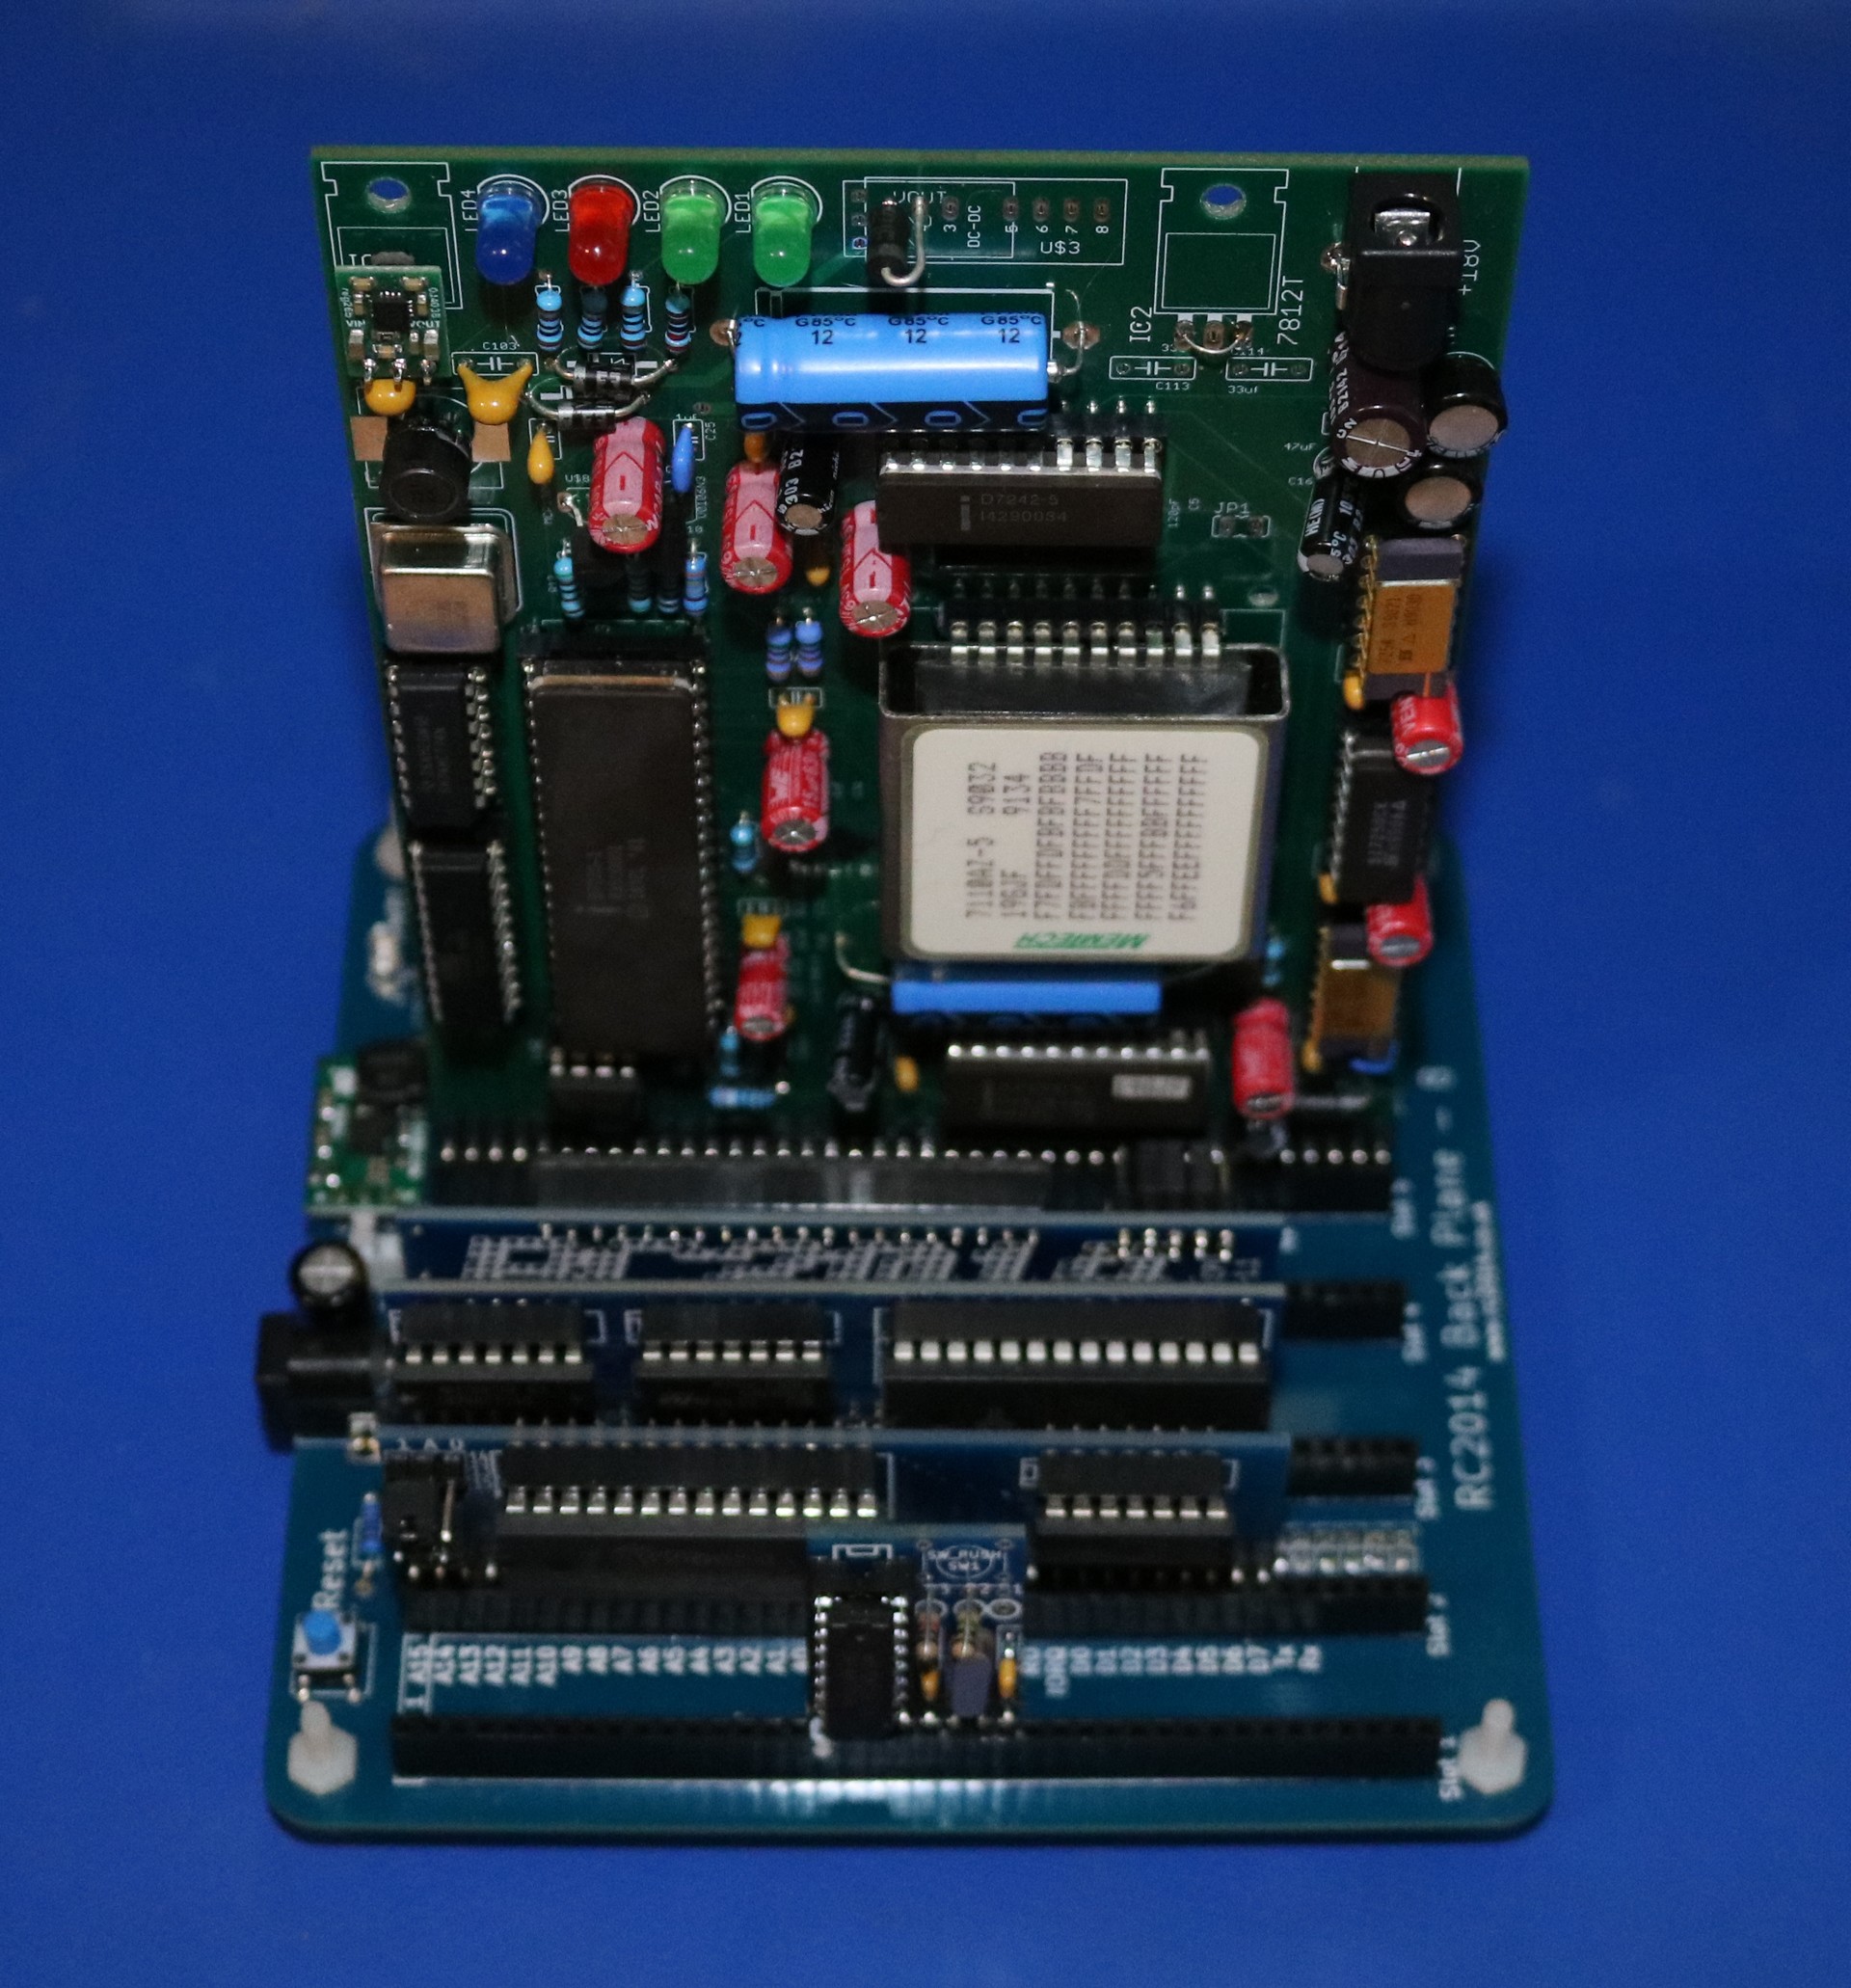
RC2014 Implementation
A slightly smaller board, that looks like a chopped-off version of the SBC board:
and mounted in my mostly-stock RC2014:
I did have to make a couple modifications to the RC2014 switched ROM module. The module by default was configured to only map 8K. I need about 10-12K for Bubble Basic, because it’s a little bit bigger than standard basic. So I made two changes:
- Remove the A13 jumper, and hardwire A13 on the ROM to A13 on the bus connector
- Remove the connection from U1A-1 to A13 on the bus, and wire U1A-1 to U1A-2
With these two changes, the switchable ROM board will hold four banks of 16KB instead of eight banks of 8KB.
Bubble Basic
RC2014 Basic, which is based on Grant Searle’s Basic, which is based on Nascom Basic, which was in fact written by Microsoft has full source code and is relatively easy to modify and extend with new commands. I added some commands to load and save files to and from Bubble Basic.
- BSAVE <n>. Save the program to a slot. <n> can range from 0 to 3. Only four programs can be saved.
- BLOAD <n>. Load a program from a slot.
- BAUTO <n>. Designate slot <n> to automatically load and run on boot up.
- BNOAUTO. Disable BAUTO.
There’s a few utility routines
- BINIT. Initialize the bubble memory — you don’t need to do this, but it was there for debugging/development/testing.
- BTEST. Destructively test the bubble memory. Any programs saved to bubble memory will be lost.
Finally, there’s some non-bubble-related commands
- HELP. Display help info.
- ABOUT. Display info about the authors.
- BAUD <n>. Set the baud rate, if you’re using an SCC. For 38400 or 115200 use 3840 and 11520 for <n>, because I had to fit it in a signed integer.
Resources
Hello,
I’m interested in your bubble memory SBC and wondered whether you can provide Gerbers etc.
I already have a couple of thru-hole memory modules and would like to see them working.
Thanks
I was a early (bleeding edge) from the 8008 though Altair8800 and the intel part was late 1981 I was able to get two BPK72 kits for the 128kX8 module. I still have the system I built then based on Z80/SIO/CTC, 32KB rams, and 16Kbbyte Eproms. IT booted from ERPM and ran CP/M 2.2.
That was a long backwhen.
Eck!