In this post, I take my System 310 development computer, install an 86/30 CPU board, and install the iRMX86 operating system on it.
Background
I bought a System 310 Microcomputer from a friendly seller on a forum:
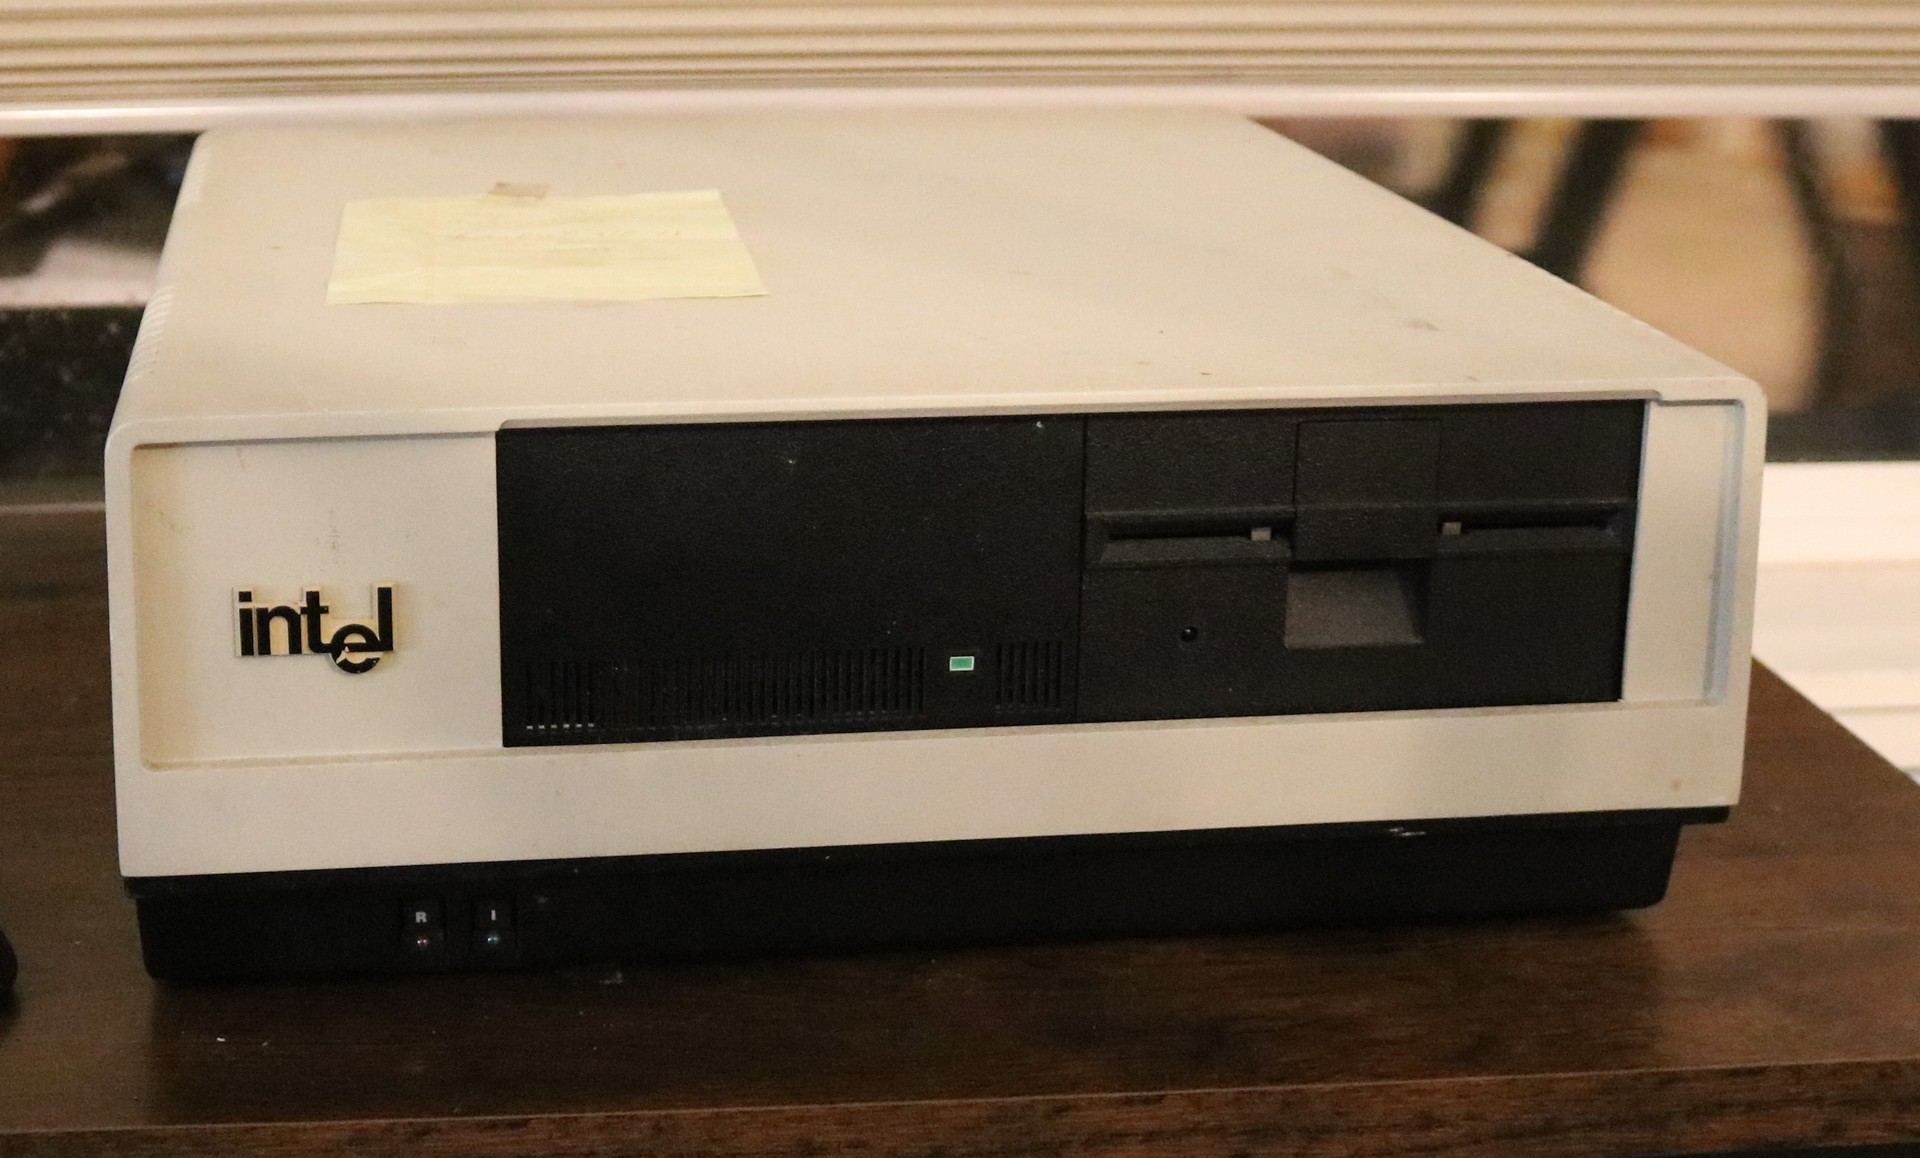
When it arrived, this computer came with Xenix installed and was using an SBC-386/24 CPU board. This is not the original CPU board that would have come with a System 310 — it’s certainly an quite an upgrade as the computer would have originally come with either an 8086 or an 80286 motherboard. The loadout looked like this:
- SBC-386/24 CPU Board
- Piggyback RAM board on the 386/24 with a few megabytes of RAM
- SBC-188 8-port serial board, SBC-215G winchester controller
- SBX-218 floppy drive controller multimodule:
- Maxtor XT-1085 hard disk drive
- 5.25″ floppy drive
Xenix was installed to the Maxtor HDD and it booted right up. If you’re not familiar with Xenix, it’s your typical Unix operating system, licensed from AT&T.
Why iRMX-86 ?
Xenix is not all that interesting to me — I’ve spent most of my life working with various UNIX distributions, most commonly Linux, but also BSD, System V, Convergent CTIX, and things from college that I don’t even remember. Unixes are all fairly alike. I wanted to try something different.
Enter iRMX-86. Quoting one of the manuals:
“The iRMX 86 Operating System is a software package designed for use with
Intel’s iSBC 86,88 Single Board Computers and with other iAPX 86,88-based
computers. The Operating System is different from many other systems in
that it is specifically designed to be incorporated in the products that
you build.
The iRMX 86 Operating System consists of a collection of subsystems, each
of which provides one or more features that can be used in your product.
Based on the features that you need to build your product, you decide
which subsystems you want. You then combine these subsystems to form a
tailored operating system that precisely meets your needs.”
This is not just an OS, it’s a sort of OS building kit. It was aimed at OEMs and VEUs who build products for external and internal customers, respectively.
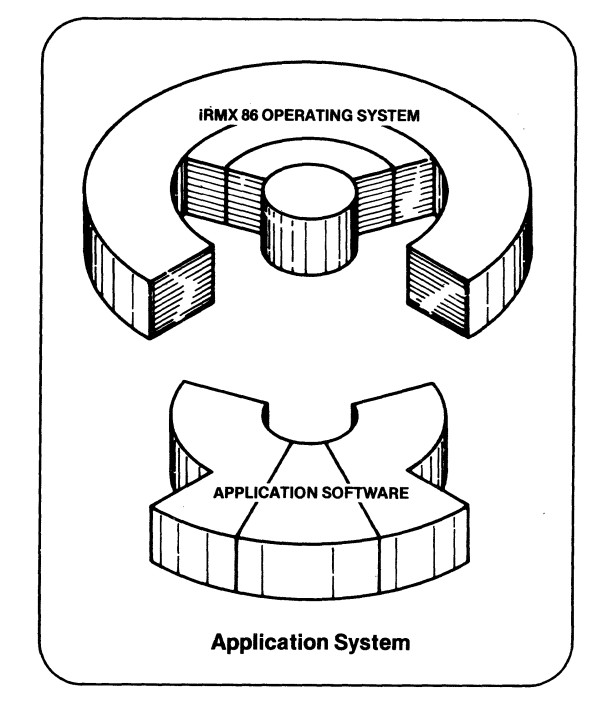
The OS is only part of the picture and my impression from literature was that it was never really intended to be installed directly by the end user, but to be bundled together with the “Application Software” from the OEM or VEU, which would be then sold as an integrated system.
So the documentation for iRMX-86 is relatively developer-heavy, concentrating on building the custom OS on a separate development machine such as an iPDS and installing it to the target machine. One document even says that to install the OS you’ll need a “wire-wrap gun and about a foot of kynar wire-wrap wire“. It wasn’t clear to me that you even could install this OS from a floppy, or if I would have to go the heavier route of building it.
Selecting a new CPU board
The first challenge I had is that I couldn’t find an iRMX distribution that was documented to work with my 386/24 CPU. board. I do have access to RMX86 and RMX286. I had no luck with either one on the 386. But I do have sitting in the junk box a perfectly good 86/30 board, which is documented to work with iRMX-86. The manuals even have the necessary jumper settings:

See all those little blue wires when you zoom in to the above pictures? Those were all the things that the manual called for jumpering on the 86/30. Many of them were clustered around the “interrupt matrix”. In the above picture you can see the ROMs the board came with, which from the ROM dump looks like it came from this:
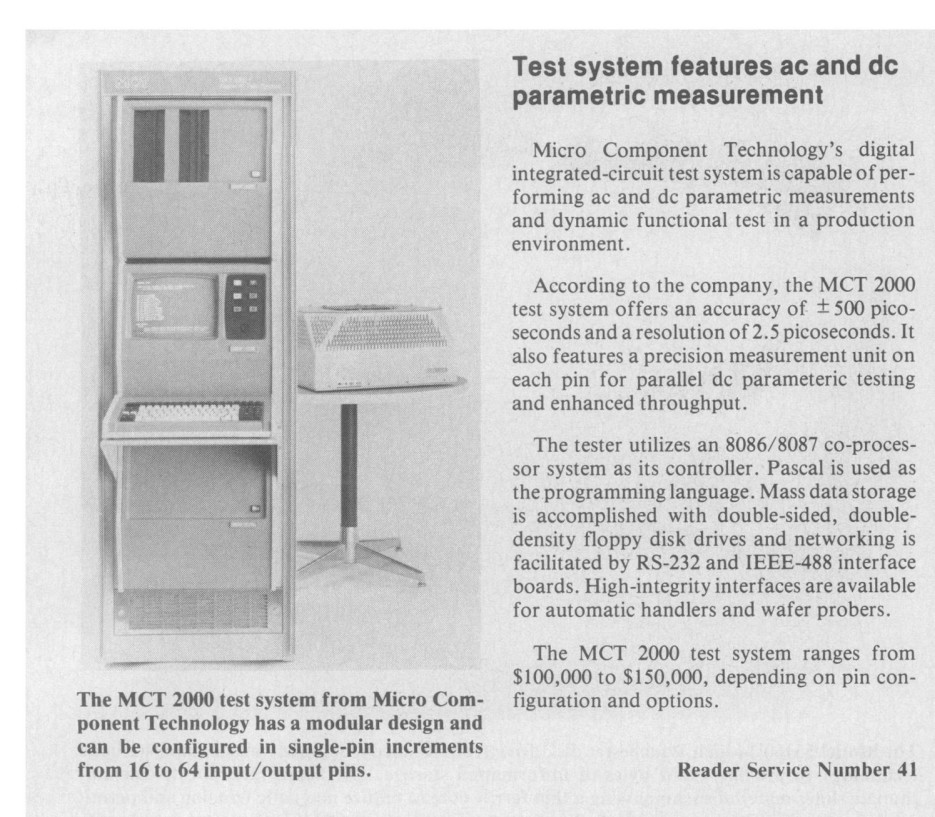
Yes, that’s right, a $100,000 parametric test system. Oh well, maybe with some effort I can play Zork one day.
The eBay seller was kind enough to disassemble the CPU board and the piggyback board when he took pictures in the listing, but then he did this when he reassembled it:
If you haven’t seen it, look at the lower right corner, right next to the plastic standoff.
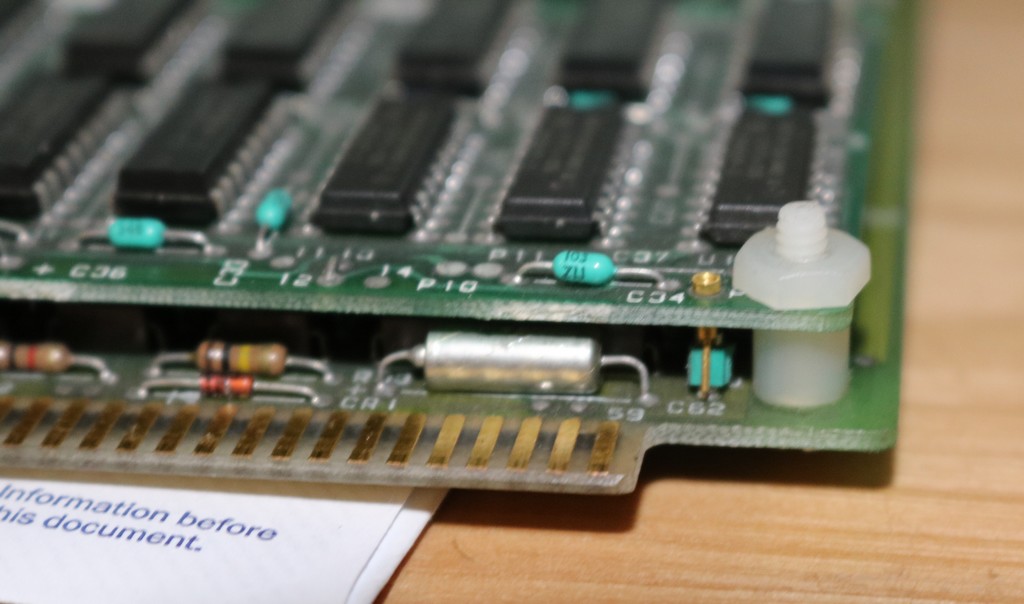
I also made another change to the hardware stack, removing the SBC-188 8-port serial card and installing an SBC-028 memory board in its place. The SBC-028 adds another 128KB of memory. There’s 128KB from the 86/30, 128KB from the 304 piggybacked on the 86/30, and another 128K from the SBC-028 for a grand total of 384KB.
At least one of the ROMs I tried was unhappy with 256KB, so that’s why I upped it to 384KB. The ROM I end up describing below seems fine with only 256KB, but I found iRMX itself would not load with only 256KB. So I suspect you do need at least 384KB.
ROMs and Install disks.
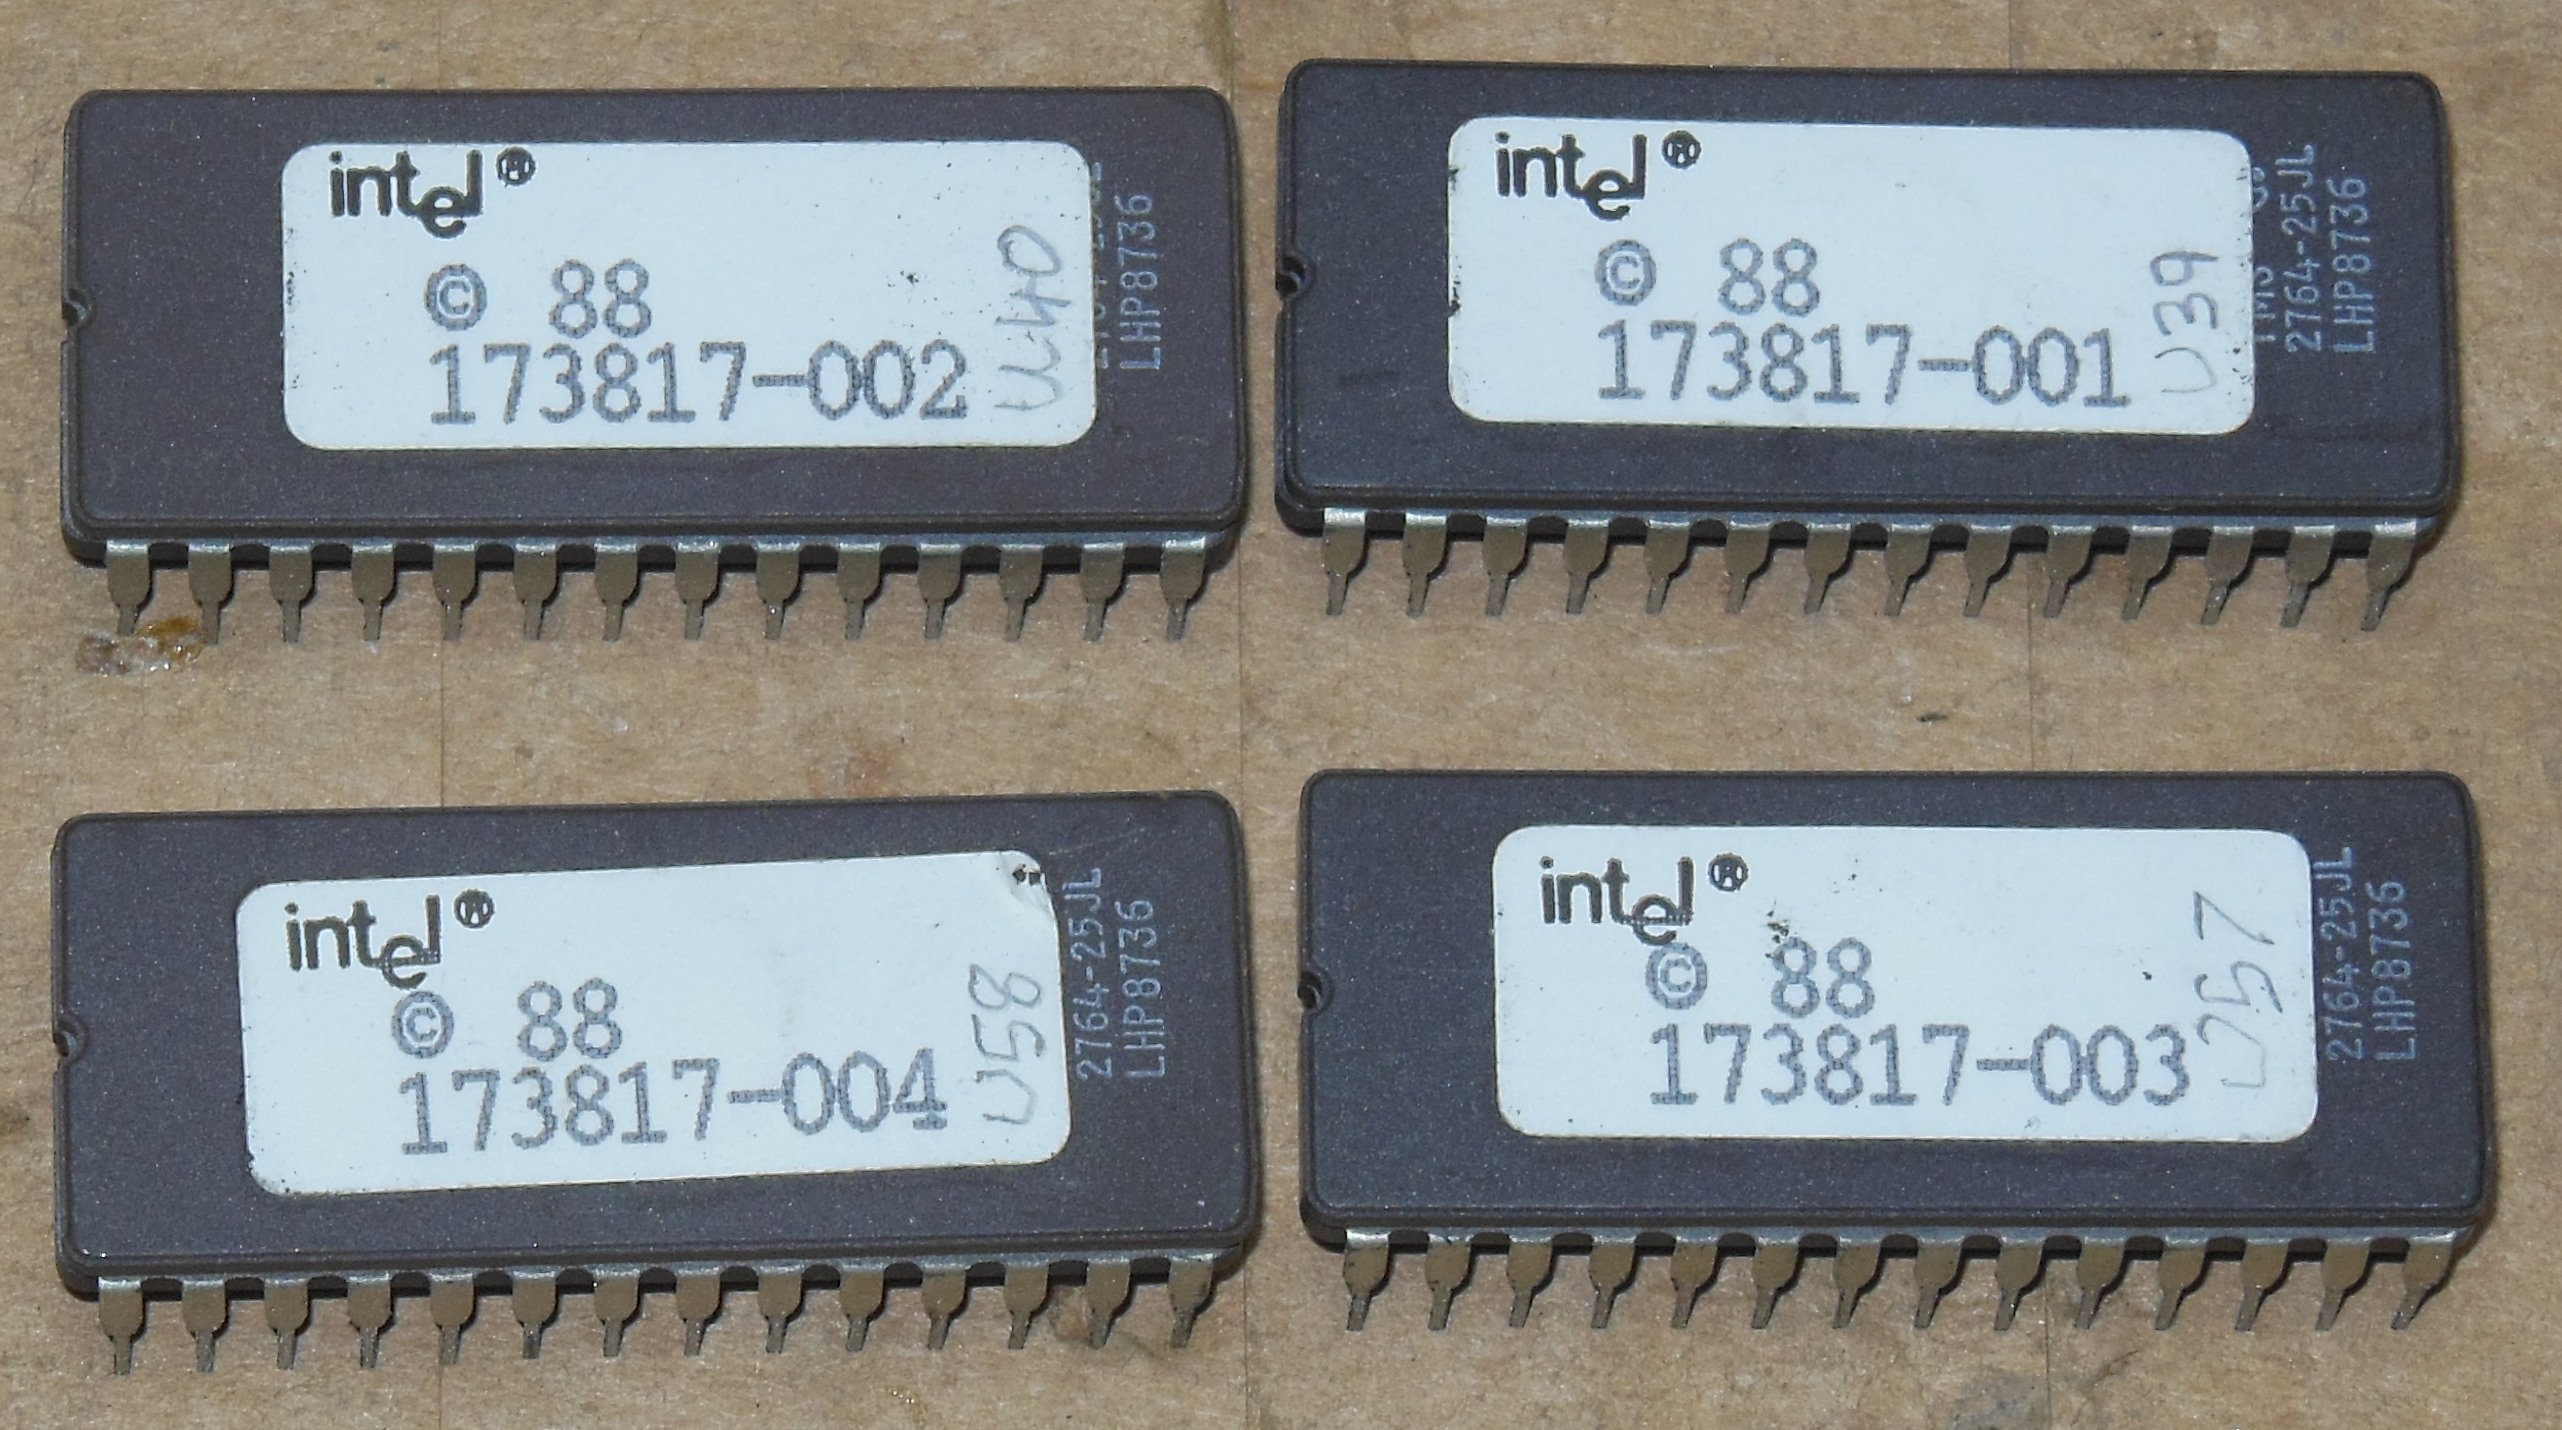
The ROMs that came with this board were a custom industrial application, so they needed to be changed out for ROMs that included the iSDM (System Debug Monitor) monitor and the SCT (System Confidence Test). You need the right ROMs to be able to access the winchester and floppy devices with the bootloader to boot iRMX. I settled on the 173817 set, which implements SCT 86/300W, V1.2.
You also need an install disk. I settled on this one:
147023-001 iRMX 86 INSTALLATION DISKETTE FOR iAPX 86-BASED SYSTEMS
I’m not even going to go into the few evenings and the weekend that it took to figure out which ROM to use, how to use it, and which disk to use. While it all might seem easy in retrospect, I spent many hours staring at a terminal that says “Winchester …. NO-GO” over and over again, then when you hit the “b” key it just locks up. I eventually disassembled portions of the ROMs to understand how they work.
I haven’t linked either of these software assets here. I trust you can find them if you need them.
Learning experiences
As I mentioned, it took a weekend and a couple evenings to figure out how to make it work. Some interesting things I learned:
- The floppy takes a little over a minute to boot, and any noise it makes is entirely masked by the unrelentingly loud fans in the system 310. This led me many times to give up a boot sequence because I thought it was hung.
- The System Confidence Test (SCT) will declare the Winchester to be a “GO” if it either has 0000 at offset 1B0 in the disk image, or it has a valid SBC-215 device descrption there. Otherwise, it’ll declare it a “NO-GO”. One such valid description is the byte sequence “01 32 00 04 00 09 0A 04” (note: this is byte-swapped) which is for a CMI 5412 hard drive. I think you don’t actually need to manually set this in your image; the iRMX FORMAT program will fill this in when it formats the disk.
- You don’t need the Winchester to be a “GO” in order to boot from the floppy.
- You want to pick a disk type that is known to iRMX-86. These include Priam 3450, CMI 5412, CMI 5619, Quantum Q540. There’s also a generic disk type, but this is useless as iRMX will think it only has 1 cylinder, and also fail to format it.
Selecting a new hard drive
I extensively use the MFM Emulator designed by David Gesswein on my vintage computers that use MFM drives. This allows me to preserve the relatively fragile ancient hard drive, and also be able to support multiple disk images, and easily archive progress. The MFM Emulator functions just like a real MFM drive as far as the computer is concerned.
I imaged the Xenix on the original Maxtor XT-1085, but I did not emulate this drive (not for lack of trying) because it’s not one of the drives supported on the iRMX install disk I was using.
I chose to emulate the CMI 5412. The commands to the Gesswein emulator were as follows:
# first fill cmi5412-310.ed with a bunch of zeros with a tool like dd.
# next, use the emulator to turn the ED file into an emulator image
root@beaglebone:~/mfm# ./ext2emu  --emulation_file ../data/cmi5412-310.emu --extracted_data_file ../data/cmi5412-310.ed --format Intel_iSBC_215_1024B --heads 4 --cylinders 316

# activate emulation mode
root@beaglebone:~/emu# ./setup_emu

# start emulatoing
root@beaglebone:~/emu# ./mfm_emu --drive 1 --file ../data/cmi5412-310.emu -q 0
At this point we have something that looks and acts like a CMI 5412 to the System310. Note that I chose the CMI over the other drives in the iRMX installer because it has 9 sectors per track, and the format I used on the MFM Emulator is also 9 sectors per track.
Booting the rom monitor
Set your terminal for 9600 BAUD, No Pairty, 7 data bits. Power up the computer, or press the reset button.
When the ROM monitor starts, you’ll see a series of asterisks. Press the upper-case “U” key on your keyboard and the ROM monitor will start:
****************

SCT 86/300W, V1.2                      Copyright 1982, 1983 Intel Corporation
  TEST                                                        STATUS
USART/Timer   .                                                 GO
PIC           .*. Input "I" ?                                  NO-GO
ROMCKSM       .                                                 GO
PPI           . . .                                             GO
  Processor Subsystem                                          NO-GO

Onboard                                                         GO
Offboard                                                        GO
  Memory Subsystem            Total Memory = 384K               GO

Winchester    ?                                                NO-GO
Floppy        .                                                 GO
Tape          .                                               OFFLINE
  Boot Subsystem                                               NO-GO

SCT Complete...NO_GO Exit to Monitor

*BREAK* at F800:3EAF
.
For illustrative purposes, I did some things wrong above. Two things are apparent from the ROM output:
- During the Programmable Interrupt Controller (PIC) test it said to input a key, and I didn’t input a key. So we got a NO-GO on the PIC test, and because of that a NO-GO on the Processor Subsystem. Next time just press a key when the machine tells you to. It’s trying to test the interrupt from the serial port, so it wants to see a character show up.
- My HDD wasn’t configured correctly, so we got a NO-GO on the Winchester, and therefore a NO-GO on the boot subsystem. We’ll deal with that shortly.
BTW, there are three keys you can hit during the System Confidence Test (SCT) that have special meaning:
- CTRL-C will abort, usually the next time it wants to print something. This is good for aborting so we can ask it to boot from floppy when we need to.
- CTRL-D appears to cause it to try to boot a file called “/test”. I have no idea what that is for.
- CTRL-L will initiate a PPI loopback tests. You probably need something connected to your parallel port.
- “M” if pressed when the PIC is asking you to hit a key will cause it to do a memory test.
If the system confidence test fails, we get dumped to the monitor. From the monitor, you can always boot. For example, typing “b :wf0:” will attempt to boot from the floppy drive. This is the digit “0” not the letter “O”.
Here are some useful commands
| B <device> | boot. For example “B :wf0:” will boot from the floppy. This is the digit “0” not the letter “o”. You can probably even boot a specific file from a specific drive. |
| D <address> | dump memory. For example “D 0000:1000” will dump segment 0000 offset 1000. If you use an exclamation point, you can dump a range. For example, “D 0000:1000!0000:1100” will dump 100 bytes from 0000:1000 to 0000:1100. |
| DX <address> | disassemble memory. For example, “DX 0000:1000” will disassemble the instruction at segment 0000 offset 1000. You can put a number before to disassemble multiple instructions. For example “5 DX 0000:1000” will disassemble 5 instructions. |
| G | go. It will go at the current CS and IP. Use “X” to see what those are, or change them. |
| <n> N | step through instructions. For example “5 N” will step through the next 5 instructions. Just “N” by itself will print the current instruction |
| S <address>=<value> | set a memory address. For example, “S 0000:1000=FF” to set FF to segment 0000 offset 1000. |
| X | examine registers |
| X reg=<value> | set a registrer. For example, “X IP=1234” will set the instruction pointer. |
There are many other commands, and there are a couple of documents floating around out there, but I did not find the actual manual for the monitor. I had to guess at the syntax to dump ranges using the “D” command. I knew there must be a way to do it — and I tried keyboard characters and found the exclamation point. I have to thank Mark Fisher, who told me about the very useful “DX” command, and a few other useful tidbits that he had discovered in the monitor.
Formatting the hard drive and installing the Operating System
The kernel in /system/rmx86 cannot be read in iRMX by mere mortals, so we need to switch to super-user. Beware that if you hit CTRL-C, you’ll drop super-user privileges and you might not realize it until 10 minutes later. The password on the installer disk appears to be empty.
- super
enter password:
super-
Note that your prompt is now “super-” instead of “-“. As long as it continues to look like that, you’re the super-user and you can read any file you want.
Next we need to format the hard disk and copy the operating system. Fortunately there’s an instal.csd script that will do all the hard work for us. The only parameters you’ll need to enter are on the submit command-line itself, and these are:
- The name of the physical device to install to. Following my guide, use “cm0“. This corresponds to the CMI5412. Even though “w0” sounds tempting, “w0” is a generic winchester with only one cylinder.
- The interleave factor. 5 seems fine.
- The number of files. I went with 300. I don’t know how well this old system responds to big directories.
There’s a lot in the next block, but don’t let that frighten you as I only typed the first line, and the rest of it is all output.
- submit :system:/instal.csd(cm0,5,300)
- ;
- ;   *-*-*   INSTAL.CSD   *-*-*
- ;
- ;   Submit file to install the iRMX 86 R6.0 Installation System for
- ;   iAPX 86-based systems.  This file should only be executed by the
- ;   System Manager; a user with an id of '0' (super).
- ;
- ;   Invocation:  submit instal(dev_name, interleave, files)
- ;
- ;   Where:  dev_name is the physical device name of the device on which
- ;               you are installing the Installation system.
- ;           interleave is the interleave factor that best suits the
- ;               device on which you are installing the Installation System.
- ;           files is the number of files you will need to be able
- ;               to create on the device on which you are installing the
- ;               Installation System.
- ;
- ;   WARNING: the specified device will be formatted!
- ;
- attachdevice cm0 as :wd0:
cm0, attached as :wd0:, id = 0
- ;
- format :wd0:rmx86 il=5 files=300
volume (rmx86) will be formatted as a NAMED volume
    granularity   = 1,024        map start =      5,314
    interleave    =     5
    files         =   300
    extensionsize =     3
    volume size   = 10,656 K

TTTTTTTTTTT
volume formatted
- ;
- diskverify :wd0:
iRMX 86 Disk Verify Utility, V3.0
Copyright 1981, 1982, 1984 Intel Corporation
*verify all

DEVICE NAME = cm0            : DEVICE SIZE = 00A68000 : BLOCK SIZE = 0400

'NAMED1' VERIFICATION

'NAMED2' VERIFICATION
   BIT MAPS O.K.
'PHYSICAL' VERIFICATION
   NO ERRORS
*save
save fnode map? yes
   free fnode map saved
save space map? yes
   free space map saved
save bad block map? yes
   bad block map saved
*exit
- ;
- ;  create standard directory tree
- ;
- copy :sd:rmx86a.060 over :wd0:rmx86a.060
:sd:rmx86a.060 copied OVER :wd0:rmx86a.060
- ;
- createdir :wd0:system,:wd0:lang,:wd0:utils,:wd0:config,:wd0:boot, &
**          :wd0:config/user,:wd0:config/cmd,:wd0:work,:wd0:user, &
**          :wd0:user/world,:wd0:user/world/prog,:wd0:rmx86, &
**          :wd0:rmx86/nucleus,:wd0:rmx86/th,:wd0:rmx86/ios, &
**          :wd0:rmx86/eios,:wd0:rmx86/loader,:wd0:rmx86/hi, &
**          :wd0:rmx86/icu,:wd0:rmx86/crash,:wd0:rmx86/patch, &
**          :wd0:rmx86/files,:wd0:rmx86/sdb,:wd0:rmx86/inc, &
**          :wd0:rmx86/lib,:wd0:rmx86/udi
:wd0:system, directory created
:wd0:lang, directory created
:wd0:utils, directory created
:wd0:config, directory created
:wd0:boot, directory created
:wd0:config/user, directory created
:wd0:config/cmd, directory created
:wd0:work, directory created
:wd0:user, directory created
:wd0:user/world, directory created
:wd0:user/world/prog, directory created
:wd0:rmx86, directory created
:wd0:rmx86/nucleus, directory created
:wd0:rmx86/th, directory created
:wd0:rmx86/ios, directory created
:wd0:rmx86/eios, directory created
:wd0:rmx86/loader, directory created
:wd0:rmx86/hi, directory created
:wd0:rmx86/icu, directory created
:wd0:rmx86/crash, directory created
:wd0:rmx86/patch, directory created
:wd0:rmx86/files, directory created
:wd0:rmx86/sdb, directory created
:wd0:rmx86/inc, directory created
:wd0:rmx86/lib, directory created
:wd0:rmx86/udi, directory created
- ;
- ;   Create the language run time support libraries.
- ;
- createdir :wd0:lib,:wd0:lib/plm86,:wd0:lib/ndp87,:wd0:lib/pasc86, &
**          :wd0:lib/fort86,:wd0:lib/cc86,:wd0:lib/rmx86, &
**          :wd0:lib/udi86,:wd0:inc
:wd0:lib, directory created
:wd0:lib/plm86, directory created
:wd0:lib/ndp87, directory created
:wd0:lib/pasc86, directory created
:wd0:lib/fort86, directory created
:wd0:lib/cc86, directory created
:wd0:lib/rmx86, directory created
:wd0:lib/udi86, directory created
:wd0:inc, directory created
- ;
- ;   Install the Installation System.
- ;
- copy :sd:system/* over :wd0:system
:sd:system/rmx86 copied OVER :wd0:system/rmx86
:sd:system/attachdevice copied OVER :wd0:system/attachdevice
:sd:system/copy copied OVER :wd0:system/copy
:sd:system/createdir copied OVER :wd0:system/createdir
:sd:system/date copied OVER :wd0:system/date
:sd:system/detachdevice copied OVER :wd0:system/detachdevice
:sd:system/dir copied OVER :wd0:system/dir
:sd:system/diskverify copied OVER :wd0:system/diskverify
:sd:system/format copied OVER :wd0:system/format
:sd:system/permit copied OVER :wd0:system/permit
:sd:system/submit copied OVER :wd0:system/submit
:sd:system/super copied OVER :wd0:system/super
:sd:system/time copied OVER :wd0:system/time
- ;
- copy :sd:config/terminals over :wd0:config
:sd:config/terminals copied OVER :wd0:config/terminals
- ;
- copy :sd:config/cmd/* over :wd0:config/cmd
:sd:config/cmd/instal860.csd copied OVER :wd0:config/cmd/instal860.csd
:sd:config/cmd/instal860u.csd copied OVER :wd0:config/cmd/instal860u.csd
:sd:config/cmd/instal863.csd copied OVER :wd0:config/cmd/instal863.csd
- ;
- copy :sd:config/user/* over :wd0:config/user
:sd:config/user/0 copied OVER :wd0:config/user/0
:sd:config/user/world copied OVER :wd0:config/user/world
- ;
- copy :sd:user/world/prog/r'?'logon over :wd0:user/world/prog
:sd:user/world/prog/r?logon copied OVER :wd0:user/world/prog/r?logon
- ;
- ;   Establish the appropriate permissions.
- ;
- permit :wd0:,:wd0:*,:wd0:system,:wd0:system/*, &
**       :wd0:rmx86,:wd0:rmx86/*,:wd0:config/*, &
**       :wd0:config/cmd/*,:wd0:lib/* r u=world
:wd0:,
     accessor = WORLD  , -L--
:wd0:rmx86a.060,
     accessor = WORLD  , -R--
:wd0:system,
     accessor = WORLD  , -L--
:wd0:lang,
     accessor = WORLD  , -L--
:wd0:utils,
     accessor = WORLD  , -L--
:wd0:config,
     accessor = WORLD  , -L--
:wd0:boot,
     accessor = WORLD  , -L--
:wd0:work,
     accessor = WORLD  , -L--
:wd0:user,
     accessor = WORLD  , -L--
:wd0:rmx86,
     accessor = WORLD  , -L--
:wd0:lib,
     accessor = WORLD  , -L--
:wd0:inc,
     accessor = WORLD  , -L--
:wd0:system,
     accessor = WORLD  , -L--
:wd0:system/rmx86,
     accessor = WORLD  , -R--
:wd0:system/attachdevice,
     accessor = WORLD  , -R--
:wd0:system/copy,
     accessor = WORLD  , -R--
:wd0:system/createdir,
     accessor = WORLD  , -R--
:wd0:system/date,
     accessor = WORLD  , -R--
:wd0:system/detachdevice,
     accessor = WORLD  , -R--
:wd0:system/dir,
     accessor = WORLD  , -R--
:wd0:system/diskverify,
     accessor = WORLD  , -R--
:wd0:system/format,
     accessor = WORLD  , -R--
:wd0:system/permit,
     accessor = WORLD  , -R--
:wd0:system/submit,
     accessor = WORLD  , -R--
:wd0:system/super,
     accessor = WORLD  , -R--
:wd0:system/time,
     accessor = WORLD  , -R--
:wd0:rmx86,
     accessor = WORLD  , -L--
:wd0:rmx86/nucleus,
     accessor = WORLD  , -L--
:wd0:rmx86/th,
     accessor = WORLD  , -L--
:wd0:rmx86/ios,
     accessor = WORLD  , -L--
:wd0:rmx86/eios,
     accessor = WORLD  , -L--
:wd0:rmx86/loader,
     accessor = WORLD  , -L--
:wd0:rmx86/hi,
     accessor = WORLD  , -L--
:wd0:rmx86/icu,
     accessor = WORLD  , -L--
:wd0:rmx86/crash,
     accessor = WORLD  , -L--
:wd0:rmx86/patch,
     accessor = WORLD  , -L--
:wd0:rmx86/files,
     accessor = WORLD  , -L--
:wd0:rmx86/sdb,
     accessor = WORLD  , -L--
:wd0:rmx86/inc,
     accessor = WORLD  , -L--
:wd0:rmx86/lib,
     accessor = WORLD  , -L--
:wd0:rmx86/udi,
     accessor = WORLD  , -L--
:wd0:config/user,
     accessor = WORLD  , -L--
:wd0:config/cmd,
     accessor = WORLD  , -L--
:wd0:config/terminals,
     accessor = WORLD  , -R--
:wd0:config/cmd/instal860.csd,
     accessor = WORLD  , -R--
:wd0:config/cmd/instal860u.csd,
     accessor = WORLD  , -R--
:wd0:config/cmd/instal863.csd,
     accessor = WORLD  , -R--
:wd0:lib/plm86,
     accessor = WORLD  , -L--
:wd0:lib/ndp87,
     accessor = WORLD  , -L--
:wd0:lib/pasc86,
     accessor = WORLD  , -L--
:wd0:lib/fort86,
     accessor = WORLD  , -L--
:wd0:lib/cc86,
     accessor = WORLD  , -L--
:wd0:lib/rmx86,
     accessor = WORLD  , -L--
:wd0:lib/udi86,
     accessor = WORLD  , -L--
- ;
- permit :wd0:work lac u=world
:wd0:work,
     accessor = WORLD  , -LAC
- ;
- permit :wd0:system/rmx86 N u=world
:wd0:system/rmx86,
     accessor = WORLD  , ----
- ;
- permit :wd0:user/*,:wd0:user/world/*,:wd0:user/world/prog/r'?'logon, &
**       :wd0:config/user/world drau u=world
:wd0:user/world,
     accessor = WORLD  , DLAC
:wd0:user/world/prog,
     accessor = WORLD  , DLAC
:wd0:user/world/prog/r?logon,
     accessor = WORLD  , DRAU
:wd0:config/user/world,
     accessor = WORLD  , DRAU
- ;
- detachdevice :wd0:
:wd0:, detached
- ;
- ;   The iRMX 86 R6.0 Installation System is installed.
- ;
- ;   Remove the Installation Diskette from the diskette drive and re-boot
- ;   iRMX 86 R6.0 from the drive on which it was just installed.  Then
- ;   proceed with the rest of the System Installation.
- ;
- END SUBMIT :system:/instal.csd
super-
Finally, we can reboot. Hit “U” as usual to skip the stream of asterisks, and we’ll get a clean SCT and boot straight through onto the HDD.
*********

SCT 86/300W, V1.2                      Copyright 1982, 1983 Intel Corporation
  TEST                                                        STATUS
USART/Timer   .                                                 GO
PIC           .*. Input "I" i.                                  GO
ROMCKSM       .                                                 GO
PPI           . . .                                             GO
  Processor Subsystem                                           GO

Onboard                                                         GO
Offboard                                                        GO
  Memory Subsystem            Total Memory = 384K               GO

Winchester    . . .                                             GO
Floppy        .                                                 GO
Tape          .                                               OFFLINE
  Boot Subsystem                                                GO


SCT Successful...Now Booting System


iRMX 86 HI CLI, V3.0: USER = 65535
Copyright 1981, 1982, 1984 Intel Corporation
- date q

DATE:  0089:
Also, if you don’t hit “U” to abort the asterisks, after a while it’ll boot itself, this time skipping the SCT:
.*********************

SCT 86/300W, V1.2                      Copyright 1982, 1983 Intel Corporation
  Processor Subsystem                                           GO
  Memory Subsystem            Total Memory = 384K               GO
  Boot Subsystem                                                GO


SCT Successful...Now Booting System
Compiling C Programs
There is a C Compiler for iRMX-86, called CC-86. Getting it to work took a little bit of trial and error, but here is an example.
Let’s take a look at my little C program:
- copy hello.c to :co:
#include <stdio.h>
main() {
    printf("Hello, World!\n");
    return 0;
}
hello.c copied TO :co:
-
First we need to compile it:
- /lang/cc86 hello.c debug include(:sd:inc/)
iRMX 86 C-86 COMPILER V2.0
Copyright Intel Corporation 1983, 1984
The above compiled hello.c into hello.obj and found the necessary include files — namely, stdio.h — in the /inc directory. The next step is to link it:
- /lang/link86 hello.obj,/lib/cc86/sqmain.obj,/lib/cc86/sclib.lib,&
**/lib/small.lib,/lib/cc86/87null.lib to hello.86 &
**BIND SEGSIZE(STACK(2000H),MEMORY(5000H)) MAP
iRMX 86 8086 LINKER, V2.0
The link command is a little bit more complicated. We need our hello.obj that the compiler created, but also some required object files. sqmain.obj is the entrypoint, sclib.lib is the small standard library, 87null.lib I think is a substitute for the 8087 numeric coprocessor, and small.lib the function calls for the small memory model. There are a couple different memory models — small and large — depending on how you want to use segmentation. The BIND tells it to make a runtime loadable program, MAP says to write a map file to disk describing the linking progress, and SEGSIZE specifies the size of the stack and heap segments. Make sure to put the MAP after the SEGSIZE. The manual had it the other way, and link86 would throw a syntax error. I think it wants some whitespace after the SEGMENT options.
Once it is linked, we can run it
- hello.86
Hello, World!
Hi Scott,
You mentioned in the article that you have access to both RMX86 and RMX286.
Where did you get these from and which release of RMX86? Release 6 or release 8?
As an old-time developer on both operating systems I’ve been looking for the disks so I can get it running on the multibus cards I’ve recently acquired.
The RMX 86 release 6 disks are readily available online, but nothing newer and definitely no RMX286, so I’d love to know how to get a copy of these.
Many thanks,
Mark
I think you can find this one easily: “147025-001 iRMX 86 INSTALLATION DISKETTE FOR iAPX 286-BASED SYSTEMS”. Perhaps I’m mistaken by calling this RMX286 — it’s really just the boot disk that runs on the 286 multibus boards.
Ah, yes, that’s a disk allowing you to install RMX86 on a 286 board, so not really RMX286.
RMX286 is a different beast, an evolution of RMX86 that fully takes advantage of segmented memory to address 16MB of RAM.
AFAIK TenAsys has sole distribution right for RMX286 and RMX386.