In this video, I design and build a Z180 CPU Board for the RC2014
Motivation
I wanted to try a CPU that runs at faster clock speeds and has more built-in peripherals than the Z80. More built in peripherals means less external boards needed for mundane features, and more room in the backplane for “interesting boards”.
Selecting a CPU
There are several variants of the Z180. I chose the Z8S180 because it is available in a PLCC package, which means you can mount it using a through-hole PLCC socket. The latest and greatest version offers a few more features than the Z8S180, but is only available in QFP. On-board peripherals of the Z8S180 include:
- Interrupt controller, featuring three maskable interrupts and one non-maskable interrupt
- Two DMA controllers
- Two Asynchronous Serial Interfaces, one featuring a full set of handshaking signals (CTS, RTS, DCD)
- Memory-management unit that allows up to 1 MB of pageable memory
- Clocked Serial IO port
- 16-bit Programmable Reload timer, usable as a baud rate generator
- Timing generator that interfaces with a crystal or an oscillator, and can operate the cpu at 2X, 1X, or 0.5X the speed of the crystal.
The Asynchronous Serial Interfaces and Programmable Reload Timer should in theory mean no need for the Z80 CTC or SIO/2 that I tend to use in my other projects. The MMU has the potential to eliminate much circuitry on the banked ROM/RAM board.
Design
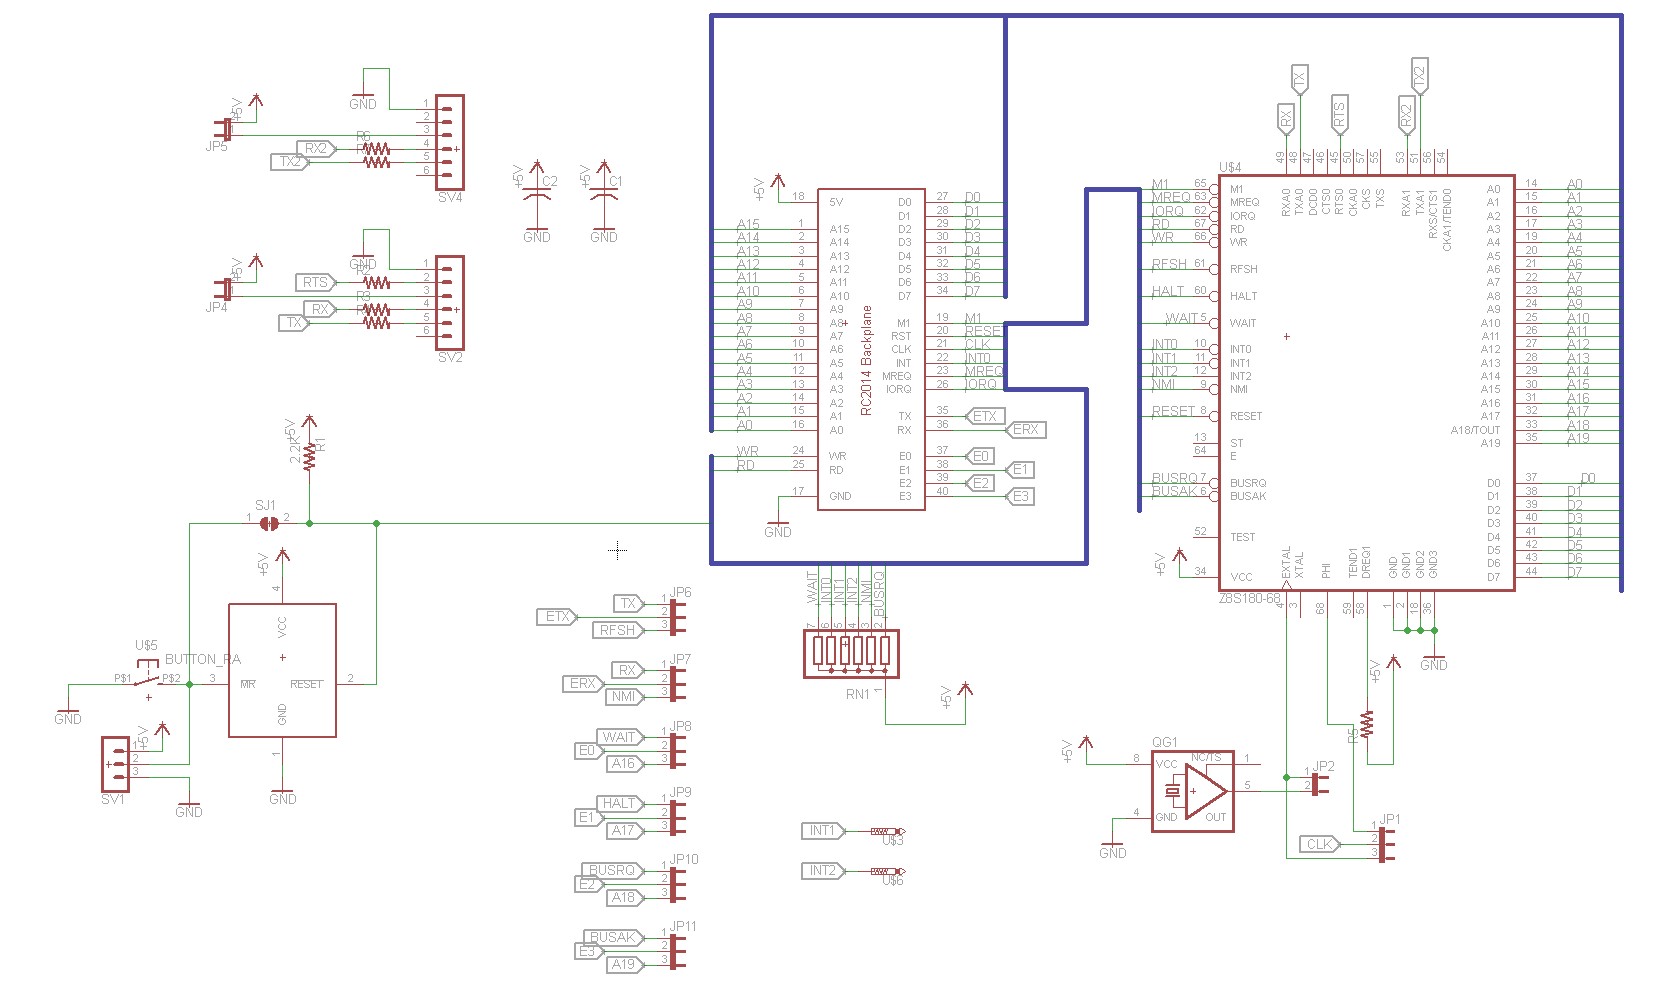
Below is the schematic for the Z180 board:
As you can see, the bulk of the schematic is the Z180 CPU and RC2014 backplane connector. We do the obvious thing, and connect all of the address, data, and control lines from CPU to backplane.
It gets a little more interesting where the oscillator is connected. The Z180 has both a clock input (EXTAL) and a clock output (PHI). This allows peripherals to take advantage of the Z180’s software-controllable clock multiplier and divider. I wanted to make sure the board was compatible with external clock boards (like a slow clock, etc) so I made it so the RC2014’s CLK pin could be jumper to either the clock input (EXTAL) or the clock output (PHI). I also put the usual on-board footprint for a crystal oscillator, with a jumper to enable it to be connected to EXTAL. This should pretty much support any type of clocking that one wants to do with an RC2014.
Note that if you intend to use the RC2014 serial boards, either a ACIA or SIO/2, then you’ll have to either run your Z180 at 7.3728 Mhz, or clock the ACIA or SIO/2 boards separately, since they generally derive their baud rate clock from the RC2014 bus. I built a oscillator footprint into my SIO/2 board for exactly that reason.
There’s also a MAX811 power-on reset circuit, and a smd jumper to work around it if you don’t want it. There’s a header for external reset switch and a footprint for onboard reset button.
Because the Z180’s onboard MMU has support for addressing up to 1MB of memory, there are several extra address lines to contend with. I designed this board so that you can select the RC2014’s extra pins between the traditional functions of my other CPU boards (busreq, busack, halt, wait, etc) and the address pins. I’m thinking this will allow me to develop a banked ROM/RAM board that uses the Z180’s MMU instead of its own page selection circuitry.
The serial headers are broken out to FTDI-compatible jumpers.
Implementation
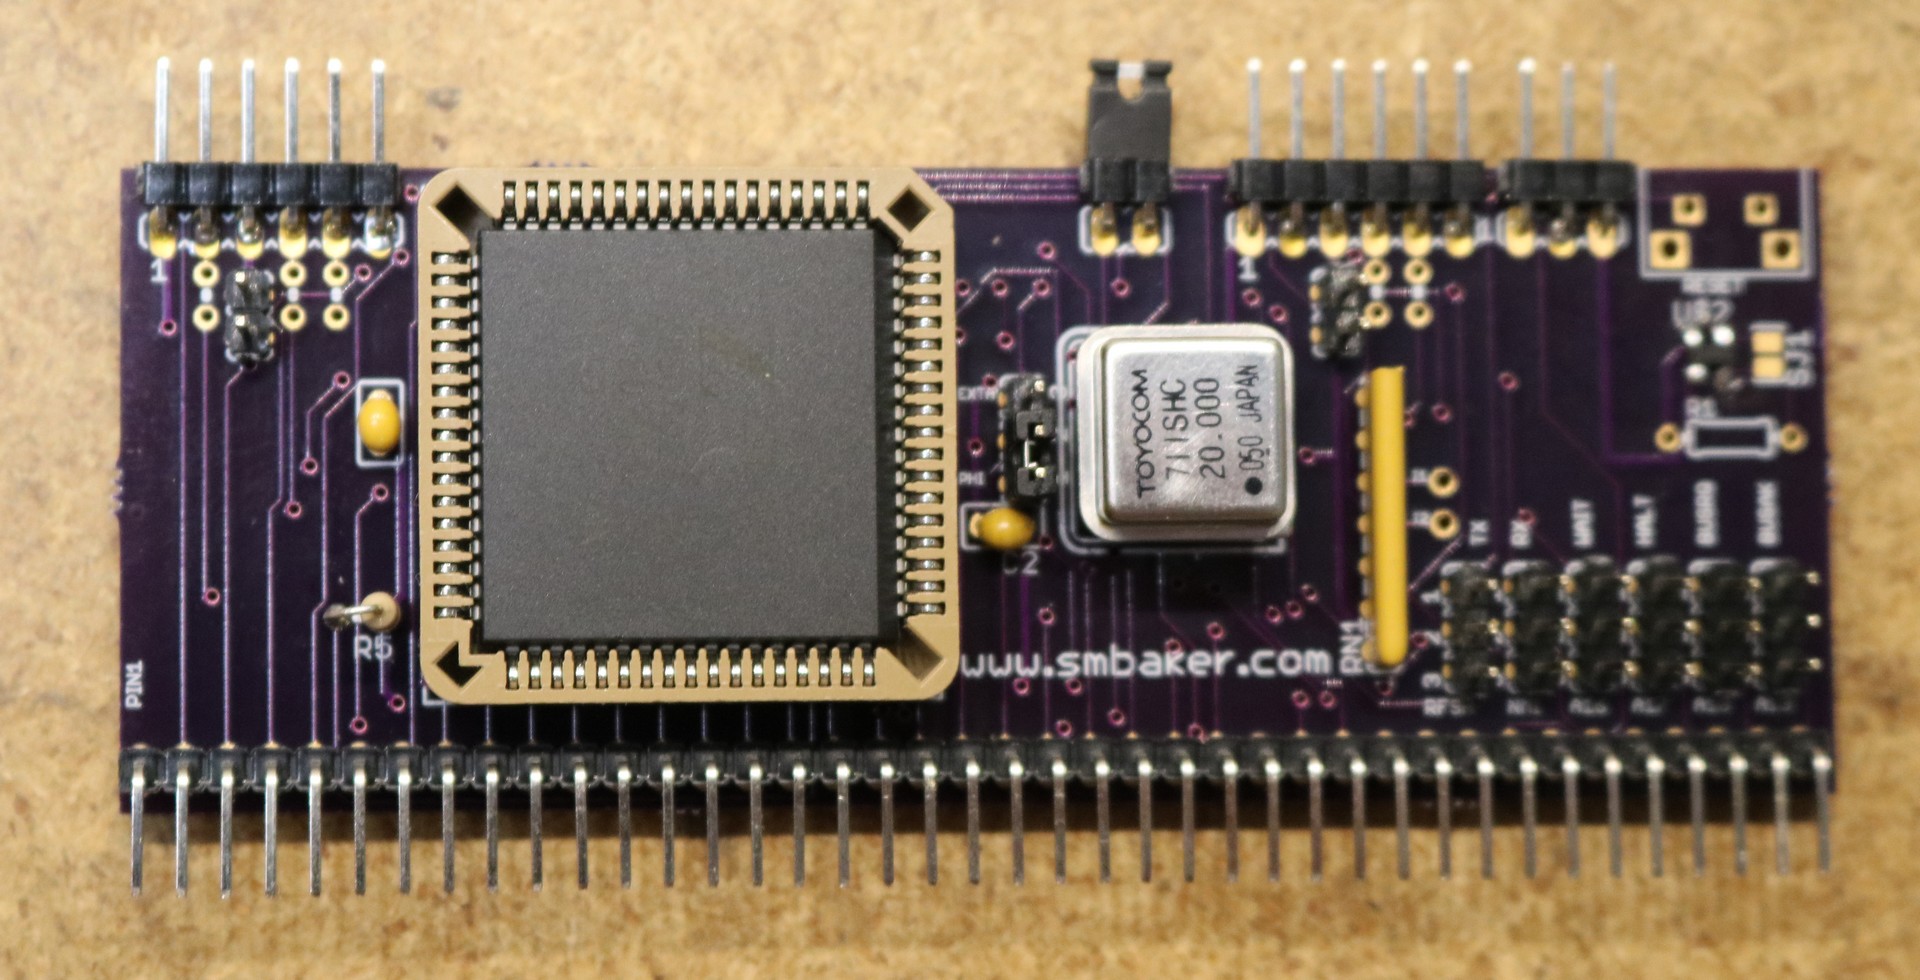
Below is a picture of the assembled CPU board.
As we can see, I’ve installed a 20 Mhz oscillator (I socketed this oscillator so that it can easily be changed). The jumpers are installed to connect the oscillator to EXTAL and to connect the Z180’s PHI to the RC2014 BUS’s CLK pin. By default, the CPU will boot up with the divide-by-2 clock divider selected, so it runs at 10 Mhz. This divider is then disabled in software and the CPU switches to 20 Mhz. I’ve modified RomWBW to do this.
Important Notes
I have tried out any of the onboard peripherals yet. I’m still using my SIO/2 board for asynchronous IO until I get around into looking into Z180 serial drivers. As mentioned above, this necessitated installing a 7.3728 Mhz crystal in my SIO/2 board, so that the SIO/2 board has the correct reference for baud rate generation.
PCB Availability
As usual, I’ve made the board available on Osh Park:


Hi Scott. Great job with the Z180 board.
Where can I find the BASIC listings for the benchmark programs you are using in your video?
Thanks.
Hi,
Is this open-source or under GPL license? Free to use, etc.?
Thanks!
Also, eBay sells the Z180 at 33Mhz. Will this board works with high clock frequency, given a correct oscillator is used? Thanks!
I haven’t really taken the time to sit down and think about the various licensing options. Any time I try to sit down and think about something like that, I find that I end up getting distracted and start tinkering with something instead. The board is simple enough that if you just want to make your own, I don’t think there’s any issue. If you want to use my layout then send me an email with the intended purpose/circumstance and I can consider it and grant you permission.
I’m not sure whether or not it will work at 33Mhz. I don’t see any obvious reason why not, but the higher you go in Mhz I would expect the more temperamental the entire bus becomes. If you do get it working at 33 Mhz, then please send a note and let the community know!
Are you using this as the main processor for your RC2014 (i assume you probably tinker enough you switch back and forth). If you are have you seen any issues with compatibility using the z180 (with CP/M or software)?
I am going to build a RC2014 (mostly using a lot of your boards) and was just going to build the z180 instead of the z80 board. Yes i want zork to load/run that much faster.
Sean
Hi Scott I’ve just built your z180 module and was wondering if you wouldn’t mind sharing your code to get this module up and running I use the rc2014 for personal use and would love to see your changes to romwbw.
Thanks
Kim
I have a fork of RomWBW at https://github.com/sbelectronics/RomWBW that should have the Z180 modifications available in it.
Good Day Scott;
I have a couple of Hitachi 64180 CPUs from an old Ciarcia Home computer design. Will the Hitachi 64180 be compatible in this design ?
Thank you.
/Gabe
Hello …i have a classic RC2014 but inherited a lot of boards with a 64pin Z80180 on it so I wired a CPU substitute usin the Z180 chip and hooked it up on my classic RC2014. I used your Z180 blog as a reference. Is there. ROM available that I can burn to use with the Z180 plus Basic? Thanks so much for your help