In this post, I build a Midi Hat and Jukebox using the Raspberry Pi
Motivation
I picked up a Roland SC-55 to use with my retrocomputer setup recently, and I figured it would be cool to turn the thing into a standalone midi jukebox, so that no “computer” is required. I also figured this would be relatively easy, using a raspberry pi as the controller to drive the SC-55. My first step was to figure out how to get MIDI out from a raspberry pi. One option would have been to purchase a USB-MIDI adapter. This would have worked, but I really wanted to develop a native raspberry pi MIDI interface rather than using USB. MIDI is a fairly simple interface, and the raspberry pi has built in serial capability, so this ought not to be too difficult.
Note: Although I call this a “hat” or at some times a “shield”, hats technically require a serial eeprom for plug-and-play automatic configuration. This project doesn’t have one of those, and it’s assumed the builder has the Linux skills necessary to install and configure the necessary software (ttymidi, etc).
Design
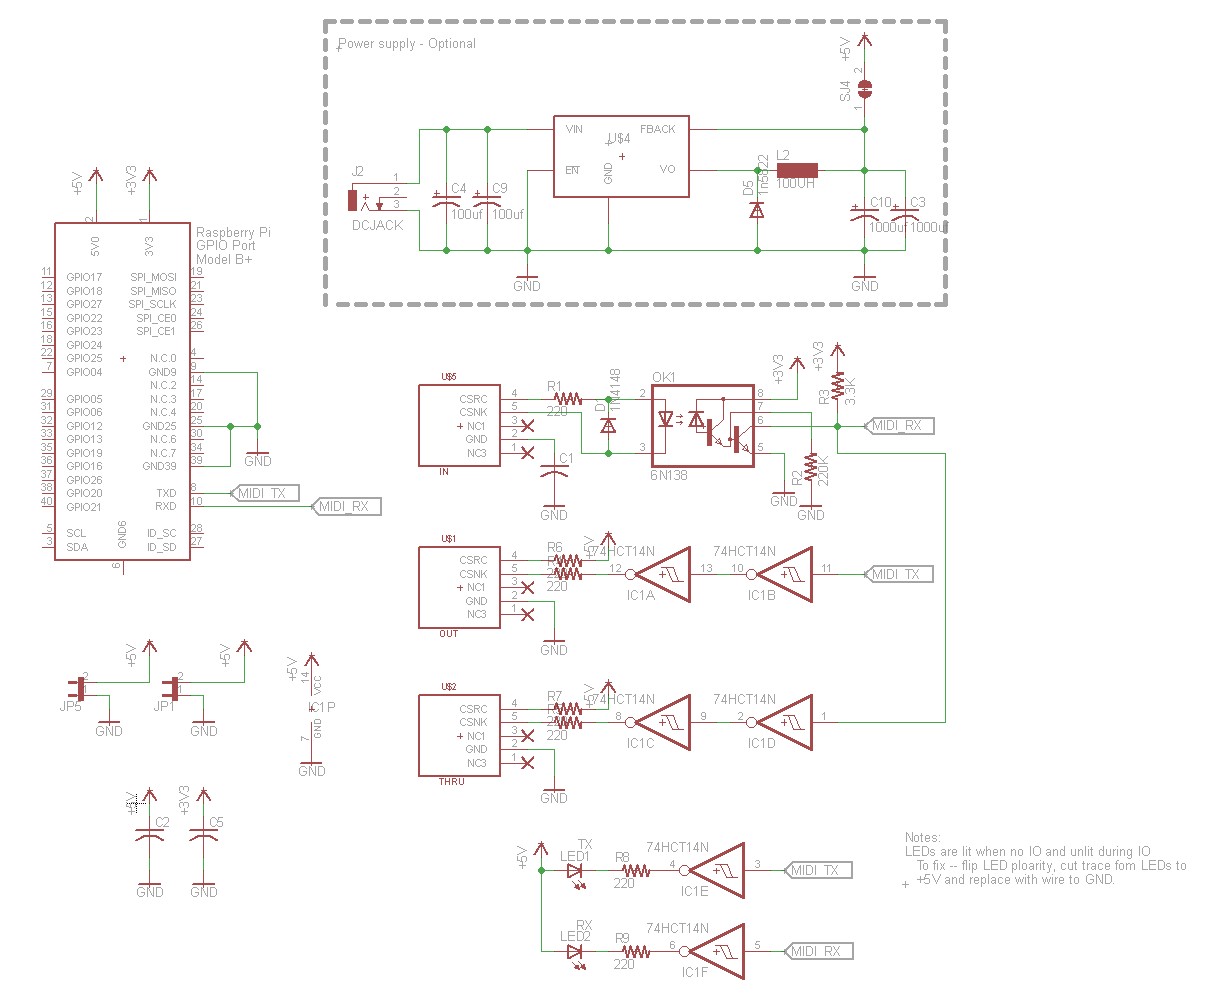
Below is a schematic of my prototype:
Note that I’m working on a revision of this board to correct the errors in the LEDs described in the schematic, and will probably have a revised schematic as soon as the new boards are tested.
At the top of the schematic is a power supply — that’s entirely optional and something that I include on a lot of my Raspberry Pi hats, space permitting. It’s a simple 5V switching power supply and allows operating the board from higher voltages (such as 12V). I designed the board so that the power supply could be cut off, making a smaller hat if desired. Now, let’s get to the interesting part.
The typical MIDI interface is well documented in a variety of sources on the web. MIDI In uses an optocoupler, in this case a 6N138. MIDI in is connected to raspberry pi pin 10, which the pi uses as serial uart receive.
MIDI Out uses a pair of pins, one is 5V through a 220 ohm resistor, and the other is our serial data line, also through a 220 ohm resistor. It’s common to drive this with a pair of hex inverters. In this case I used schmitt trigger hex inverters. We probably can’t use the pi’s GPIO directly, as the optocouplers used in midi equipment often have a forward voltage of around 1.4 V, and the pi outputting a 3.3V high would still leave 5.0-3.3 = 1.7V output, enough to drive the optocoupler when we want it turned off. Using the hex inverter is also cheap insurance against damaging a pi by miswiring something downstream — it’s cheaper to replace a hex inverter than it is to replace a pi. MIDI Out is connected to raspberry pi pin 8, which the pi uses as serial uart transmit.
MIDI Thru is identical to MIDI Out, but instead of being driven by the pi, it’s driven by the output of MIDI In’s optocoupler. This means that whatever bits arrive on “In” get automatically sent back out on “Thru”.
The remaining two hex inverters I used to drive LEDs. As the note in the schematic indicates, I implemented the LEDs backwards — they are lit when there is no data and briefly unlit when there is data. The next revision of the board will correct this.
Implementation
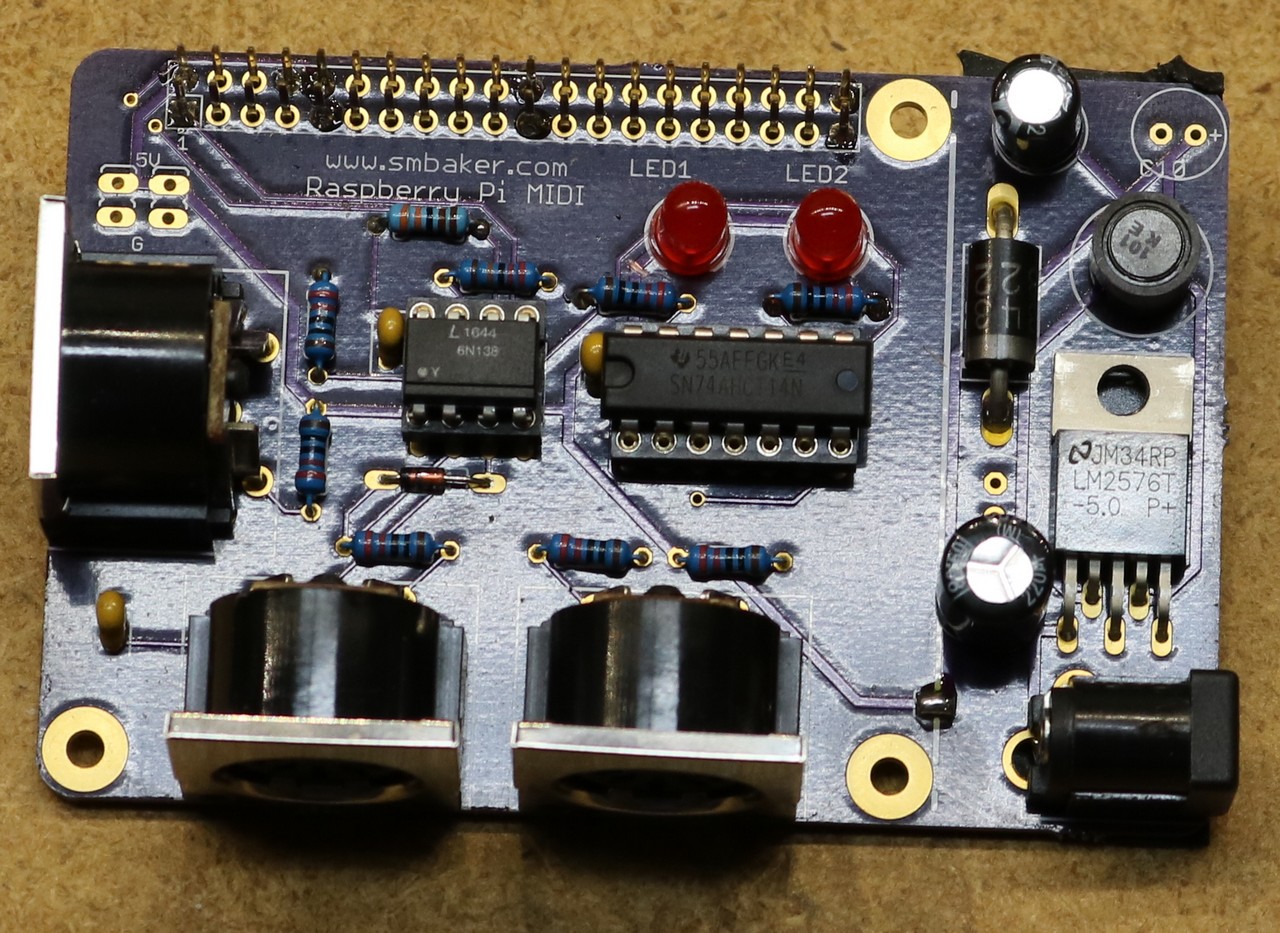
Below is a picture of the assembled hat, PCB fabricated at Osh Park:
As you can see, the optional power supply components are all on the right hand side, and the board could easily be cut down to smaller size and these components eliminated. I kinda screwed up by facing the power jack to the side; it would have been much more convenient to face it straight down. That will be corrected in the next revision.
The larger of the two DIP ICs is the hex inverter, the smaller is the optocoupler. It’s not easy to see from the picture, but I used a stacking header, so that additional hats can be mounted on top of this one. I typically only solder as many pins as are necessary on things like this, so that’s why some of the header pins are unsoldered. The two DIN jacks on the bottom are MIDI In and Out, the one on the side is MIDI Thru.
Software
I used a custom fork of ttymidi for this project. The default ttymidi didn’t support the 31,250 baud rate that was necessary for MIDI. This is somewhat surprising, considering 31.250 baud is the standard. Anyhow, it wasn’t too difficult to modify, though my C skills are rusty (I’m a python programmer these days). My custom fork of ttymidi is at https://github.com/sbelectronics/ttymidi. Once ttymidi is installed, we can use a variety of midi players on the pi to play music out the midi port. I personally use aplaymidi.
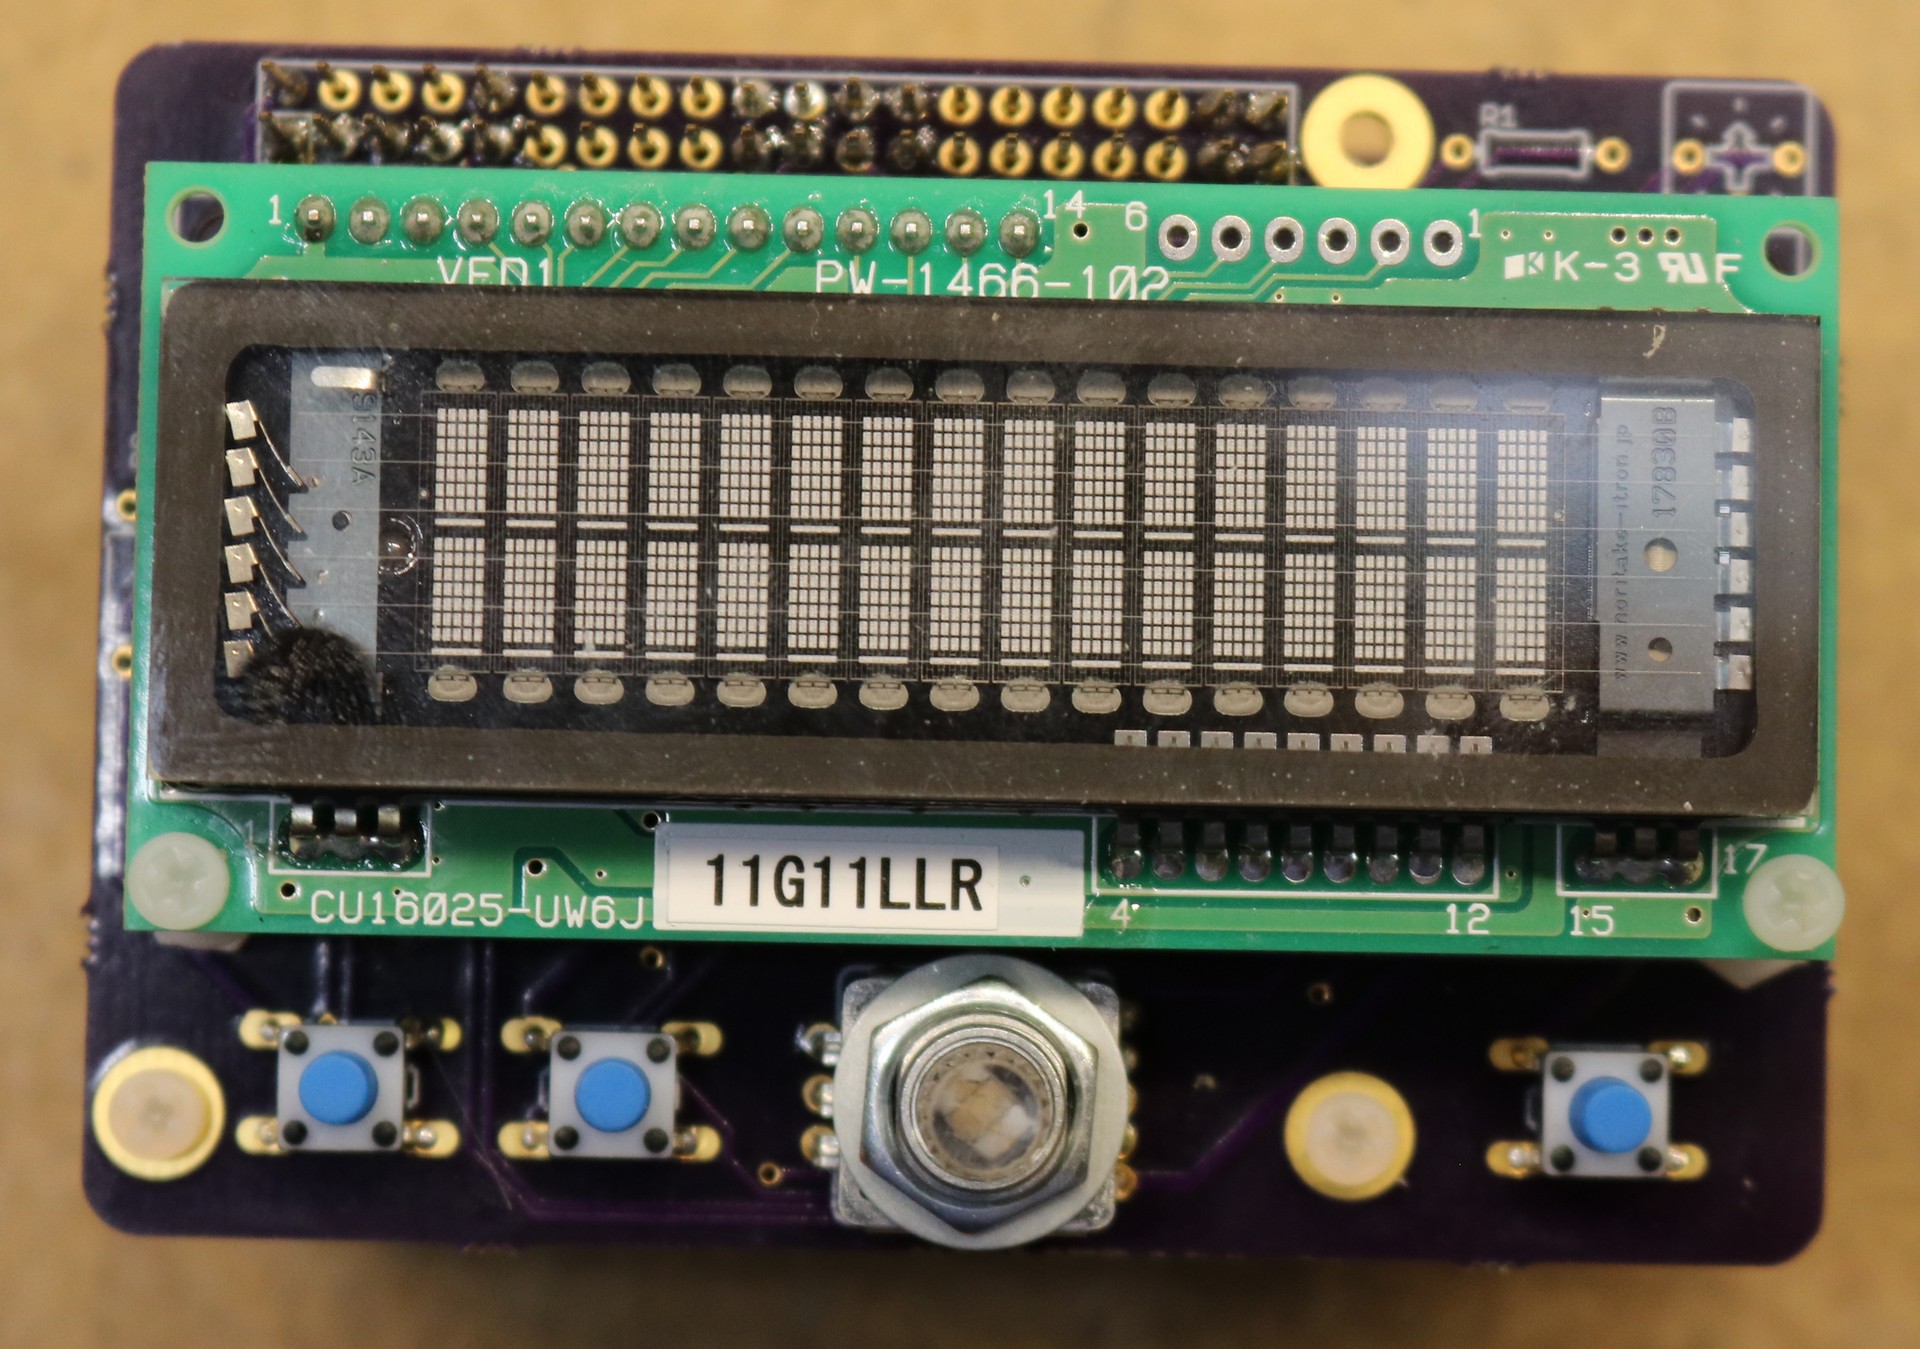
I wrote my own front-end for this project, which sits on top of aplaymidi and implements a simple jukebox user interface using a VFD display, encoder, and some buttons. My front-end is at https://github.com/sbelectronics/pi-midicontrol.
Building the jukebox
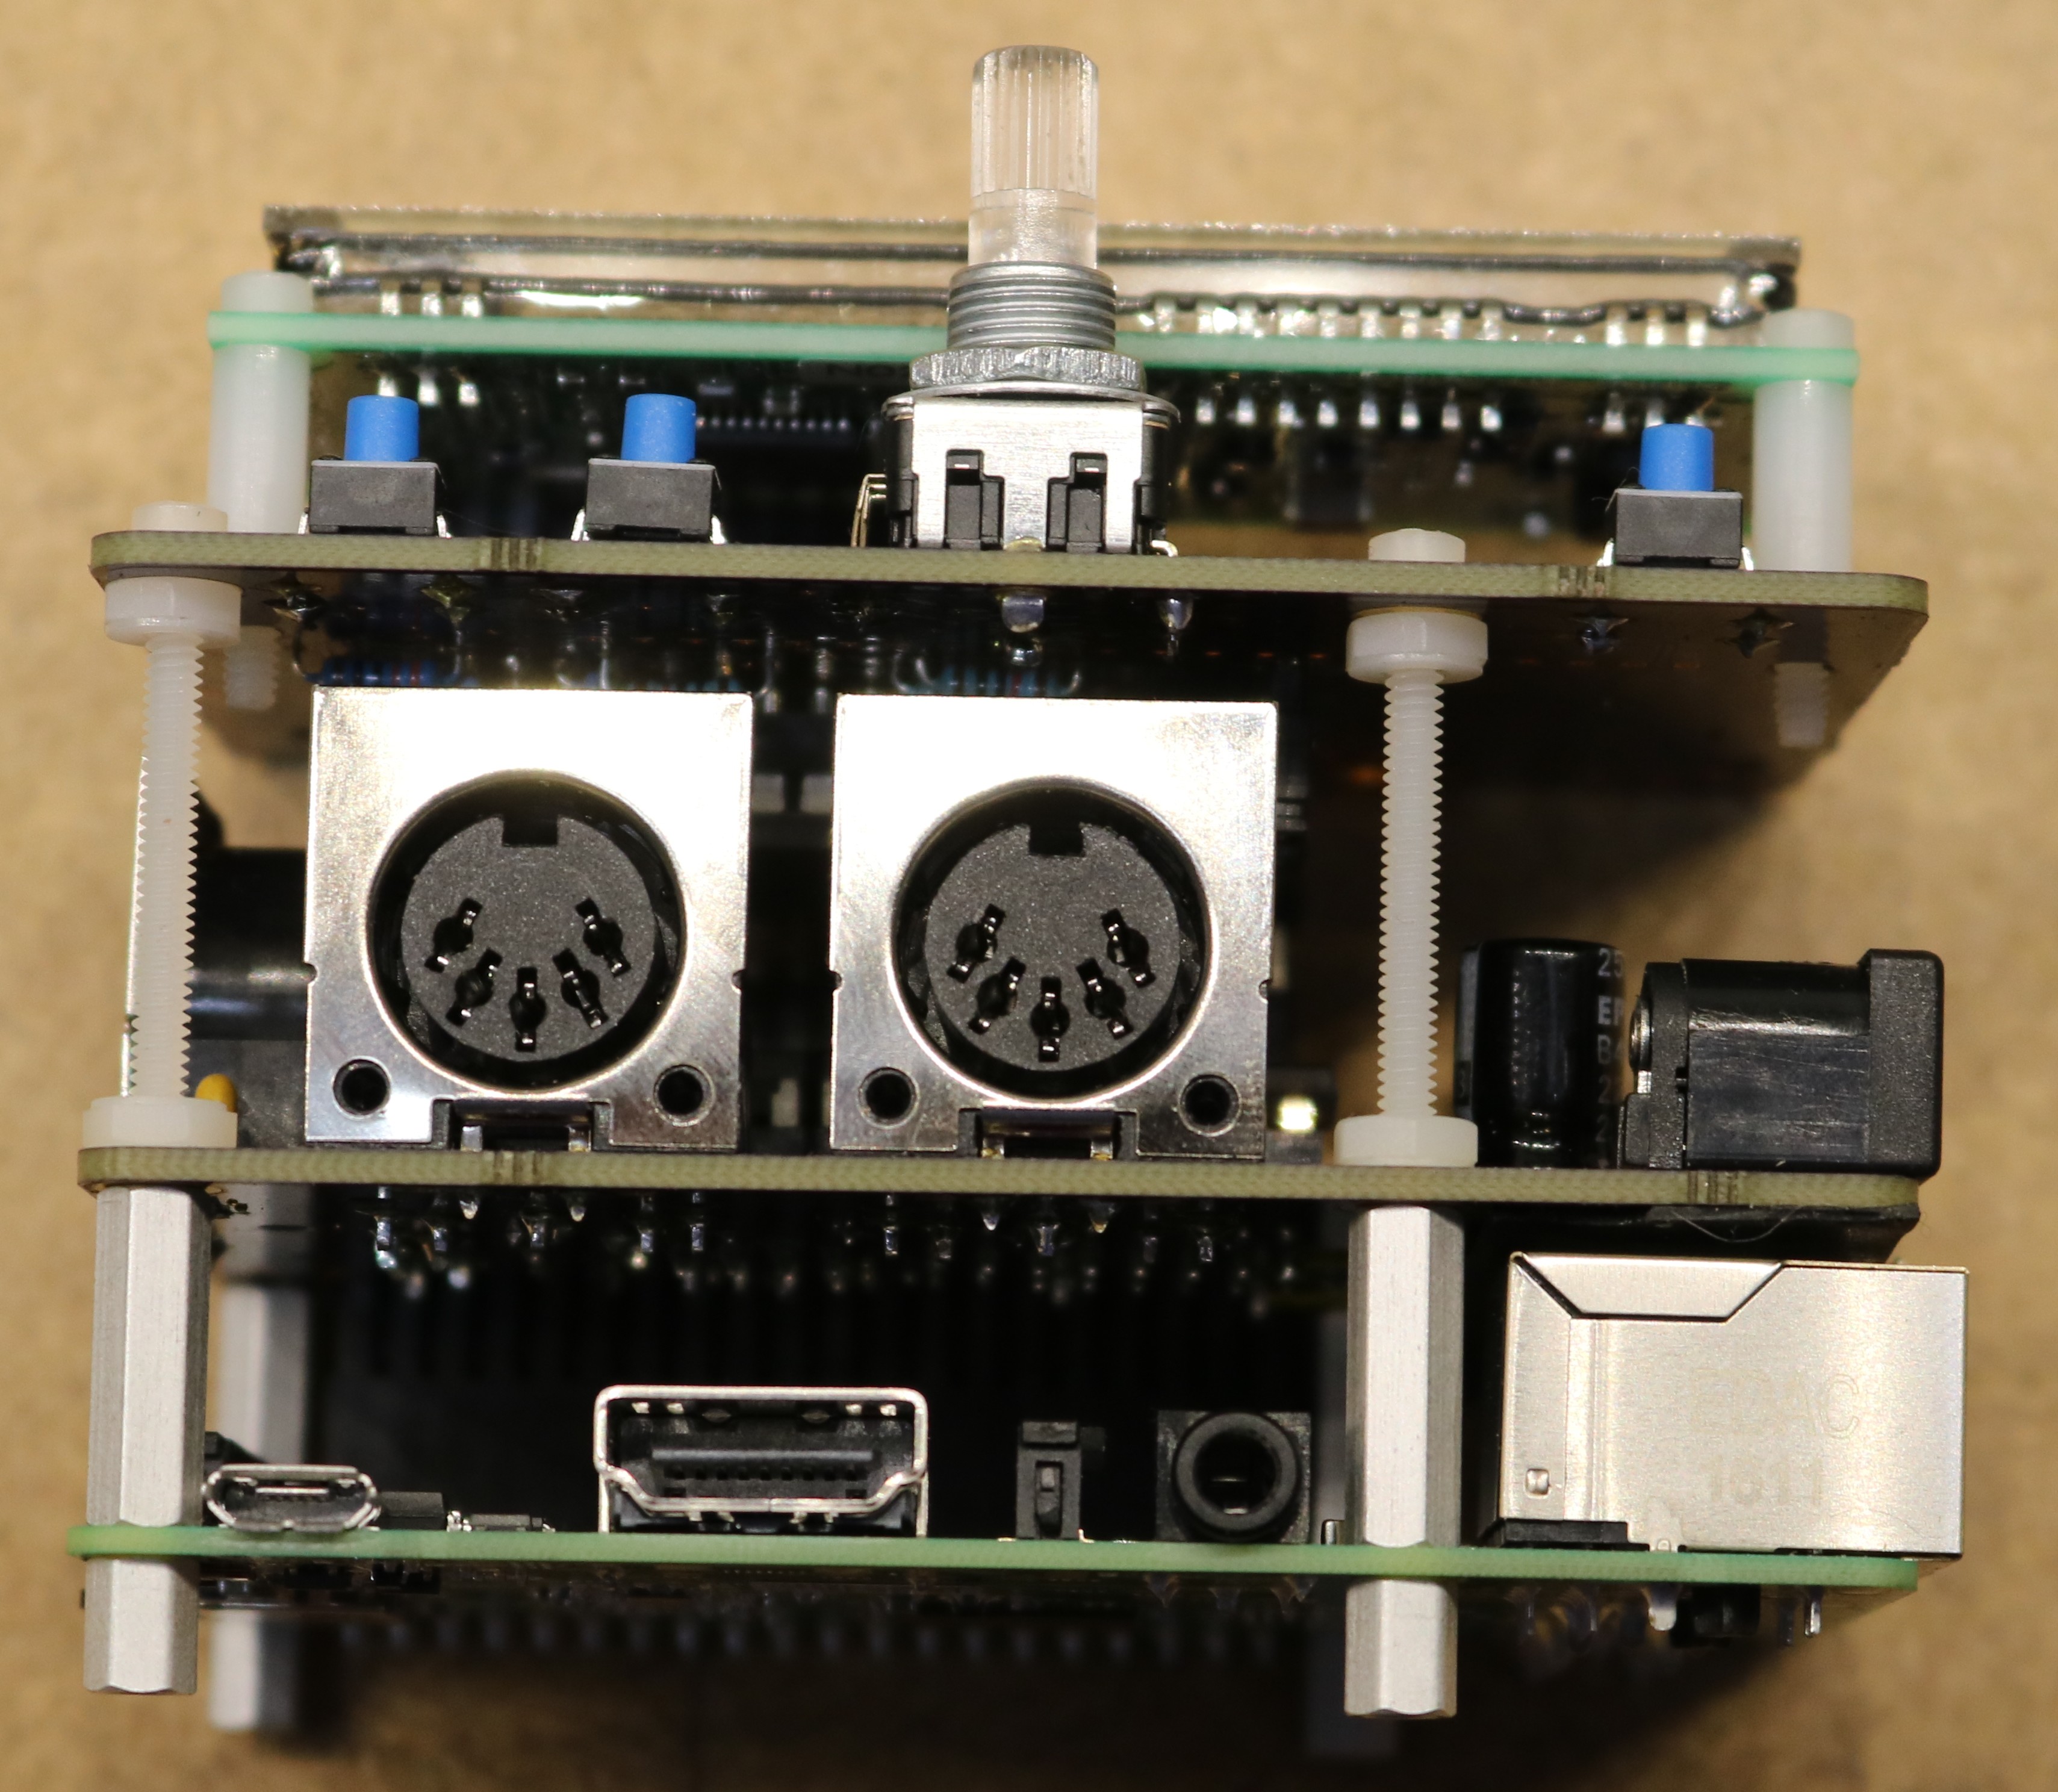
I stacked three boards together, the pi, midi hat, and my VFD display hat. Here’s what the stack looks like:
Building a case
The three-board stack was a bit ungainly, so I made an oak case and slanted the VFD hat. This is what I ended up with:
The case is a bit crude, being made out of spare wood I found in the garage, but it gets the job done. A better alternative would be to laser cut a case, from a place like ponoko.
Acknowledgements
I’d like to acknowledge PiMiDi: a Raspberry Pi Midi Box, or How I Learned to Stop Worrying and Love MIDI by jmuncher, a similar project and the place where I first learned of ttymidi. The author takes a slightly different approach to the software, reprogramming the pi’s UART clock so that 38,400 baud was clocked out at 31,250. I couldn’t get that approach to work, and ended up modifying ttymidi instead.
Board availability
As usual, I’ve put my boards up on Osh Park for those who may be interested in reproducing this build:
Pi Midi shield, original version:
Pi VFD shield:


Hi there
Great post!
Do you build those for sale by any chance?
I am looking for a solution to control my good old Fireface 400 remotely somehow.
I figured that my Pi3 + MIDI hat + remote control hat + a little of coding should do the trick.
I’m rather a software guy and not really comfortable with building something that involves soldering more than 2 resistors and a diode together tho… 🙂
Great project! I’d like to see something similar to be used as a portable sysex data dumper to load patch libraries to synthesizers.
Hello!
A very nice project. I want to build me one too.
Which display shoul I use for it? The CU16025-UW6J seems to be very expensive.
There are lots of LCD displays available on eBay for only a few dollars each that could be used in place of the VFD. Just search for “16×2 lcd display” and you ought to find some hits.
Great project! I just received the boards from Osh Park and they look great. I was wondering what type of capacitors you used for the MIDI shield? Also, I couldn’t find the schematic/parts list for the VFD shield and I’m not quite sure what to buy and where to put it. Is that in another post?
Thanks!