In this post, I build a PS/2 Keyboard to TTLSerial Adapter
Motivation
The original reason for this project is that I wanted to build a standalone RC2014 with keyboard and display. There is an official RC2014 serial keyboard, but I find it a little inconvenient for my big fingers and poor eyesight. I have plenty of old PS/2 keyboards laying around, so I figured I’d rig up a microcontroller to convert the PS/2 keyboard interface into a TTL-level serial interface that could be plugged directly into the RC2014’s serial port.
Along the way, I discovered that the very same circuit would make an interesting project to turn a PS/2 keyboard into a simple MIDI controller. So I adapted the circuit for that purpose as well.
Design part I – designing a PS2-TTLSerial adapter for RC2014
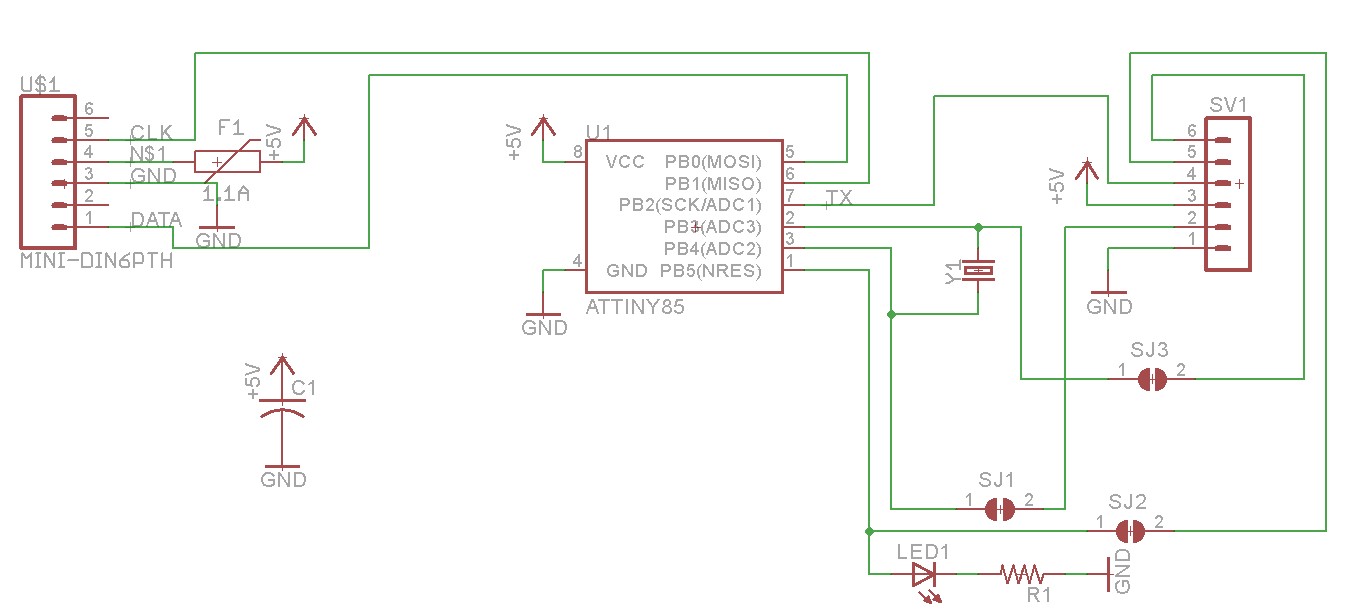
Below is the schematic:
This schematic is really very simple. The heart of the project is a ATTINY85 microcontroller. This is a small 8-pin microcontroller. Two pins are used as power and ground. That leaves up to six pins that can be used for GPIO or other functions. We only need three pins — clock and data for the PS/2 keyboard interface and transmit for the serial port. On the left side of the schematic is the PS/2 keyboard connector. As you can see, it has ground and 5V connections, with a PTC fuse for the 5V connection. On the far right is a 6-pin serial header that connects to the RC2014. Only three pins are important on this header: 5V, GND, and transmit. 5V is power from the RC2014 (RC2014 serial boards typically have a jumper that lets you enable the 5V power to the serial connector). There is also a LED that will blink when there is keyboard activity.
I also connected the remaining three GPIO pins to the 6-pin header through optional solder jumpers. These aren’t used in the design, but breaking them out to the header makes them potentially useful for other projects.
Y1 is an optional crystal. The ATTINY85 has an internal oscillator that’s suitable for our purposes, so there’s no need to populate the crystal.
Design Part II – Designing a PS/2 Midi controller
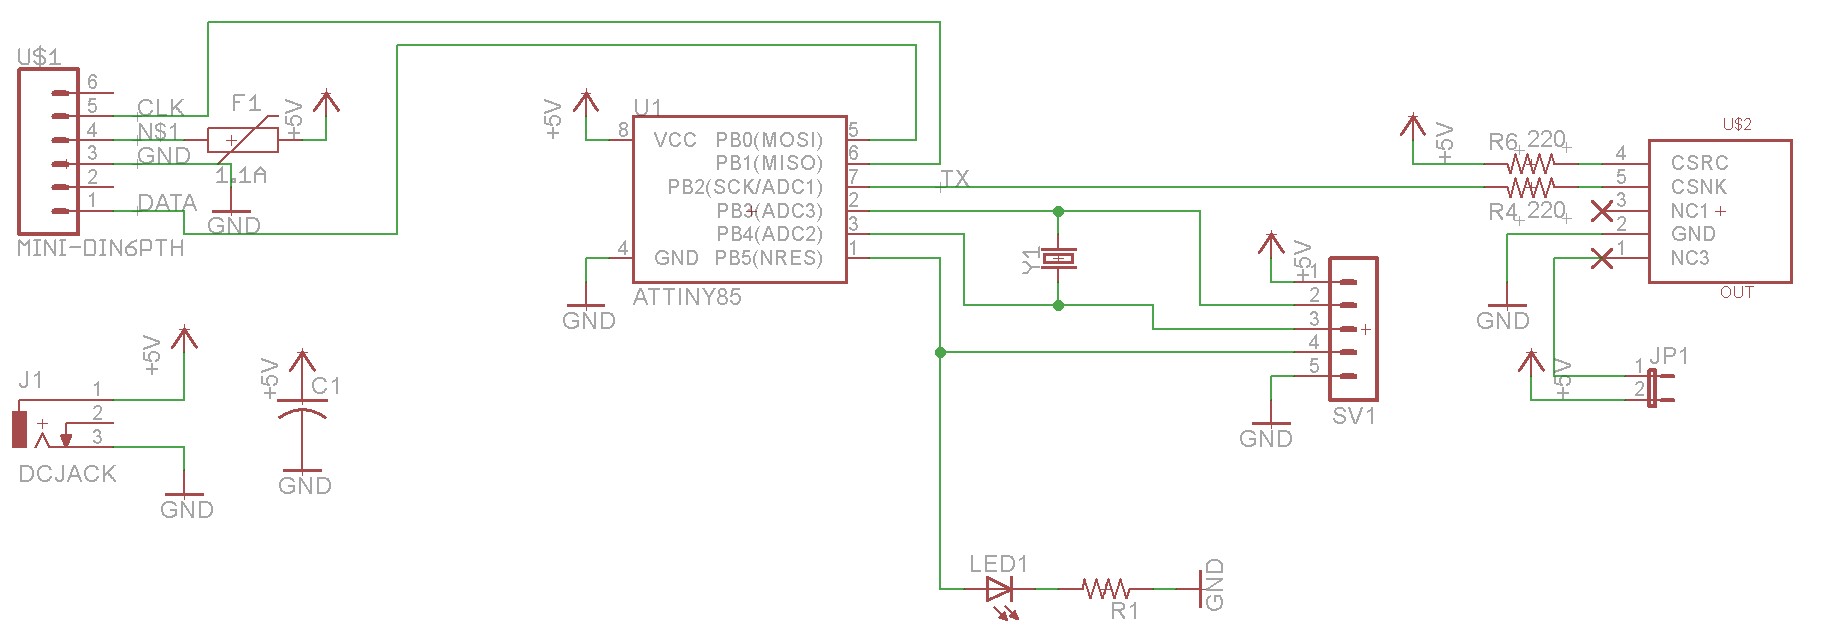
No sooner did I finish the PS2-serial board and tried it out on the RC2014, did I realize that I could repurpose this board to make a very similar MIDI controller. MIDI is a serial protocol, so it’s just a matter of modifying the circuit to interface to MIDI instead of interfacing to the RC2014. Below are the modifications:
Here we have eliminated the 6-pin header and in its place installed a 5-pin DIN jack. MIDI uses a current source and sink through 220 ohm resistors, and as such 5V is connected to pin 4 of the DIN jack via a 220 ohm resistor, and serial transmit has been connected to pin 5 via a 220 ohm resistor. Pin 2 is grounded to serve as a shield. I added a jumper to allow optional 5V on pin 1, which isn’t part of the midi spec, but allows me some future possibility to power the device through the MIDI connector (via a nonstandard MIDI cable). There’s a 5V barrel jack on the board, so power can be connected that way.
Unused GPIOs are brought out to a 5-pin header (that I could have been smarter and used the same 6-pin pinout as the PS2-RC2014 adapter and served both purposes with one PCB is an irony not lost on me). As before, there’s an optional crystal footprint that I didn’t need.
Implementation
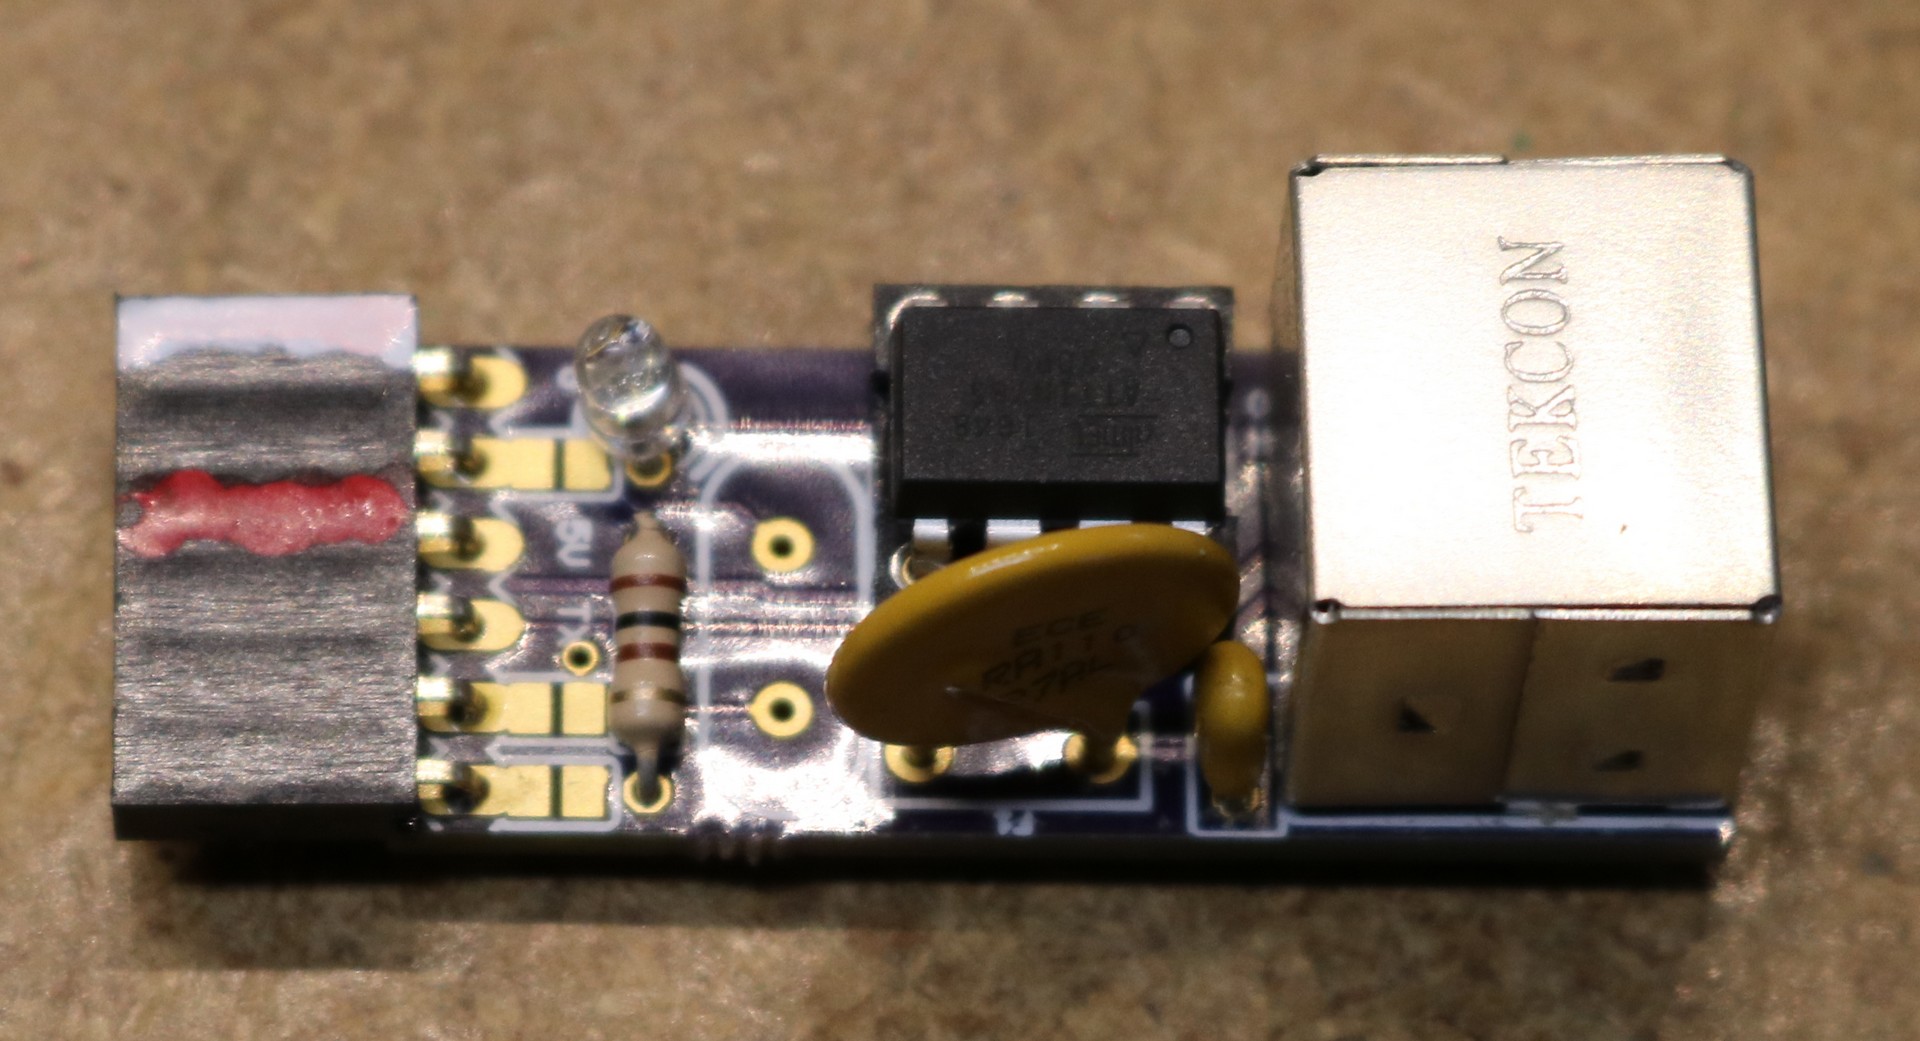
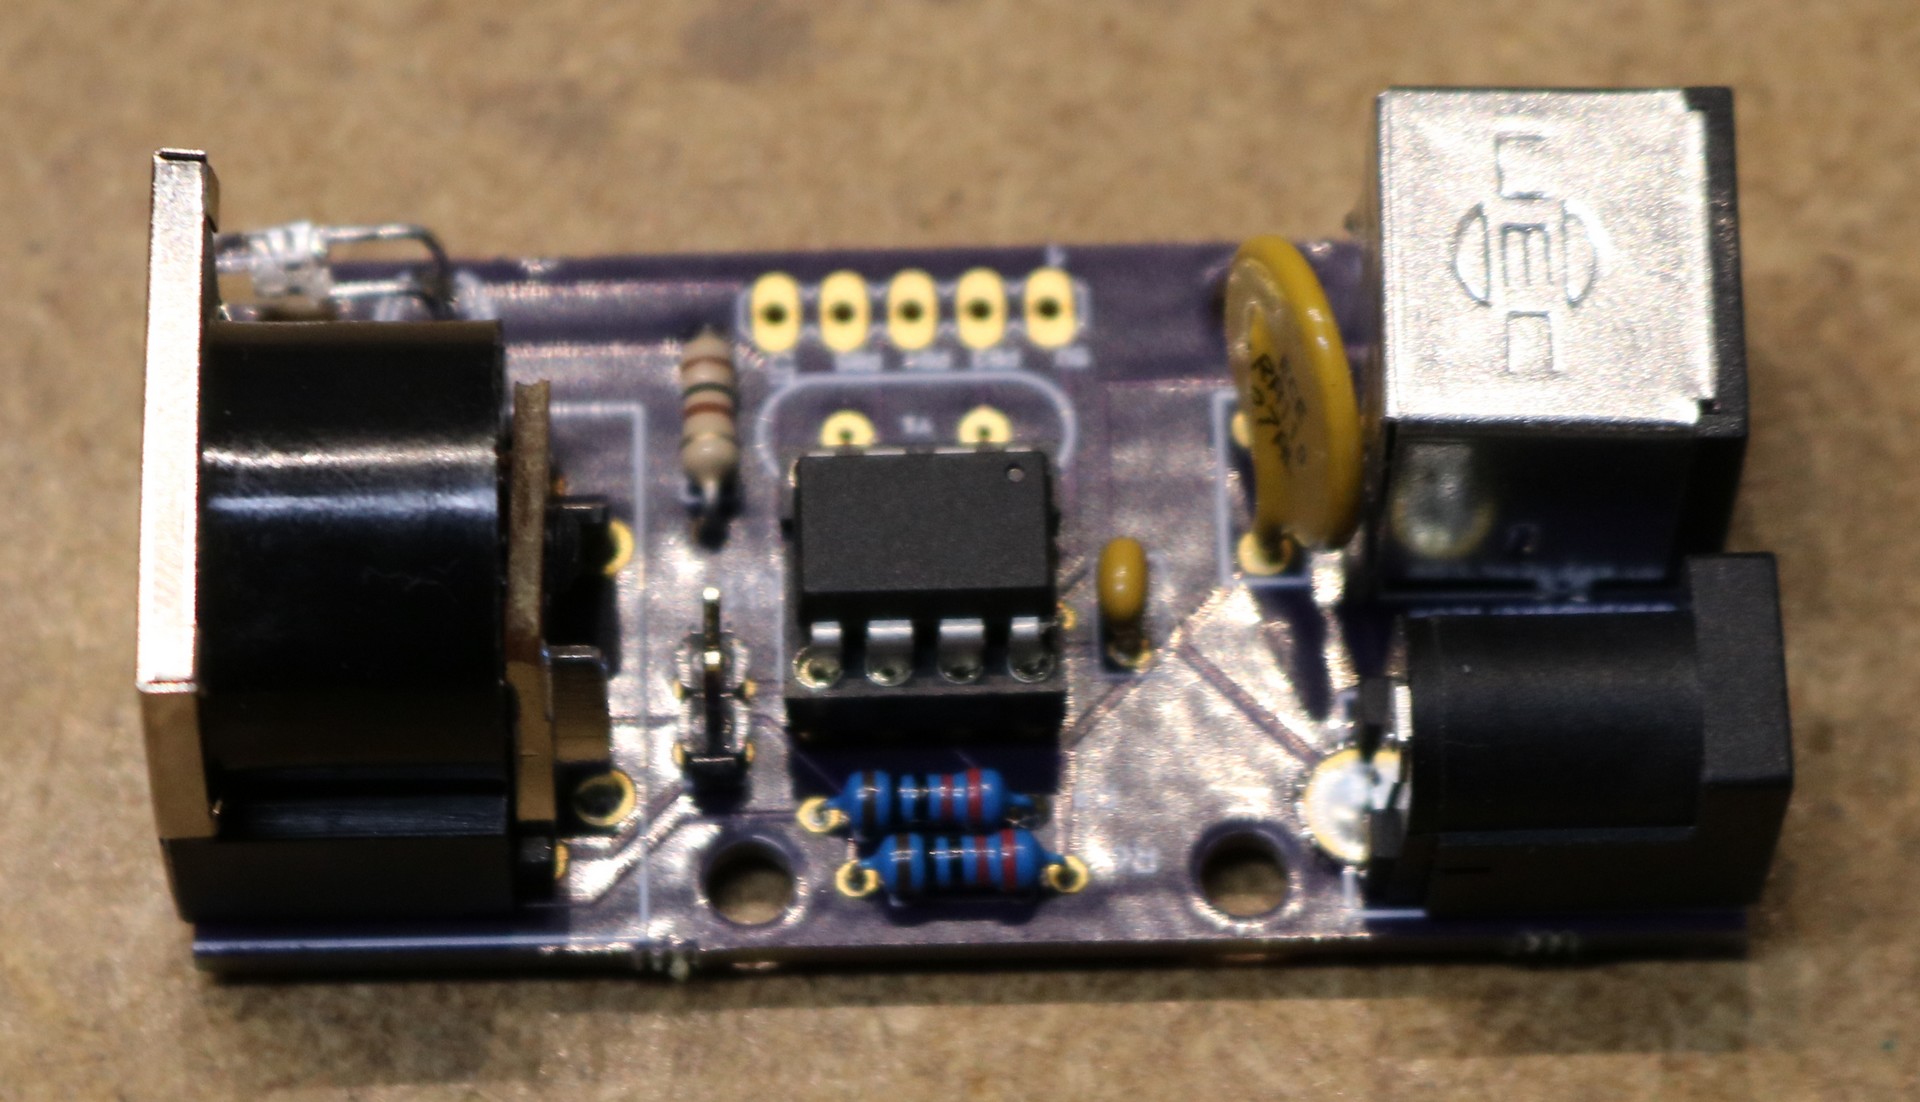
Below are the boards that I had fabricated at OSH Park:
Both of these are really very simple, so there’s not much to say here. See the design section above for a description.
Software
You can find software for the PS/2-TTLSerial (RC2014) adapter at https://github.com/sbelectronics/ps2-ttlserial and software for the PS/2-Midi adapter at https://github.com/sbelectronics/ps2-midi.
Using a PS/2 keyboard requires interpreting scancodes, and the two projects deal with this in slightly different ways. The PS2-TTLSerial project converts the scancodes into straight ascii, converting uppercase or lower case as necessary. All of the scancodes are not fully interpreted. For example, the CTRL-key isn’t supported at this time, making it a little difficult to do key combinations like CTRL-C. It’s a straightforward exercise to add that feature. I will probably get to it at some point.
The PS/2-MIDI project converts scancodes into Midi note on and off commands as necessary. When a key is pressed, a note-on signal is sent. When a key is released, a note-off signal is sent. I mapped each major row of the keyboard as a separate midi instrument (bagpipes, piano, xylophone, orchestra hit, flute) and percussion instruments for every other key. I went to a fair amount of effort to try to get every scancode converted to an instrument, as I like to let my daughter play with the keyboard and it’s nice that every key makes a noise.
Acknowledgements
Two projects were very helpful to me in building this project:
ATTiny85 UART Library
The Garage Lab
https://github.com/thegaragelab/tinytemplate
Creative Commons Attribution-ShareAlike 4.0 International License (http://creativecommons.org/licenses/by-sa/4.0/)
PS/2 Keyboard Library
Interrupts: Interfacing a Microcontroller with a PS/2 Keyboard
http://www.nerdkits.com/videos/interrupts_and_ps2_keyboard/
Board ordering
PS2-TTLSerial Adapter, for RC2014
PS2-Midi adapter


Comments (1)