Short diversion from the usual electronics posts, while I talk about my new camera light…
I designed and 3D printed this magnetic quick release mount to attach a LumeCube v2 that I recently purchased to my DSLR camera.
Purpose
I noticed recently that my camera lighting is sometimes lousy, the Polaroid light that I had been using had failed, and I was relying on my shop lights, which are a little bit to “warm”. I did a little research and decided to buy something called a “Lume Cube”. I opted for the latest, which is version 2. This Lume Cube thing is pretty awesome, a lot of light in a tiny package, with a built-in diffuser, built-in rechargeable battery, and even bluetooth control. I get nice light now when I make my videos.
However, it was still a little cumbersome to add and attach and remove the Lume Cube from my camera. As many readers of the blog know, I’ve been doing a lot of 3D printing lately, so I decided to design and print a magnetic mount.
Design Process
I did all of this in Tinkercad, which is a great program for creating 3D models quickly. It is web-based software, and I ordinarily dislike web-based software, preferring something I can install on my PC. However, despite that I’ve grown quite accustomed to using the program.
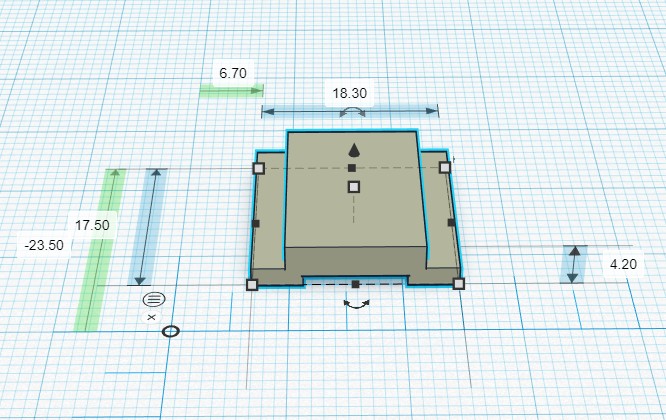
I started looking for resources on Thingiverse and came across https://www.thingiverse.com/thing:33823 by raster. This model has the dimensions of the hot shoe built right into it, and I was able to use it as a basis for developing the camera interface. I made a test print of this to see if it fit my camera, and it did. It was a bit loose though — not dangerously loose — but not quite as tight as I wanted. More on that in a moment.
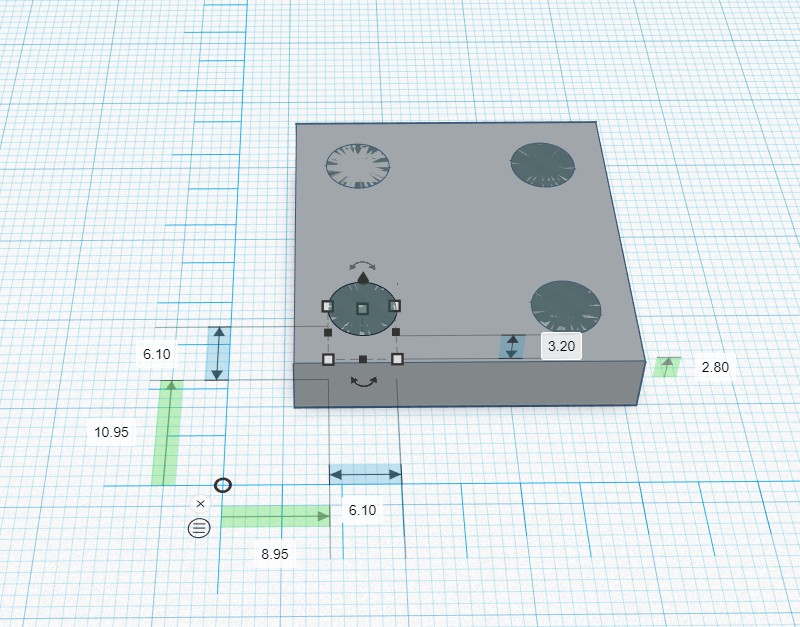
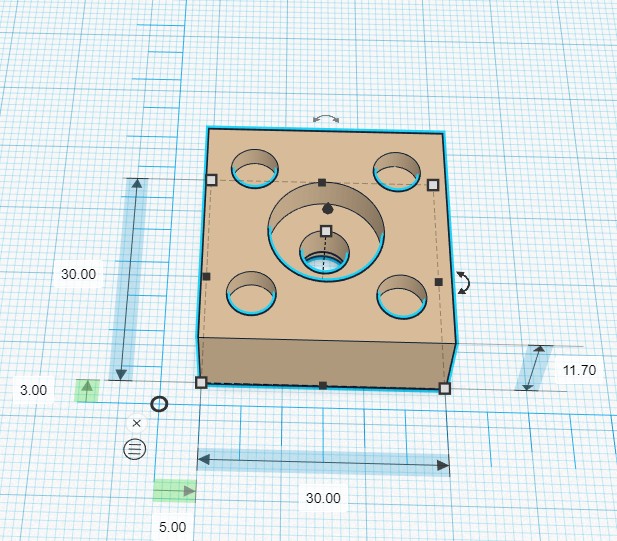
Next I started working on the magnetic portion of the mount. I added a rectangle and dropped four 6.1mm x 3.2mm cylinders into to it. Tinkercad’s basic primitives are “solids” and “holes”, so if you add four cylindrical holes to a rectangular solid, you’ll end up with a rectangular piece of plastic with four magnet pockets in it. I went a little oversize on the magnet pockets to account for 3D printing tolerances.
Next up was to make it so that I could more solidly attach the mount to the camera. I cut a “wedge-shaped” piece out of the mount (again, in Tinkercad-speak, adding a wedge-shaped hole to the model) and made a separate wedge-shaped piece. Now we have wedge that when we pull it in, we it will get progressively tighter against the camera. I put a screw hole through it all for an M2.5 machine screw.
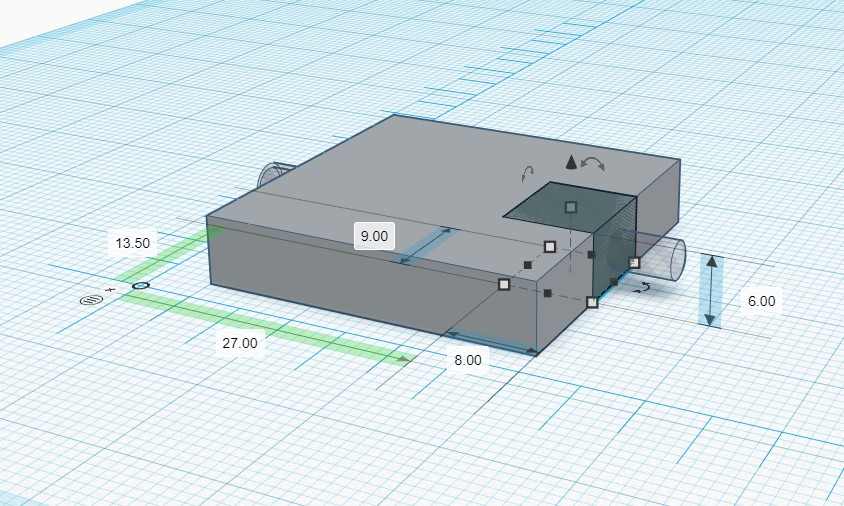
The next concern was strength. I wanted it to be able to print without supports, and to have the layer lines such that the base was not subject to breakness in the vertical direction. So I designed the whole model to print on its side. This required adding a little wedge (be mindful of the 45% overhange rule). I also added a little pillar to eliminate the need for supports in the wedge-pocket. We have our base completed.
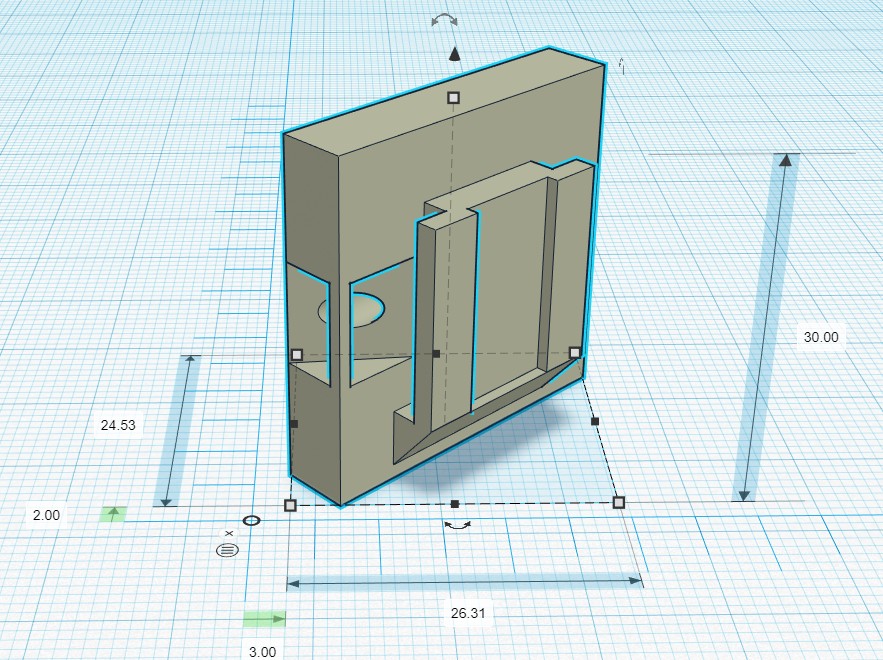
For the top piece, the process was similar. I started with a rectangle and I added four cylindrical holes for the magnet pockets. Then I added a hole for the 1/4-20 screw, and a larger hole to countersink the head of the 1/4-20 screw. I had to account for the diffuser filter mount on the Lume Cube, so I added a small indentation to the top. The top was considerably easier that the base.
Find it on Thingiverse
You can find it on Thingiverse at https://www.thingiverse.com/thing:4097839