Click here to return to the Z8000 master board index.
The Display Board is intended for diagnostic purposes as well as for simple interaction with the computer. It has the following features:
- Eight TIL311 LED displays. These displays are a little hard to find and a little expensive, but you ought to be able to locate some on eBay. The nice thing about the TIL311 is that it’s a hexadecimal display, with 4-bit input. It’s simple to interface, though it consumes a prodigious amount of electricity and generates a proportional amount of heat. The TIL311s are writable on IO ports 0x50, 0x51, 0x52, and 0x53.
- One eight-position DIP switch. The dip switch is readable on IO Port 0x51.
- Four Cherry MX blue key switches. They share the three most significant bit positions on the dip switch. As such, also readable on port 0x51.
Schematic
Schematic is below. By now you know to click it to make it bigger and more readable.
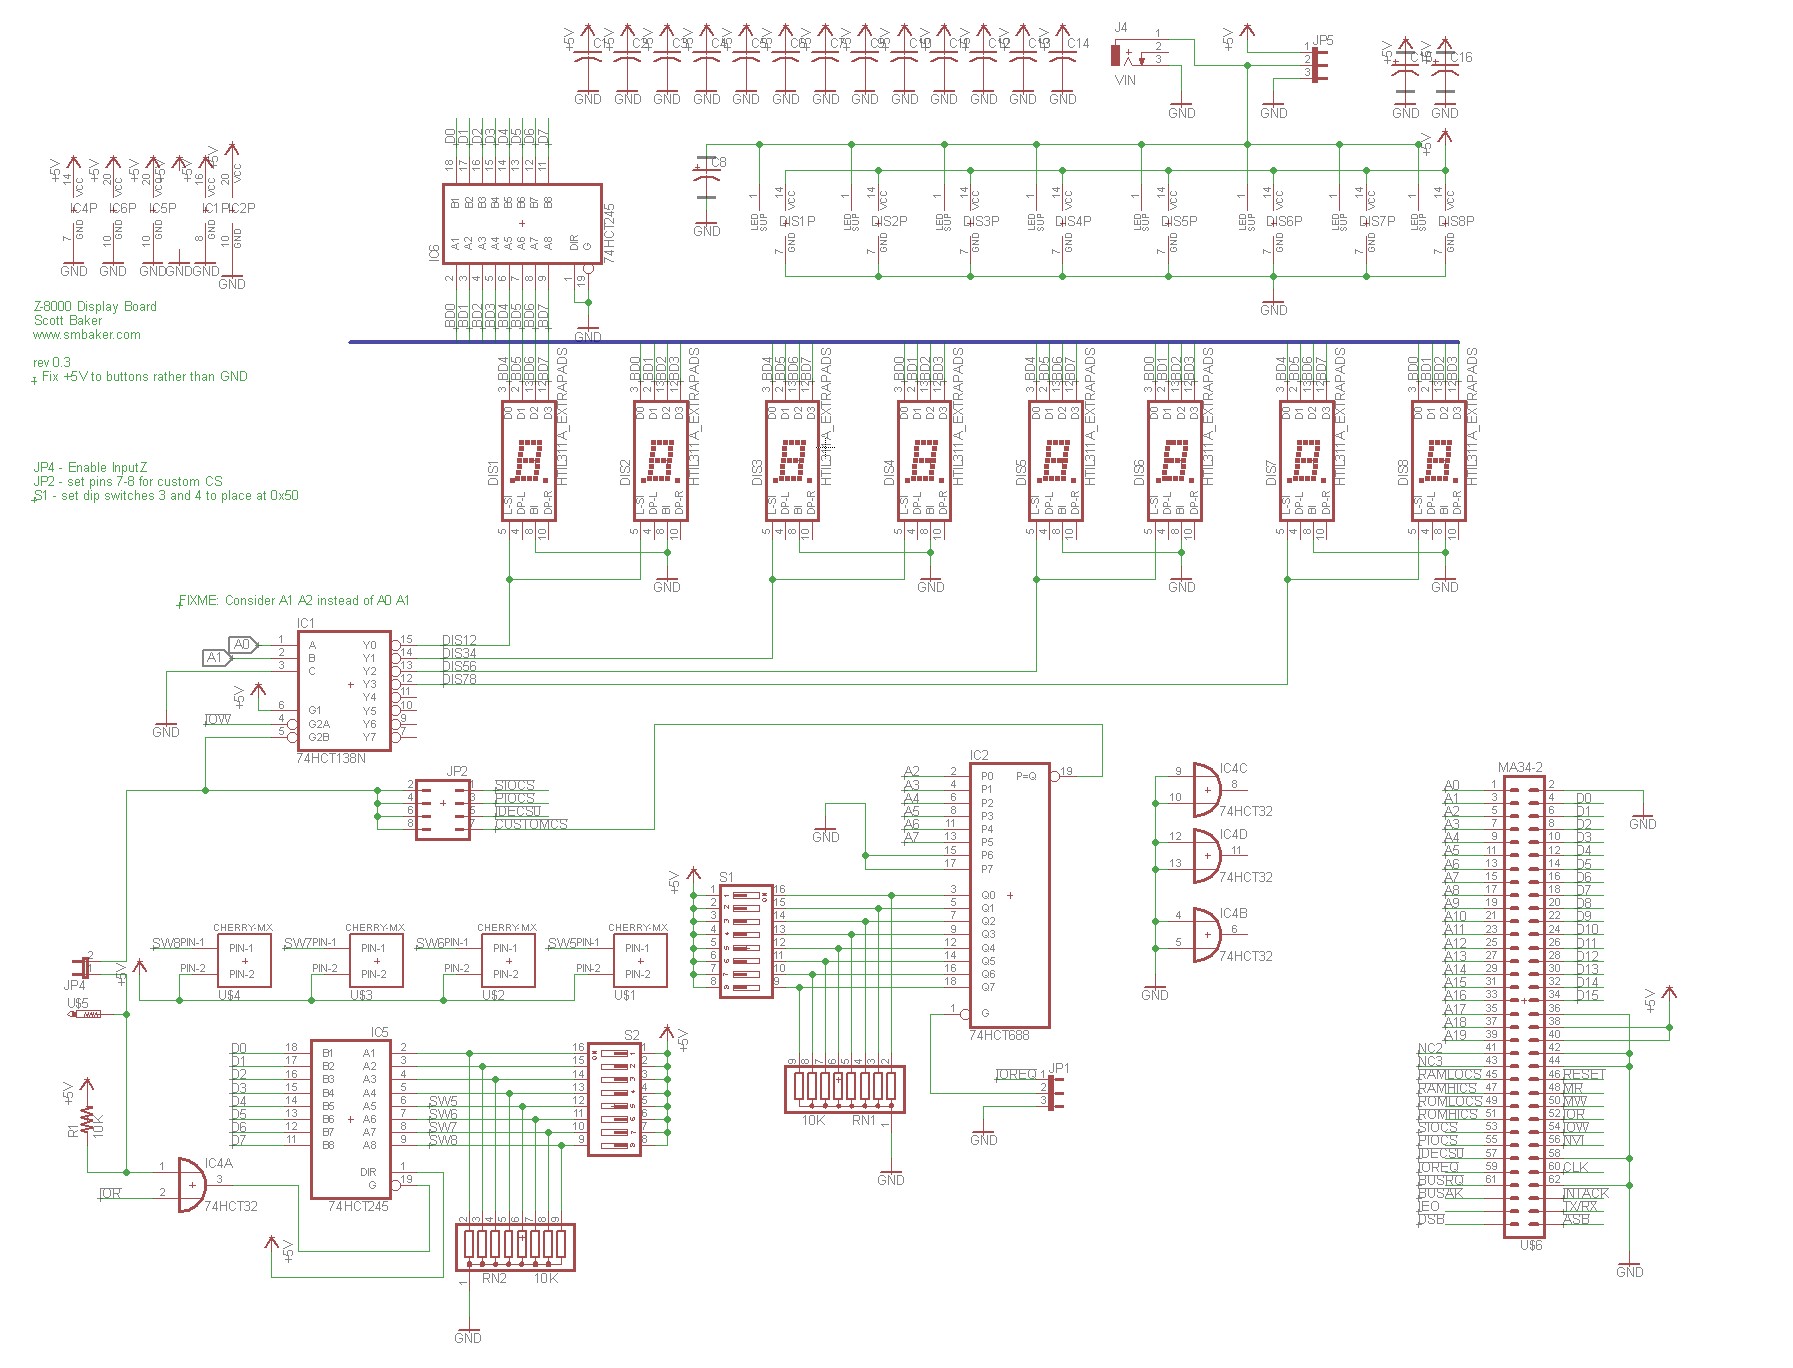
Jumper Settings
- SW1: set 3 and 5 on, and the rest off. This sets the IO port to 0x50-0x5F.
- JP1: Jumpers pins 2-3
- JP2: Install jumper in slot 4. This tells it to use the IO port set by SW1.
- JP4: Install jumper to enable the input port
- JP5: jumper pins 1-2. This will use onboard power for the TIL311 displays. Pins 2-3 can be used for an external power source (pin 3 is ground).
Bill of Materials (BOM)
It’s got to be a running joke at this point…
Board Images
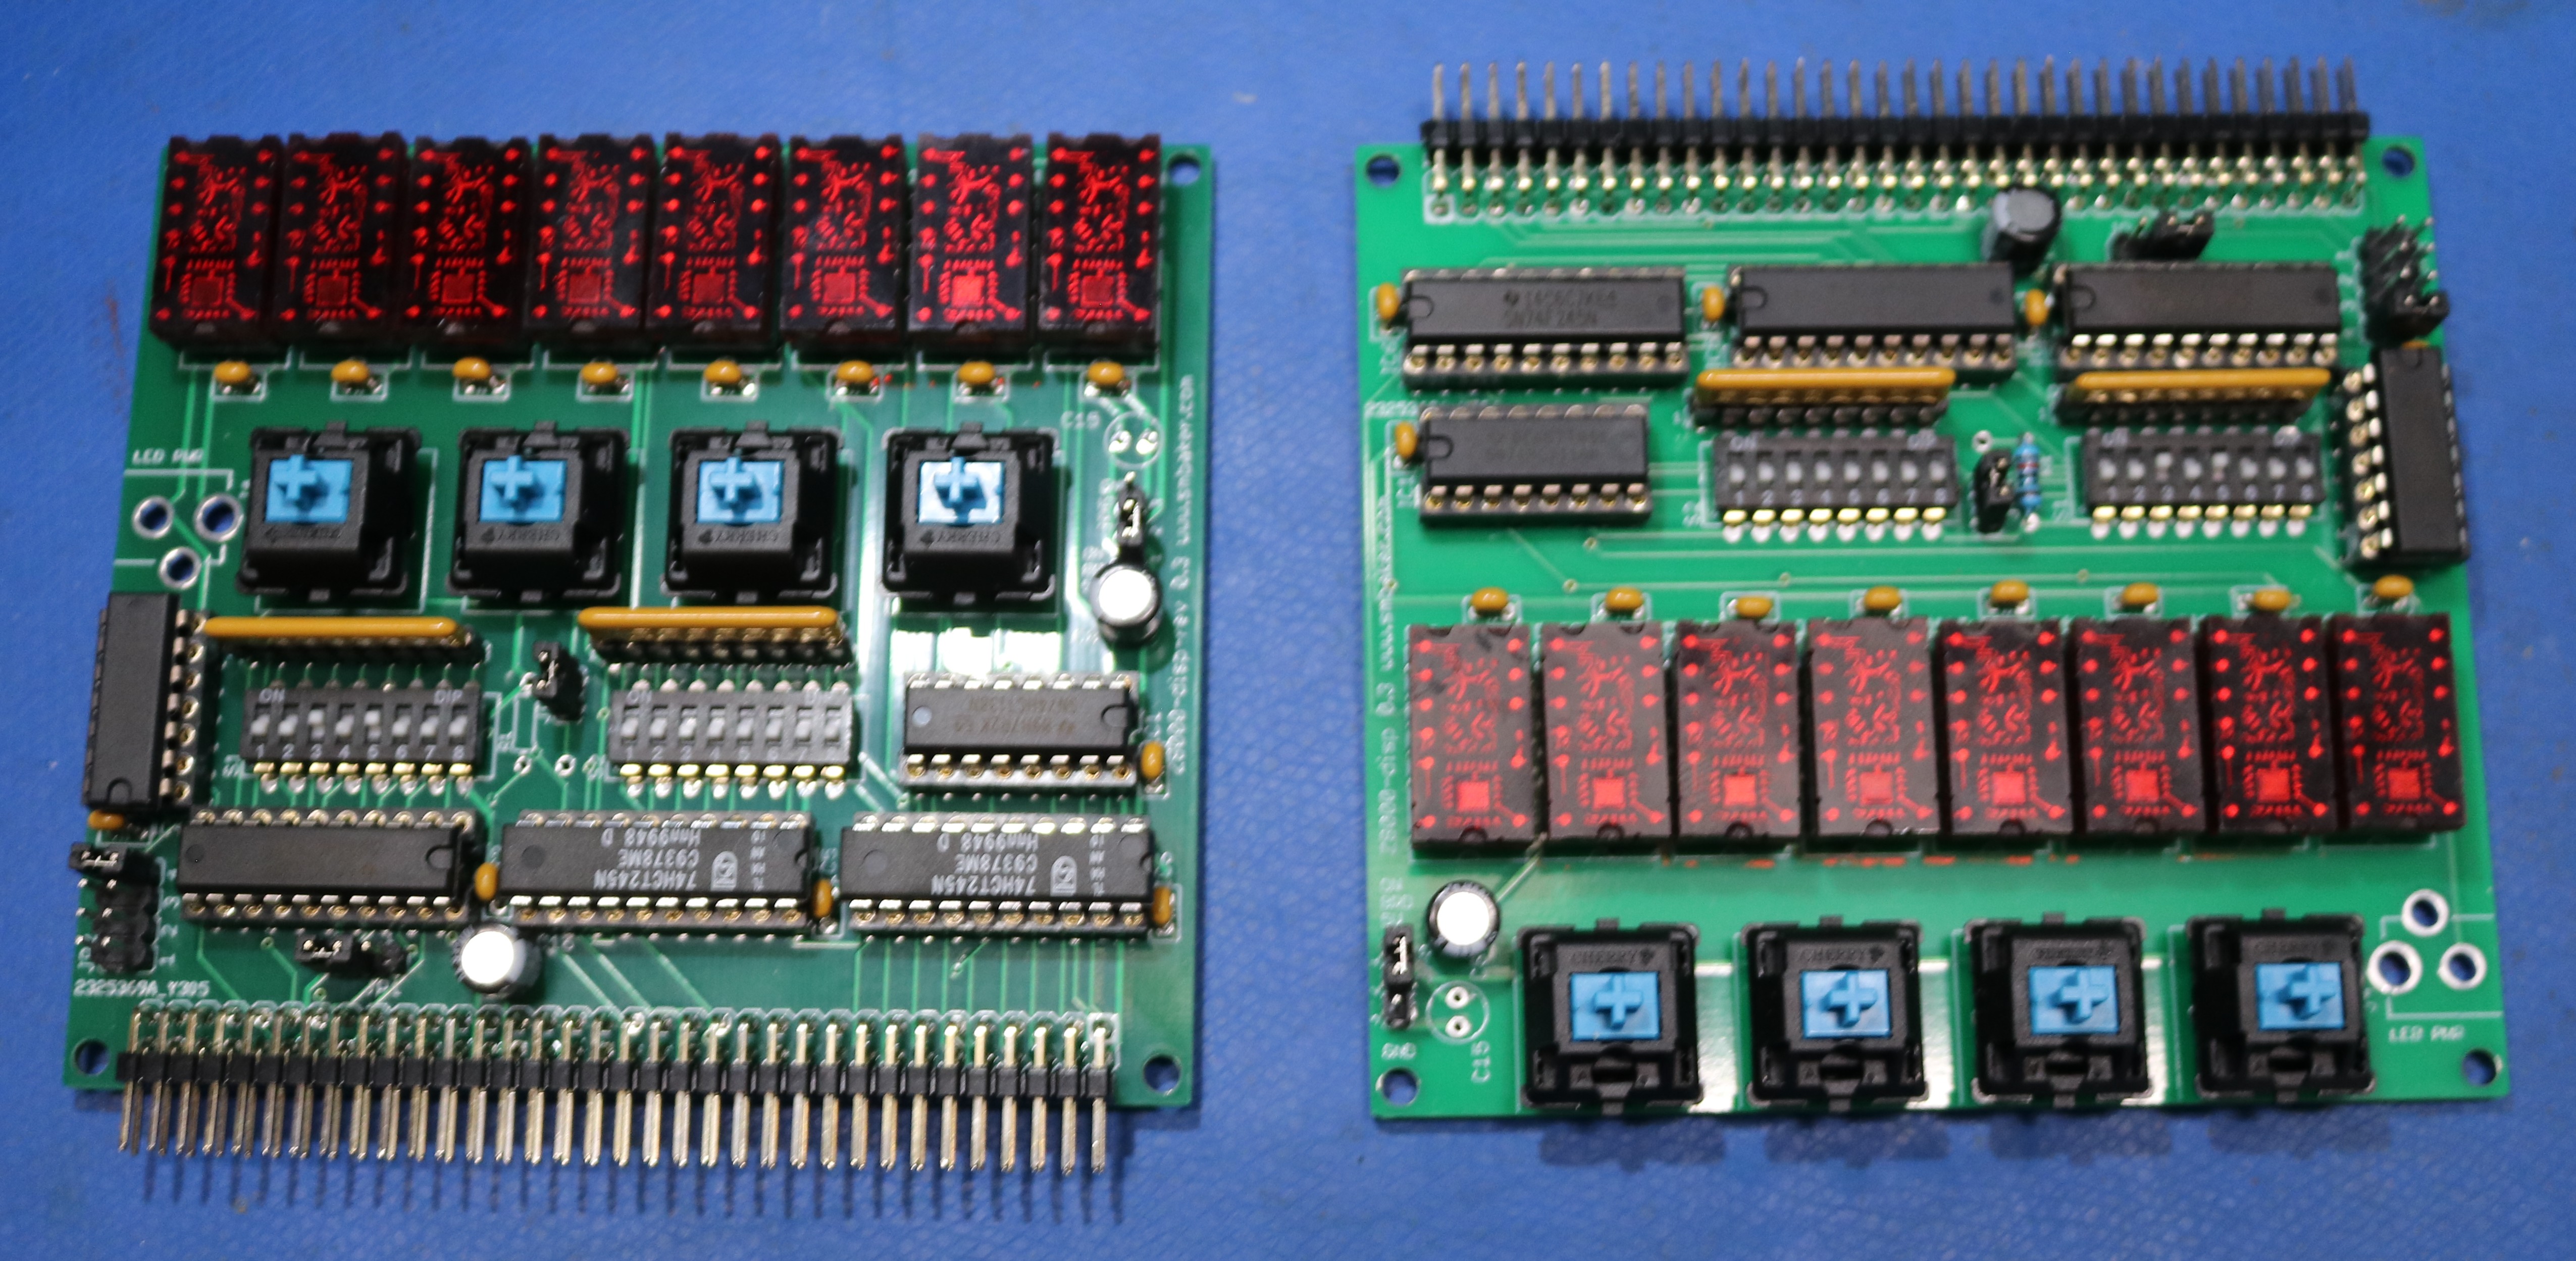
The display board has two different layouts. The “reverse” layout is pictured on the left and the normal layout on the right. You can’t simply flip a board upside-down (because the displays would then be upside-down) so there are two different versions depending on how you want to orient it.