In this post, I talk about my choice to move from the Prusa platform over to Bambu Lab with their new H2S:
Background
I got my Prusa I3 Mk3 back in 2019, and I used it for a ton of projects over the years, almost all of them printed in PETG. For a vintage computer enthusiast, a 3D printer is a very handy tool — use it to print cartridge shells for obsolete gaming systems, cases for single-board computers, drive bays / drive sleds (especially for the Gesswein MFM Emulator!), etc. I printed with the Prusa for over 5 years.
I decided 2025 was finally the year for an upgrade. First I looked at another bed slinger, the Prusa I3 Mk4S. This would have been much like my existing printer, but faster and newer and better. Then I realized that bedslingers were on the way out and Core XY printers were gaining market traction due to their enclosed chambers, fast build times, and lack of subjecting the print to jarring Y-axis movements. I started looking at a Prusa Core One.
I had the Core One in my shopping cart. Then I realized that tariffs and shipping were going to add approximately $300 to the $1199 Core One, for a total of $1499. I’d read stories about Prusa having a US distributor, and this turned out to be a company called Printed Solid. Printed Solid wanted $1599 for the same Core One printer.
That’s the point where I started looking for alternatives, and when some friends online recommended I look into the Bambu Lab printers.
The Bambu Lab P1S 3D Printer
The first Bambu Lab printer I looked at was the P1S. The P1S has a build volume of 256x256x256, which is pretty similar to the Core One’s 250x220x270. As of the time of this article, the P1S is selling for $550 shipping from the USA. That’s about a third of what Printed Solid wanted for the Core One. I’m writing this article in October of 2025, so the prices may have changed between then and when you’re reading this article now. Certainly there’s considerable cost savings when choosing the P1S.
But is it as good of a printer? I watched a number of online reviews, I looked into the parts inventory at the bambu website, etc. The P1S seems like a decent printer, and it has an optional AMS bundle for $750 that gets you not only the P1S, but also the 4-color AMS multi-material system.
The disadvantage of the P1S, and of all Bambu Lab printers, is that they are not opensource like the Prusa printers. The nice thing about the Prusa is you can download the STL files and print replacement parts yourself. You can easily mod it. It has a robust community. The Bambu on the other hand is much more of a traditional commodity appliance. If it breaks, then you either send it in for repair or buy parts from the manufacturer.
While investigating the P1S, I learned about the Bambu H2S…
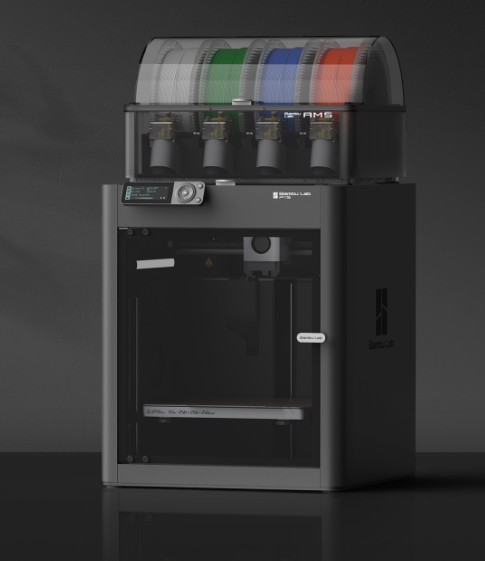
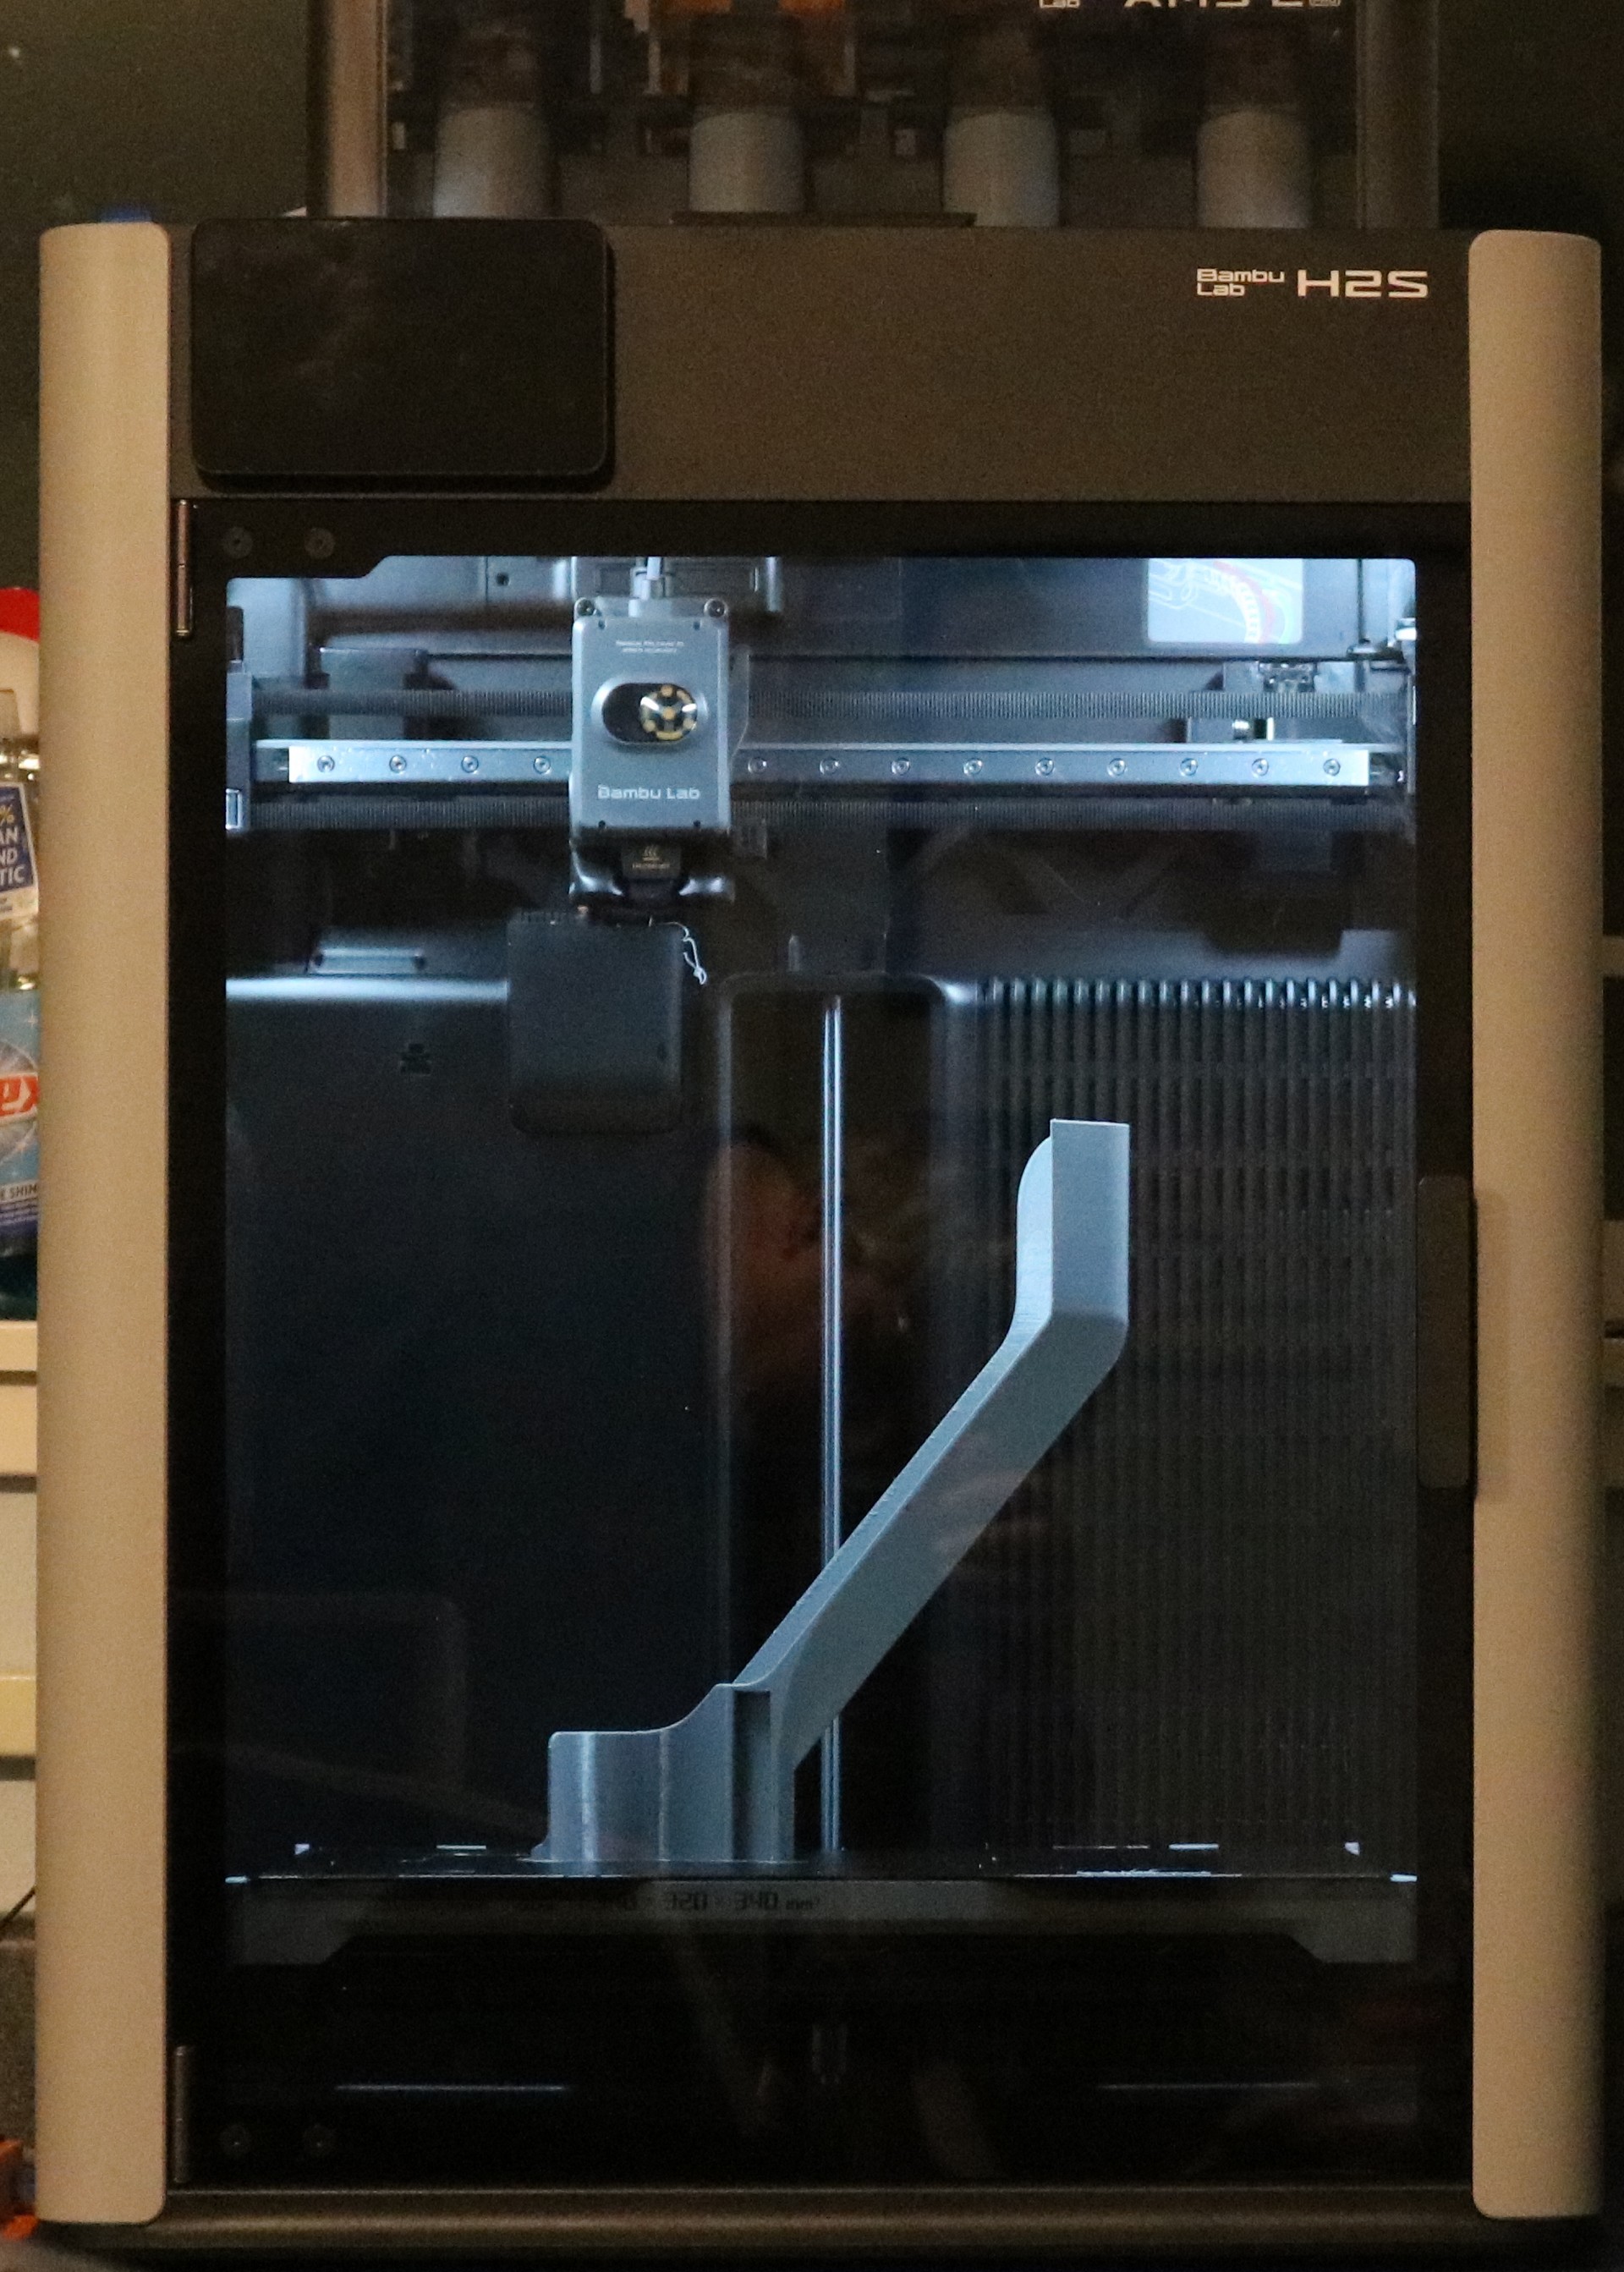
The Bambu Lab H2S 3D Printer
The H2S is the big brother to the P1S. It features a larger build volume, 340x320x340. It also comes with hardened steel extruder gears and a hardened steel nozzle automatically. It’s priced at $1249 for the printer alone and $1499 for the printer with AMS. Again, October 2025 prices, from a US distributor, with no tariff nonsense involved. This means that for $1499 I can get an H2S with significantly larger build volume and 4-color printing, for less than I would pay Printed Solid for the Core One with its smaller build volume and no AMS.
The H2S has a heated chamber, with an adaptive airflow system that automatically vents the air for PLA and PETG prints. It has a nice camera and a decent size touchscreen interface.
The one I didn’t consider: The Bambu Lab P2S Printer
This wasn’t an option for me as it had not been released at the time I made my decision. But for those who are reading this article, I’ll explain what I would have considered.
The P2S is much like a refreshed version of the H2S, offering several of the H2S’s features. The build volume remains the same as the P1S, but the extruder has hardened steel gear and hotend like the H2S and uses the new servo design. It has an adaptive venting system like the H2S but lacks the heated chamber (leftover heat from the heat bed heats the chamber).
To me the decision comes down to the build volume and the heated chamber. Additional build volume is really nice. The heated chamber is great for ABS and other materials.
The Bambu Lab H2D and H2C 3D Printers
The H2S is available in a dual-hotend model called the H2D. The H2D actually preceded the H2S. It has two hotends mounted to a single print head, and can extrude two filaments. The advantage of this is low waste, as we’ll see in a moment when I discuss the AMS. The disadvantages of the H2D is less build volume as the dual-extrusion print head takes up some X-axis space, higher cost of the printer, and higher complexity. There’s one more place for things to go wrong.
The H2C is not released yet as of the writing of this article, and it will be Bambu’s toolchanger 3D printer. It will feature multiple hotends that can be picked up by the print head and printed. This will give people a nice efficient multimaterial solution. Expect it to be spendy, but for those people who are doing commercial printing, the initial printer cost will be offset by savings from less filament waste.
I haven’t decided yet on when/if I’ll upgrade to an H2C — if I do buy one, I’ll update this post.
My Decision: Bambu Lab H2S Combo with AMS
I decided to go with the H2S with AMS. Why?
- The feature-to-cost ratio (aka “bang for the buck”) is dramatically better than the Prusa.
- There are times when the extra build volume would be handy.
- The AMS will give me some flexibility printing toys for my daughter in multiple colors. It’ll also be useful for printing support material (PLA supports for PETG models, or vice-versa).
- I chose not to buy the H2D because of its additional complexity, cost, reduced build volume, and because multi-material printing is not my primary task. The H2C is not available yet, so it was not an option, but even if it was I probably wouldn’t have been able to justify the H2C’s cost.
- The heated build chamber is nice as I have occasionally wanted to print engineering material that requires a heated temperature-stabilized build chamber.
Here it is, sitting next to my trusty Prusa I3 MK3!
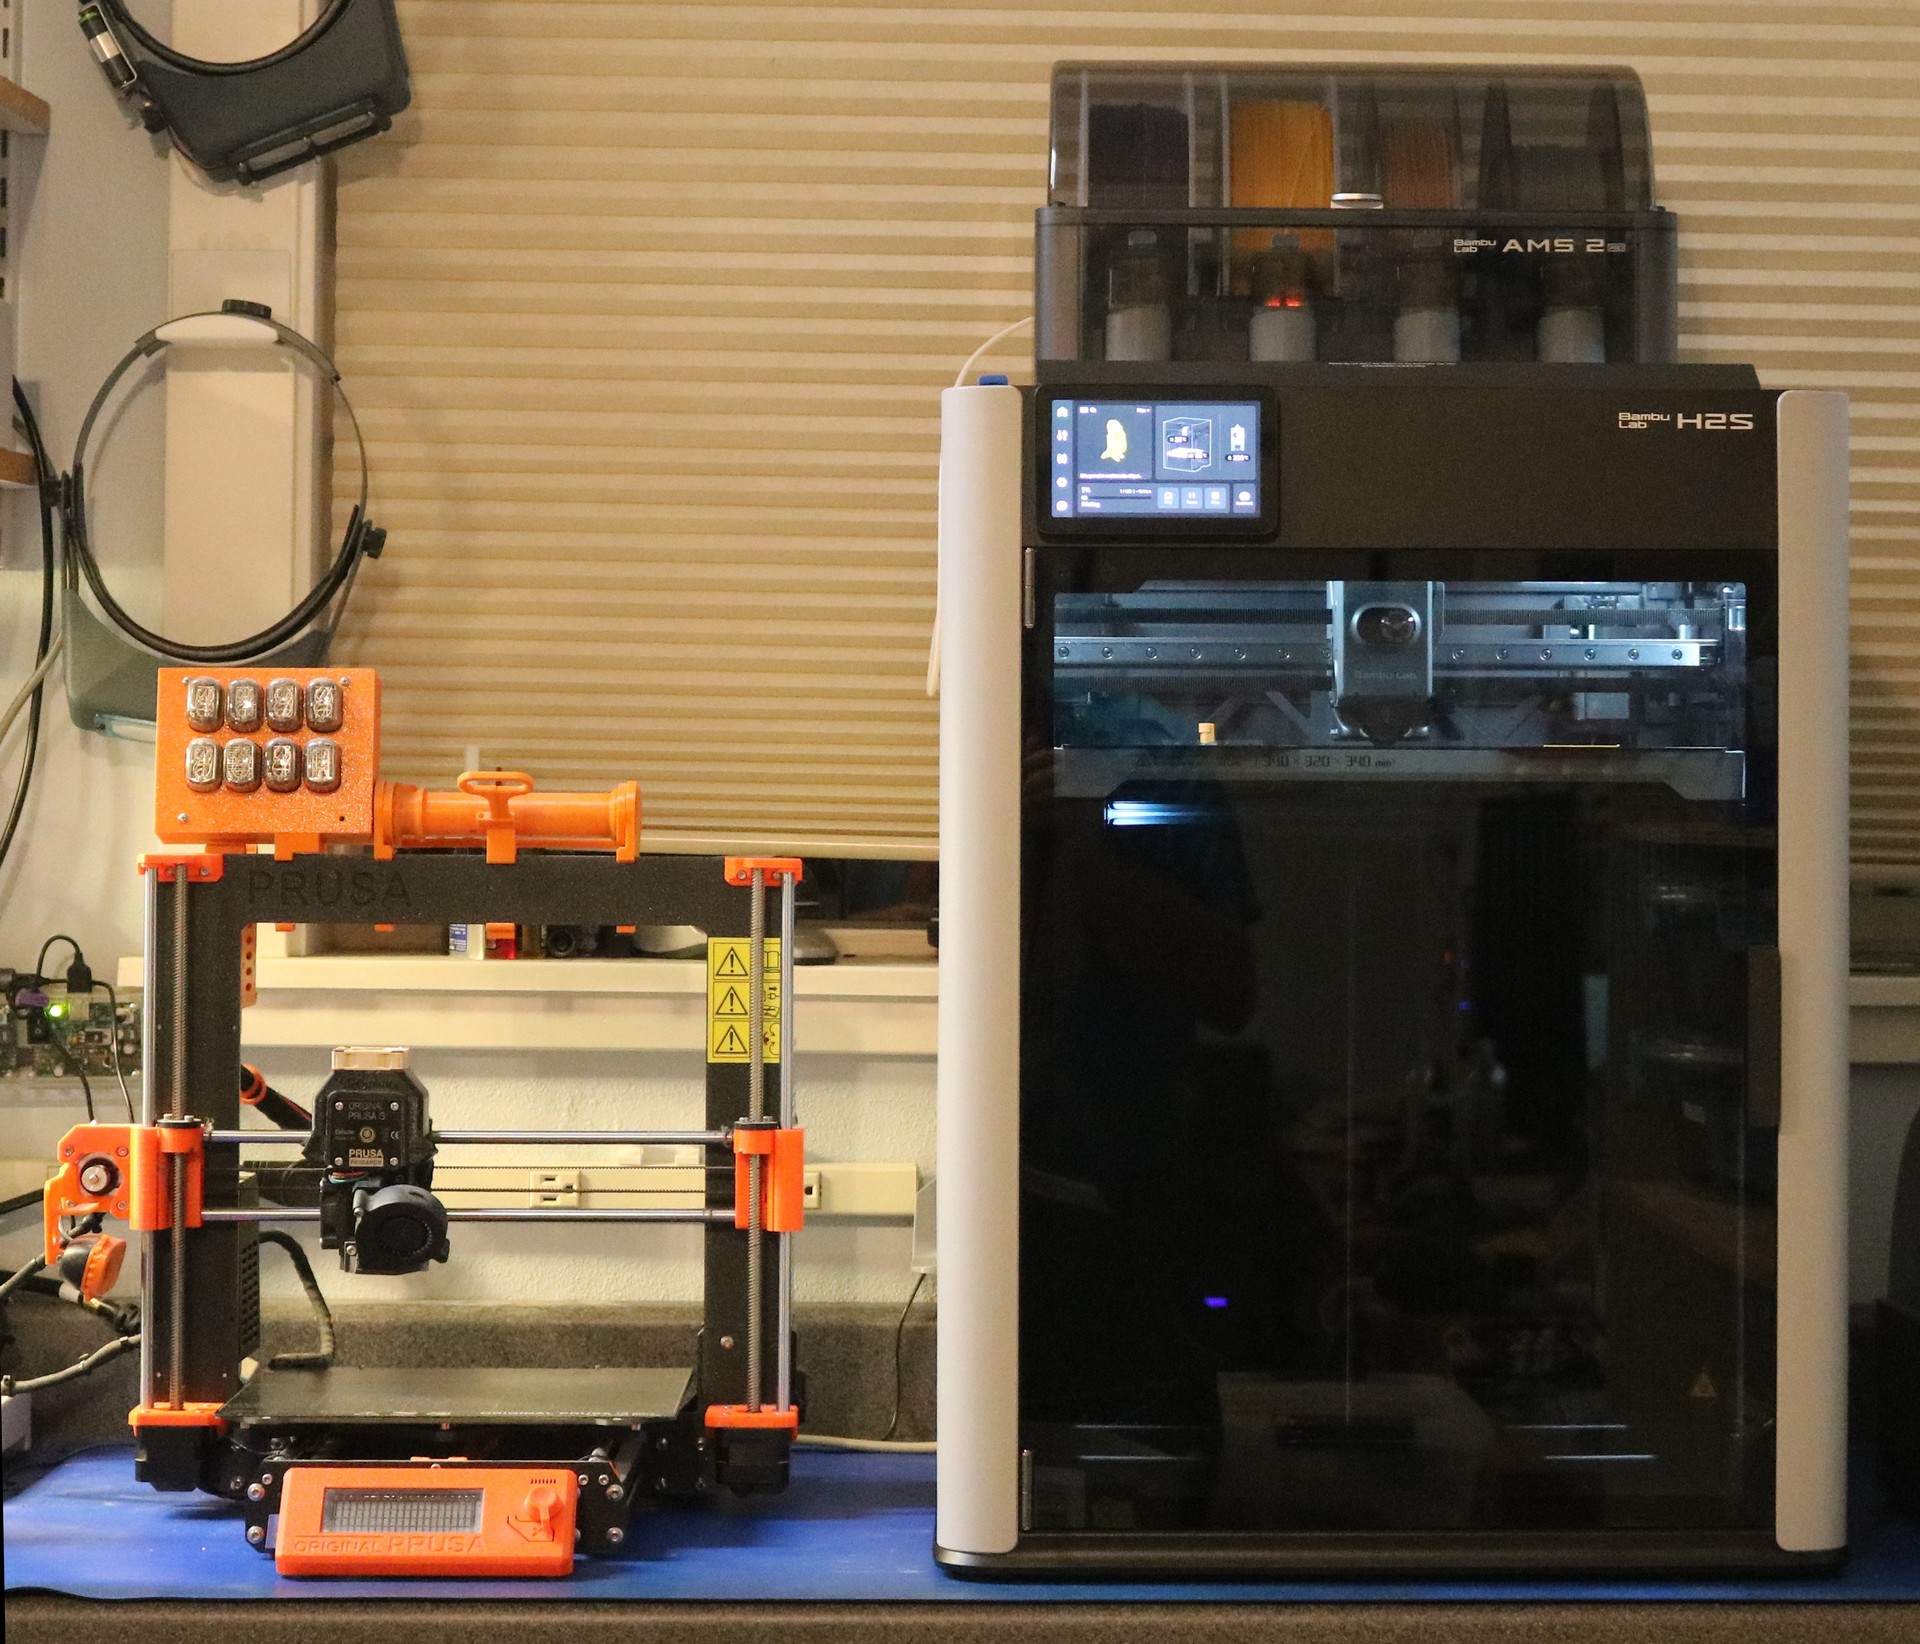
As you can see, it’s a much larger printer — not just the build volume, but also the AMS 2 sitting on top.
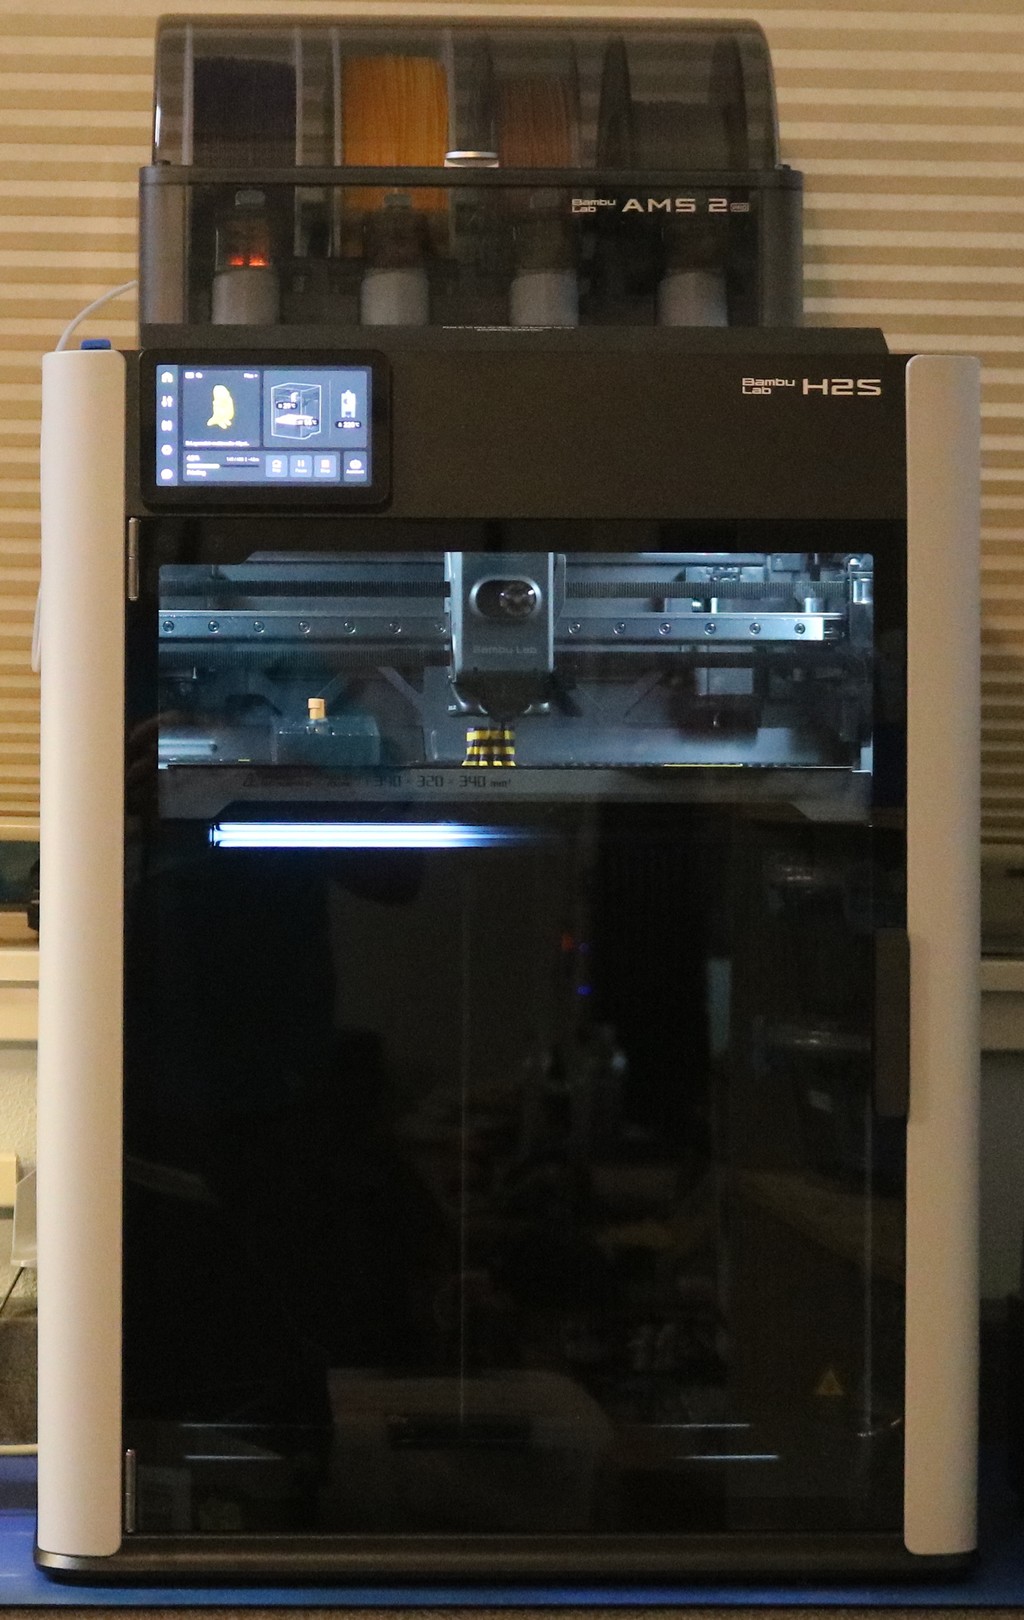
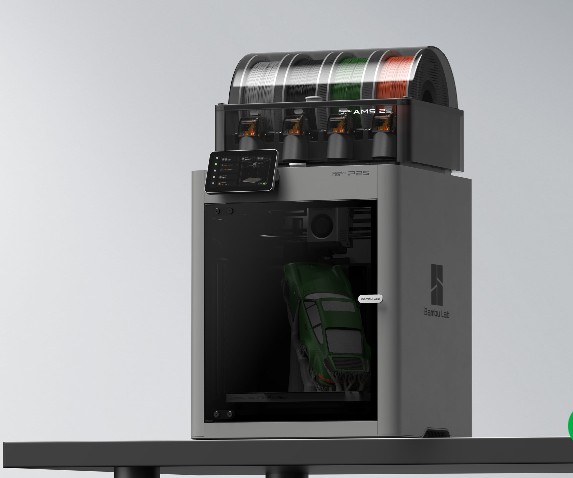
Observations on the Bambu AMS 2 Pro
The AMS is Bambu’s 4-color multi-material system. It sits conveniently on top of the printer (or alongside, should you prefer) and holds four standard 1kg filament spools. The spools are mounted to motorized rollers.

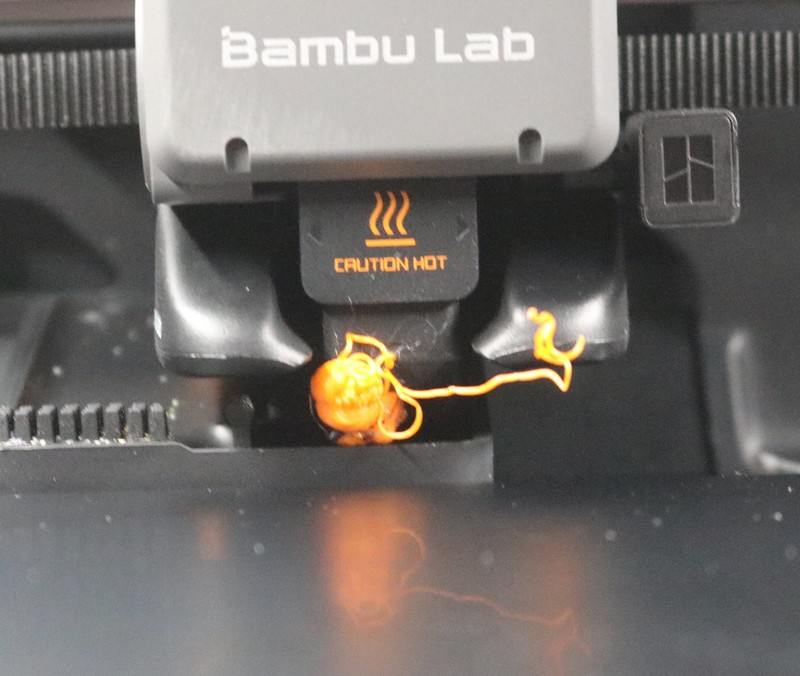
When it needs to do a filament change, it first cuts the filament at the hotend using a blade, then it engages the roller to wind most of the filament back onto the spool. Then it pushes in the replacement filament. This leaves a small bit of the old filament in the hot end, which it has to “flush” back out.
Flushes happen though a chute out the back of the printer that Bambu owners affectionately refer to as the “poop chute” and the flushed filament blobs as “poop”. Hey, don’t blame me, I didn’t make up the name.
After flushing, it still needs to do a prime of the new filament, so there is a small priming tower on the build plate.
The problem with this solution is that it’s somewhat wasteful of filament. Prusa’s MMU solution I believe does not use a cutter and is therefore able to extract more filament from the hot end. This leads to much less flushing and therefore much less filament waste. You have to factor this into your decision-making between the Bambu line and the Prusa line.
As an example, here are three Sir Layerslot, printed at 60% scale:
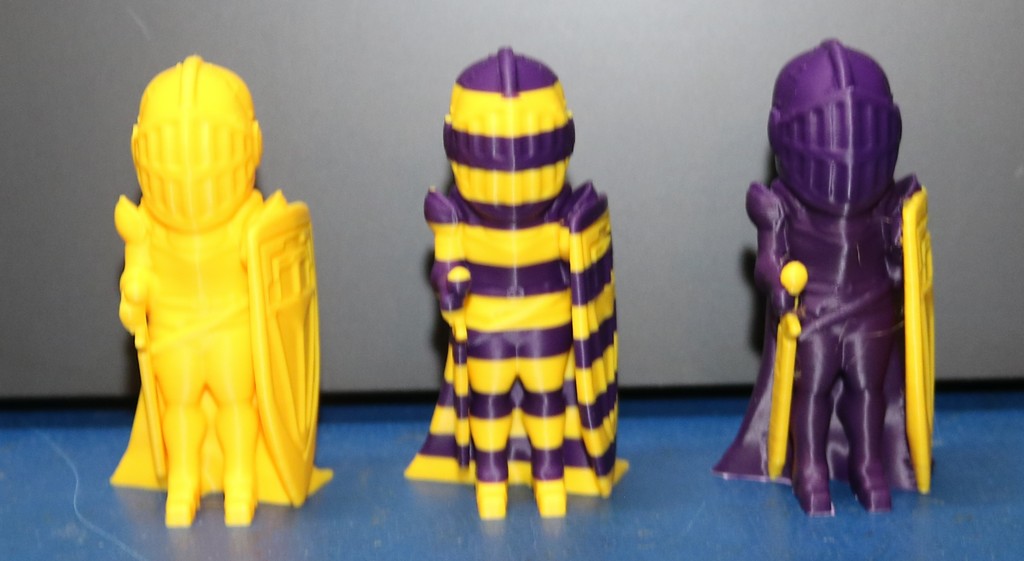
I use 60% scale with these test prints to save filament, the goal to come in under 10g. The yellow sir layersalot on the left took 8.87g of filament, which is typical. The striped one in the middle incurred 13 filament changes and required 24.21g of filament. The one with the shield and sword painted on the right required 202 filament changes and 142.69g of filament. It was about 94% waste.
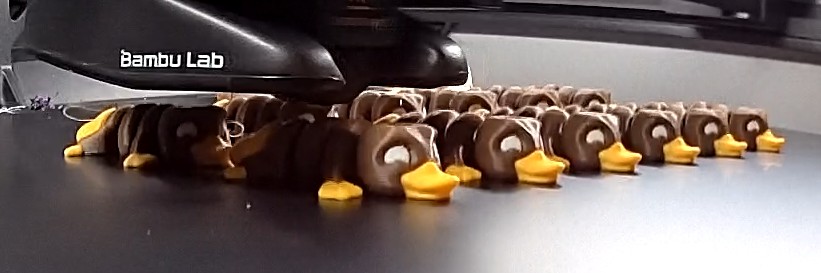
The key point is to either design your model so it minimizes layer changes, or to print several models in parallel. For example, this plate of 3-color platypuses required 64 color changes, but they were amortised across 12 models, leading to only about 17g of wasted filament.
Another issue with Bambu’s AMS is that they made the lid just barely large enough for a 200mm spool. Some manufacturers have spools that are 203mm or larger and you have to prop open the lid. You’re supposed to avoid cardboard spools because the cardboard can slip, deform, or shed fibers into the guts of the AMS. You can print plastic rings to go on the cardboard spools. A lot of filament manufacturers are using cardboard spools these days to save on costs and to be kind to the planet. So take into account whether your preferred filament is compatible.
The AMS 2 Pro features a built-in filament dryer. The AMS is normally sealed, but it will pop open a vent to exhaust the air during a drying cycle. The built-in dryer is a nice added perk.
You can collect multiple AMS 2 Pro and single-filament AMS-HT units for up to 24 colors attached to the printer at one time.
Internal Filtration and printing ABS on the H2S
The H2S does come with a built-in filter. However, this filter is disabled when the vents to the chamber are open — i.e. the filter is not used for PLA, PETG, or TPU. Most people aren’t bothered by the odor when printing these filaments, so for most people it may not be a problem. There are external filters that may be added, like the popular Vento. However, note that the Vento external filter would decrease the efficiency of the H2S’s built in fan, requiring a higher vent fan speed to cool the chamber.
Where the H2S’s internal filter is used is when the chamber heater is enabled. In this case, the vents are closed and the air recirculates internally. This configuration is used for filaments such as ABS, ASA, PC, etc.
I’ve never printed ABS before buying the H2S. I had always heard the fumes were noxious and not to do it indoors. Now that I have the H2S, I did buy a couple of spools. The built in filter does effectively reduce the ABS odor, and it is tolerable to print ABS while in the same room. That said, the odor is not nonexistent — you can still smell it a bit. Furthermore, just because the odor is reduced does not mean the potential harm is eliminated. I find it’s best to keep my office ventilated when I’m printing ABS, and to print it at night.
Also, note that even if you’re using the heated chamber, the chamber is not sealed, not air-tight. Some odor is going to escape. The little filament balls that get ejected out the chute may emit an odor.
In summary,
| Filament | Chamber | Built-in Filter in use? |
|---|---|---|
| PLA | vented / cooled | no |
| PETG | vented / cooled | no |
| TPU | vented / cooled | no |
| ABS | heated | yes |
| ASA | heated | yes |
| PC | heated | yes |
| Nylon (PA) | heated | yes |
Accessories to get for your Bambu H2S
Here’s a list of things I bought shortly after buying the printer.
AMS-HT. The AMS-HT is the “high-temperature” filament dryer. It’s also an AMS in its own right, and you can print from it. The H2S can perform filament swaps between the AMS 2 Pro and the AMS-HT, allowing you to do 5-color prints. As I mentioned above, the printer is able to accommodate up to 24 colors using four AMS 2 Pro and 8 AMS-HT. The nice thing about the AMS-HT is that it gives you a separate dryer, so you can dry in the HT while printing from the AMS 2 Pro, or vice-versa.
4-in-1 PTFE adapter. You’ll need one of these if you want to connect more than one AMS at the same time, or if you want to use an external spool without having to re-plumb everything.
PTFE tubing. Best to buy the 4000mm coil from Bambu, as you might decide you want to move your AMSes around, add an external spool, whatever. You can buy the tubing from other sources — make sure to order the right size — but I just bought it from Bambu directly, just to be sure.
Spare cutter blades. They’re a wear item. I think the printer came with one spare, but I bought some more, just to be sure.
Spare Socks. The socks tend to hold up pretty well, and they are retained pretty well on the hotend — unlike my E3D socks on my I3 Mk3 that always seemed to be trying to sag down. I haven’t had to replace a sock yet, but I do like having spares on hand just in case.
More hot ends. One of the nice features of the Bambu printers is how easy it is to change a hot end, and this makes swapping hot ends more practical. It’s worthwhile to get an 0.6mm if you want to print abrasives, which have a higher likelihood of clogging the nozzle. You may also be able to get some additional speed, if you optimize your layer height and walls for the new nozzle size.
Additional build plates. I bought the smooth PEI plate, because I always had success with my Prusa’s sticker sheet. I use the textured plate for printing PETG and ABS and the smooth plate for printing PLA. I do not need glue or release agents, or anything additional with these plates. The Biqu Cold Plate has also been recommended to me, though I have not bought one.
Filament. You get a deal if you buy filament at the same time you buy the printer or the same time you buy an AMS. Stock up on that PLA! The bambu spools are really convenient with the built-in RFID, and the profiles are dialed in perfectly. Even if you don’t plan on doing much ABS, it’s good to have a roll of AMS in case you want to print something that requires high temperature (like the desiccant holders you’ll see below).
Maker’s Supply Parts. Bambu also sells nuts, screws, motors, lights, and other goodies that are used for some of the models on makerworld. For example, below when I start showing off models you’ll see a picture of a Wankel Rotary Engine that I printed. Maker’s Supply had the DC motor that I used in that print. If you know you’re going to be printing a few functional prints that require some parts you don’t have, then tacking them on to a bambu order is a logical thing to do.
Failures and AI detection
It’s a fact of life with 3D printing that things can and will go wrong. One nice thing about the H2S is that it will use the camera to detect some issues and warn you. Generally my printing has been trouble-free, but here are a few of the issues I had:
- A flexi-dragon had a large veritical wing and it tipped over. The H2S alerted me that spaghetti printing was occurring and paused the print. My daughter still likes the broken-wing dragon.
- I had some miniature pumpkins that wouldn’t stick to the build plate. This was my fault for not doing a good job of cleaning the build plate. The H2S alerted me that a blob had formed and paused the print before damage occurred.
- There have been a few false positives of blob detection, where the printer paused the print and I found nothing was wrong. They resumed without issue, but it is annoying to wake up in the morning and find a needlessly-paused print.

The blob detection, though it did generate some false positives, I feel is a really nice feature as if a blob goes undetected, it can lead to a repair that is both time-consuming and costly.
To Cloud or not to Cloud
The H2S can be operated in two modes — normal mode or LAN-only mode. The normal mode is cloud-enabled and thje printer is available to Bambu’s cloud-connected infrastructure. This lets you easily operate the printer while on your phone or tablet while away from home.
Some people have expressed concern about having a cloud-connected printer. What happens if the cloud infrastructure goes down or the company abruptly discontinues cloud service? or decides to charge for it? These are valid concerns, as other cloud-connected devices have turned into bricks at the whim of the company. To alleviate this concern, Bambu does offer a “LAN-Only” mode where the printer does not require cloud access, and software can communicate directly over your local network. This should give some peace of mind.
Others have expressed some concern that your models or your g-code or whatnot might be sent to the cloud where it could be intercepted or lost in a hack. If you are concerned about this, then LAN-only mode might be for you.
For myself, I’ve been operating in the normal mode, with all of the cloud enabled features. It’s really nice to be able to check on the status of a print while I’m sitting at a restaurant.
Let’s show off a few models
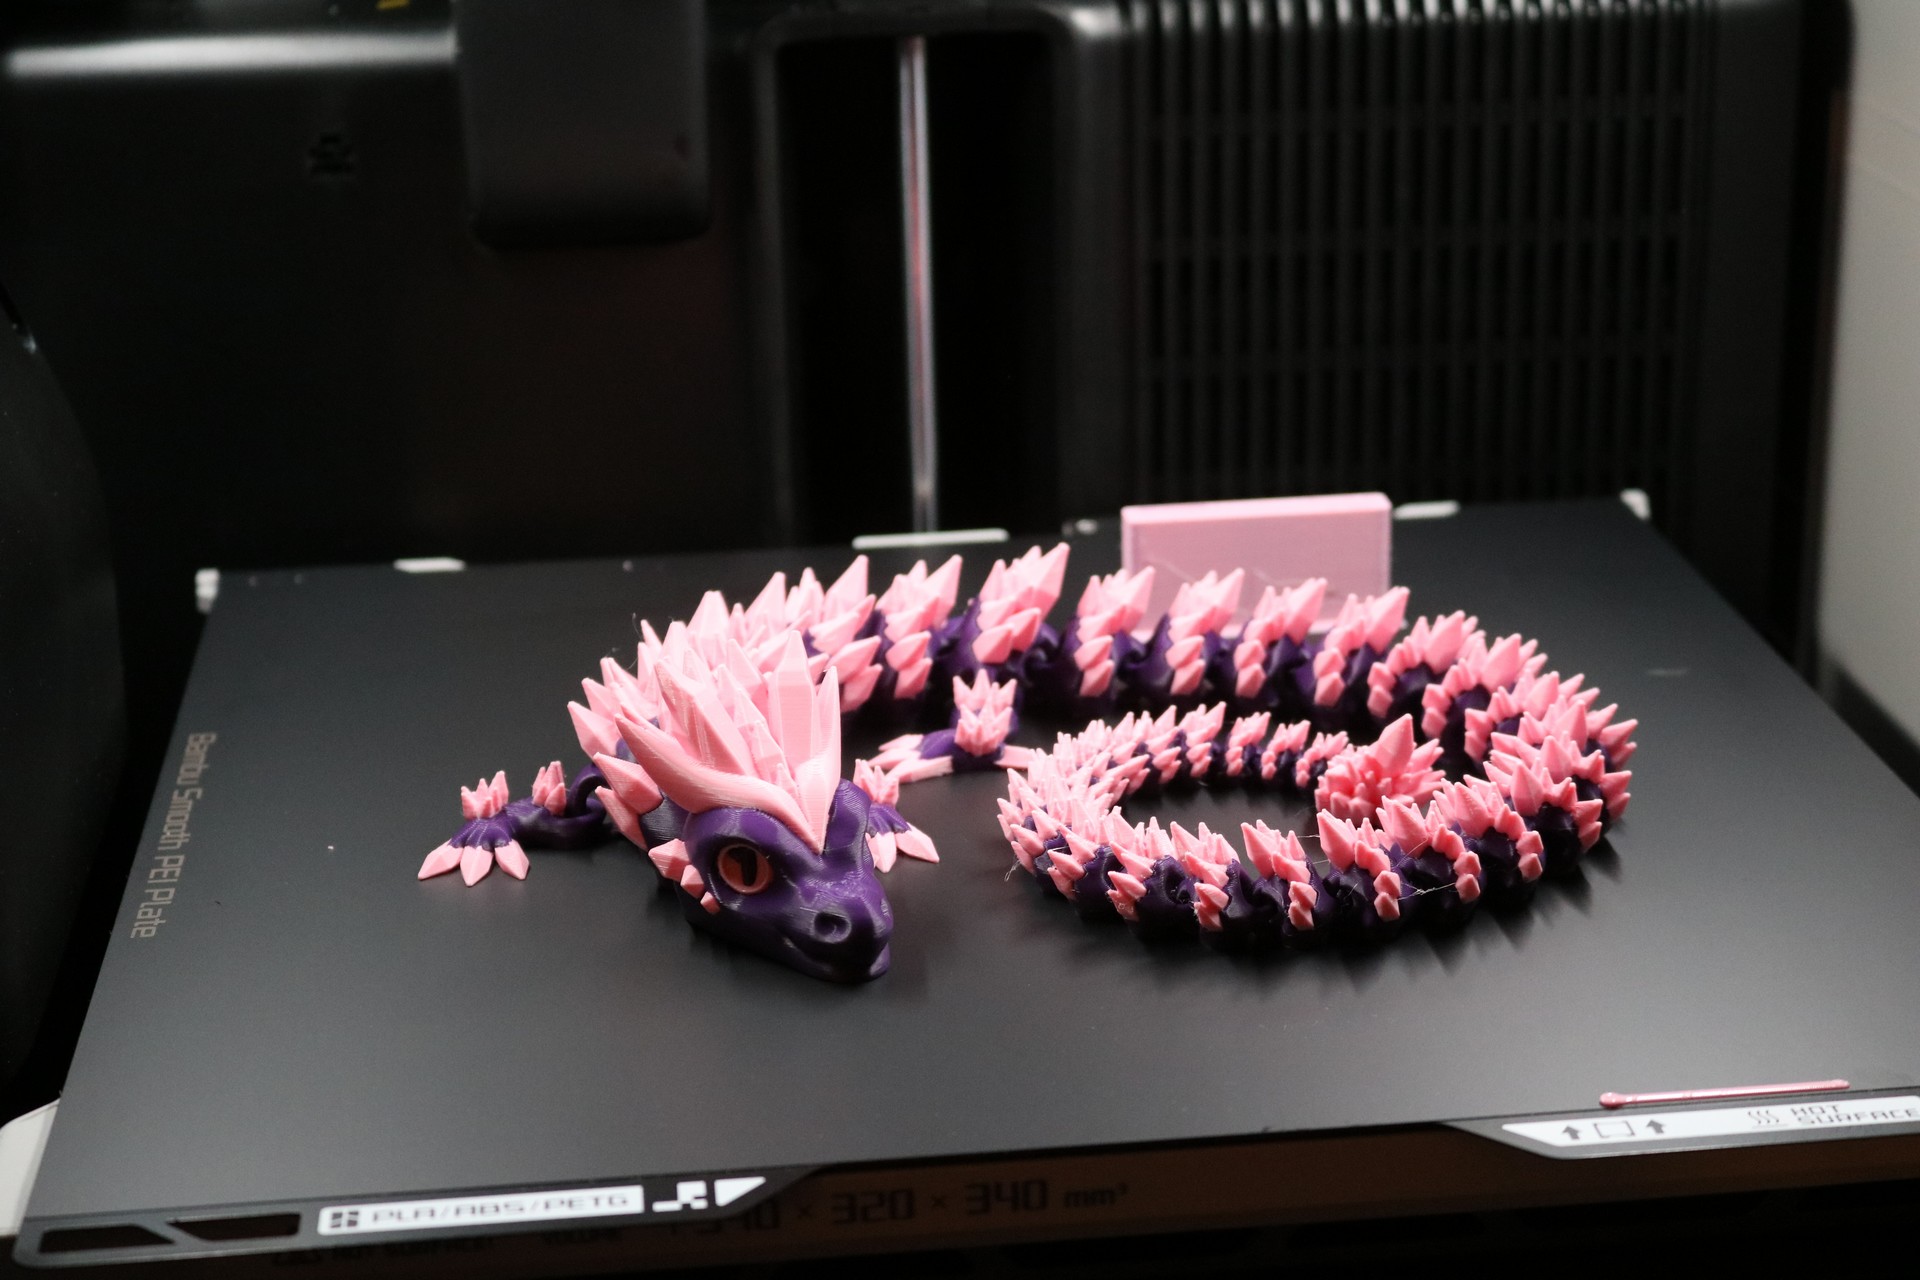
Our first flexi-dragon. These are flexible dragons that print in place. I believe this one was by Saber3D:
Here is a chute I printed for the filament blobs that get discharged out the back of the printer. You can find this chute on Makerworld. Printed in some ancient AmazonBasics PETG. Notice the nice overhang that it was able to handle!
A wankel engine, found on makerworld. I’ve always had a fascination with the Wankel / Mazda rotary engines. This was of course not a “print-in-place” model but was something that I assembled. Approximately 20 hours of printing. Printed in a combination of AmazonBasics PETG and Bambu PLA:

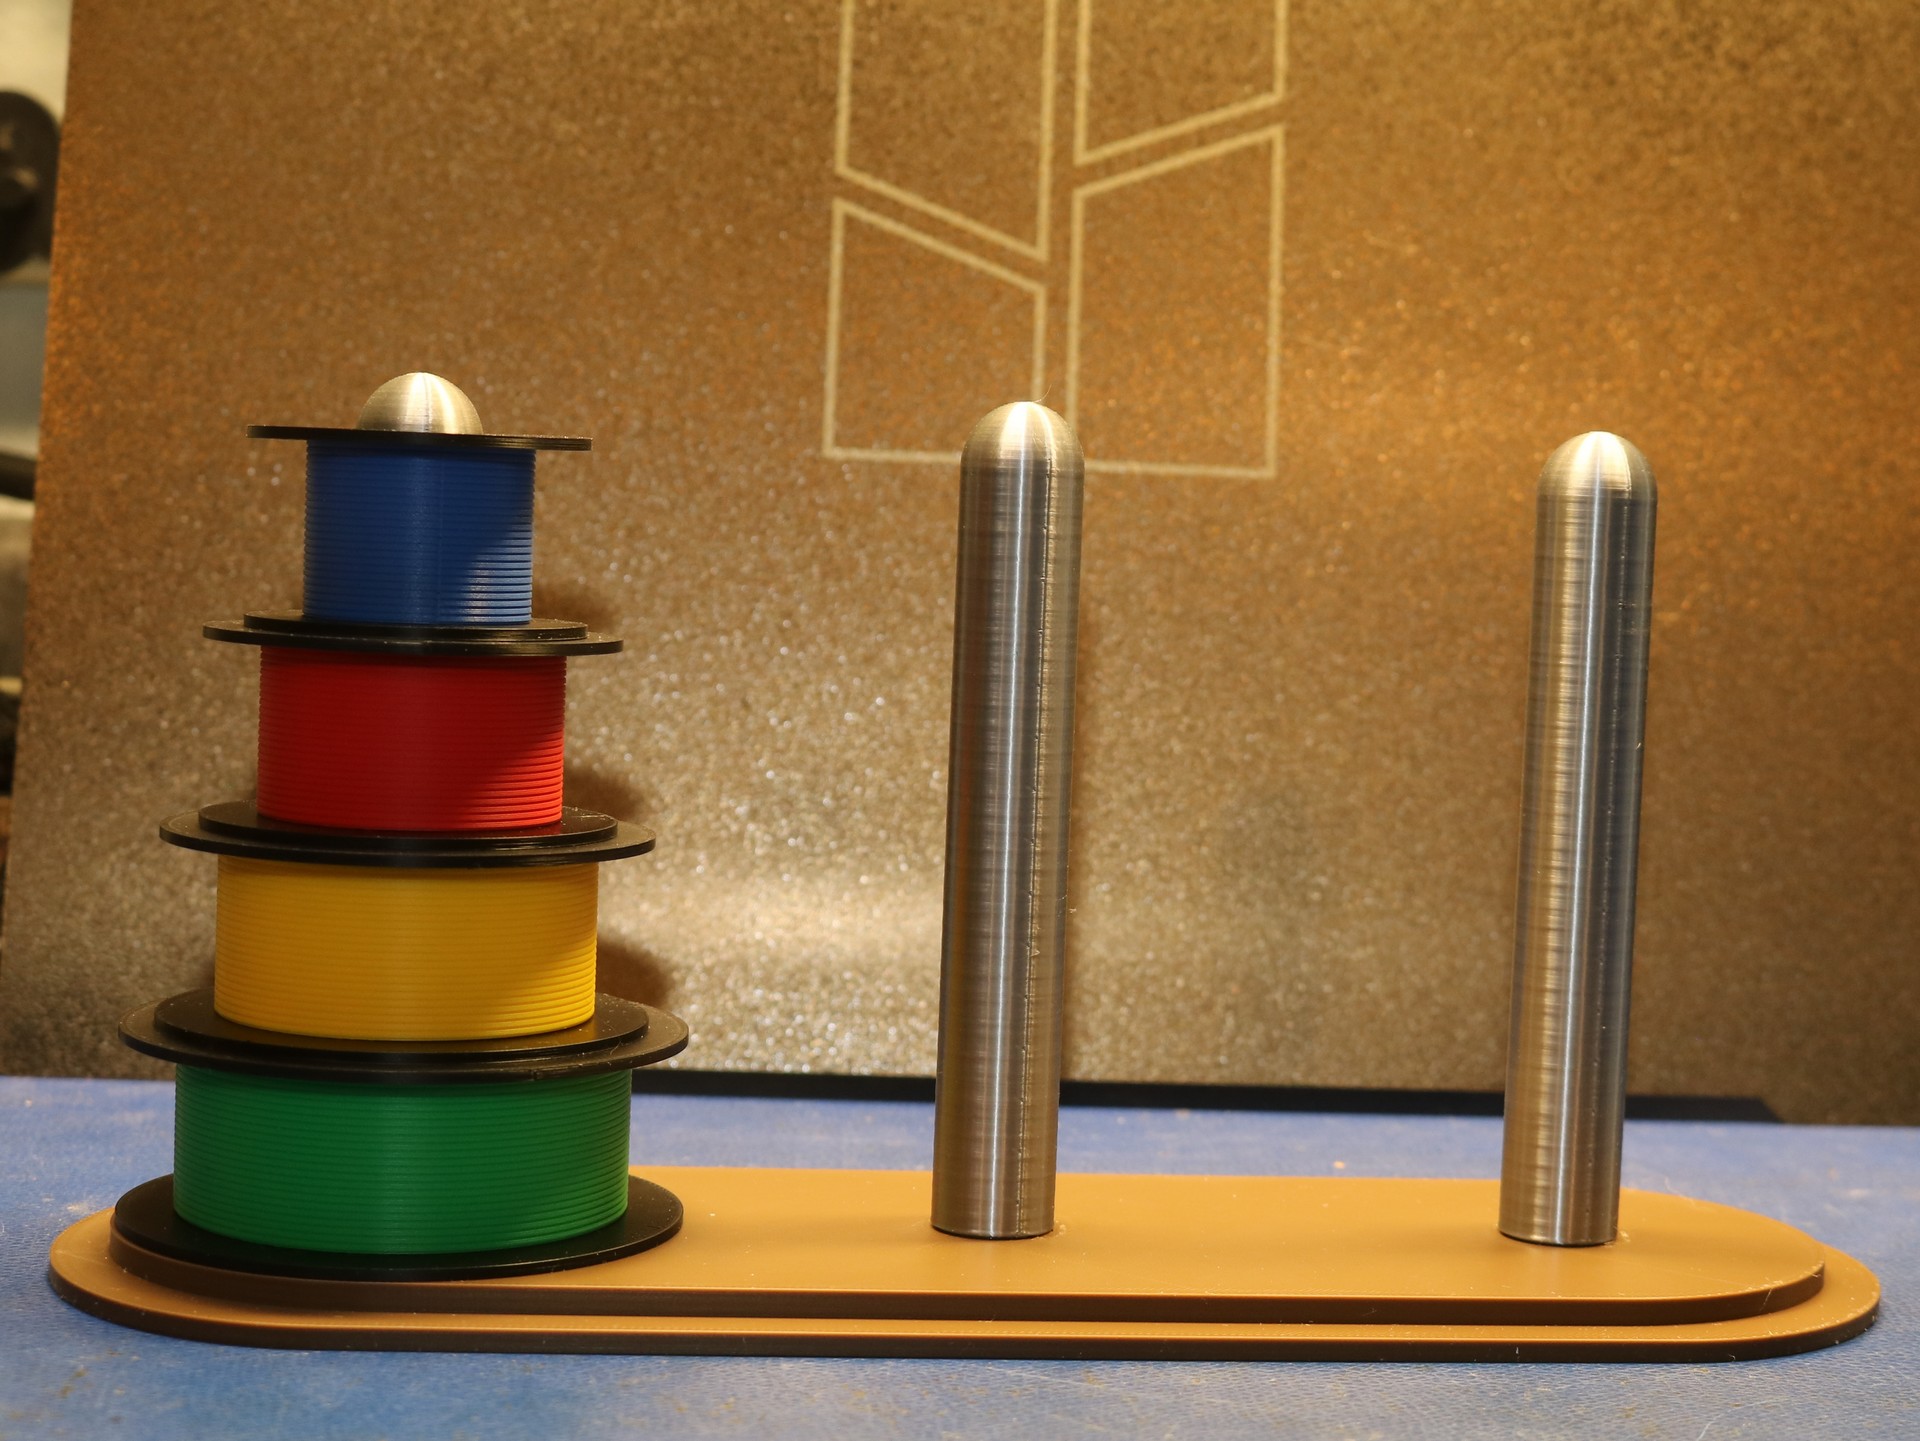
A 3D printed Towers of Hanoi Game (designed by me). Find it on Makerworld. I used a variety of PLA filaments, including silver silk.
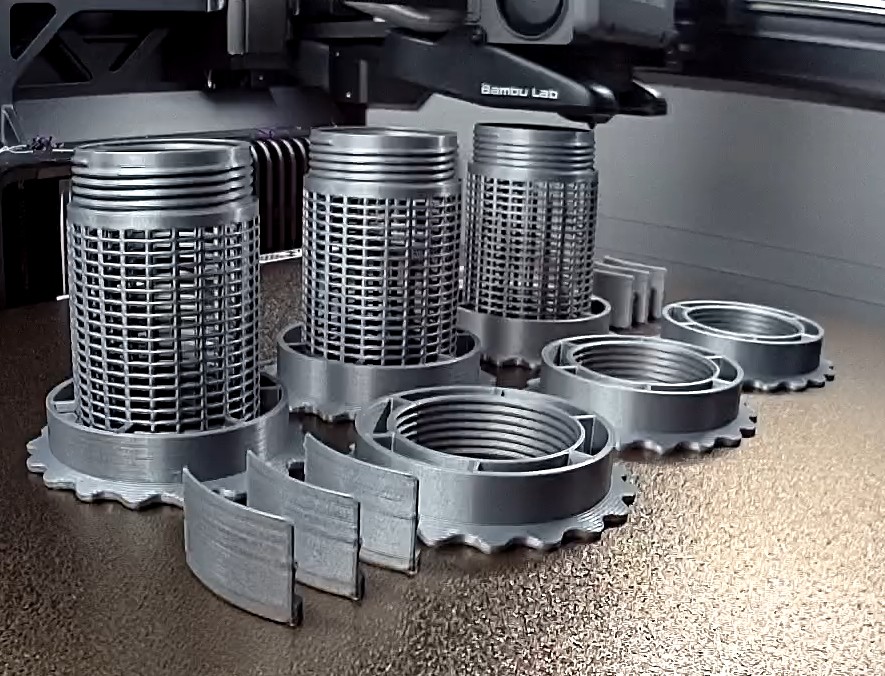
Desiccant containers. This was my first ABS print on the new printer… not just that, but my first ABS print ever!
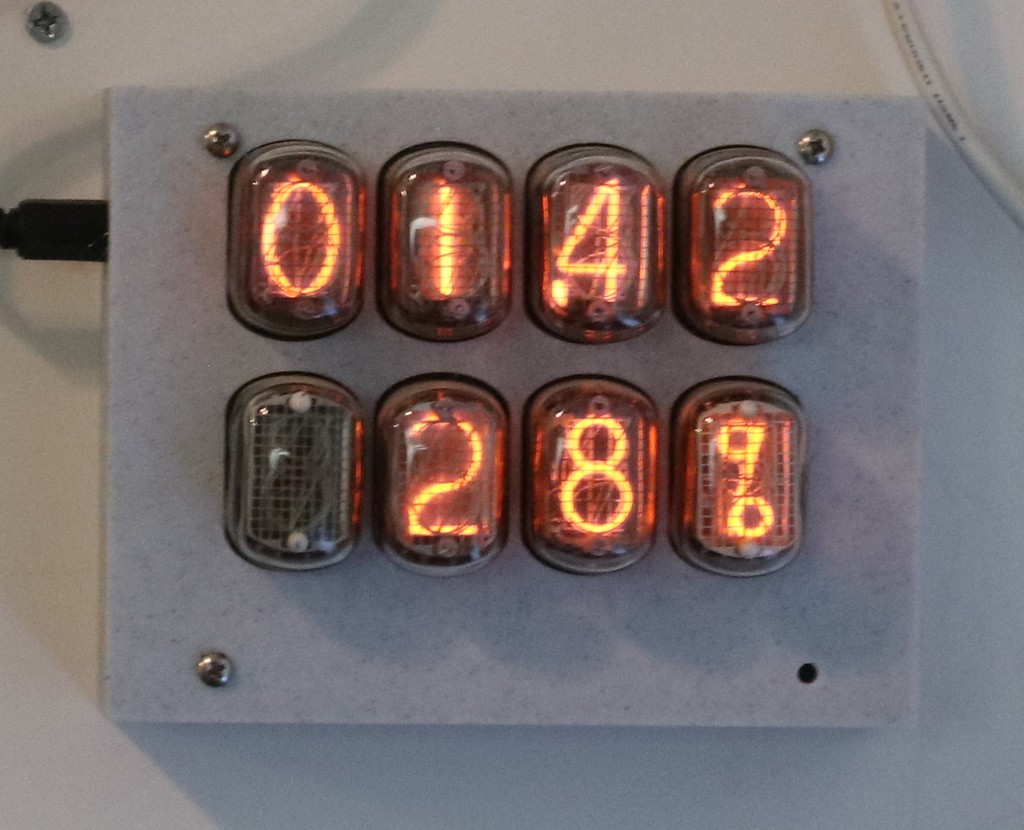
The filodometer revisited. Back when I had the I3 Mk3, I printed a Nixie Tube filament meter that showed meters of filament extruded and percent complete. I updated my software to connect to the Bambu over MQTT and reprinted the case (“Prusa Orange” seemed out of place) in Atomic Marble. Unfortunately, I couldn’t get meters of filament extruded from MQTT, but so I switched my top display to hours.minutes remaining. Small project cases like this are 90^ of my 3D printing. This screenshot shows a print with 1 hour 42 minutes remaining, that is 28% complete:
Conclusion
As of the time I’m writing this article, I’ve been printing with my new Bambu H2S for just under a month. I love this printer — it’s fast, easy, and convenient. More than once it has saved me from myself by letting me know that I had inserted the wrong plate, or a blob was forming due to a detached print, or something like that. I printed halloween decorations. I’ve printed my daughter and her friends a dozen flexi dragons of various types. I’ve printed a few functional models. I’ve printed project boxes. It’s all worked very well.
I wasn’t sure how much use I would get out of the multimaterial AMS 2 Pro, but even just a 2-color print has a lot more pop to it than a 1-color print. Plus, sometimes it’s nice to lay out several different color objects and use print-by-object to kick them all off overnight.
The large build volume gives me plenty of room to spare.