Scott’s Junk Yard Dog Sandrail project
[Note: If you’re looking for my “Good” RX-7 Mazda Sandrail Project, click here]
The Junk Yard Dog sandrail is what I’m building out of all the “leftover” parts from the good sandrail. After building the good sandrail, I had a turnkey mazda engine, transmission, starter, etc leftover, and I decided to build something out of it. The real goal is just to take all of the leftover pieces that are cluttering up the garage and put them all in one spot, one on (hopefully) running vehicle.
Here’s a list of the leftover parts:
- Mazda 12A Engine w/ stock carb, distrib, intake, and exhaust
- Mazda RX-7 Manual transmission w/ Starter
- Two VW tires
- Lots of scrap iron
- One worn-out battery
Here’s a list of the parts needed to complete the project:
- Some iron, for a frame
- A rear-end/differential
- Steering
Week 1:
The first week consisted mainly of assembling the few remaining components that I needed and building a frame and a rear axle.
The first thing that I needed was some kind of differential. Ideally, I would have just used an 86 or newer RX-7 differential, but that’s the one thing I was missing. So, I went junk-yard shopping, and picked the first differential that looked easy to pull. What I ended up with was a front differential out of a (Nissan?) four-wheel drive pick up.
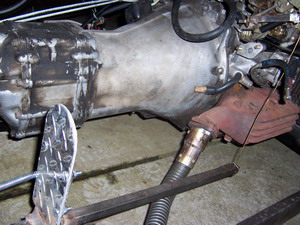
Of course, there was no ready way to mate the RX-7 tranny’s output to the Nissan pickup, so I had to fabricate a drive shaft. I used an only RX-7 drive shaft, and cut it down and rewelded it:
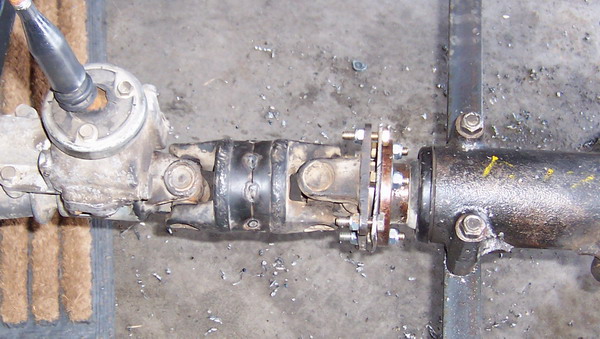
Then, I build a small adapter plate to adapt the bolt pattern of the RX-7 drive shaft to the differential.
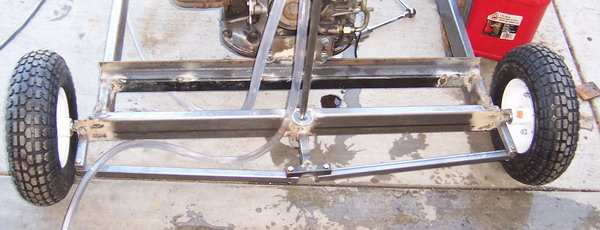
Now that I had a fully functional running gear, I had to construct a frame for it. The frame was constructed from 1″ x 3″ rectangular steel tubing. The frame is pretty much just a big rectangle. Once the frame was constructed, I had to build mounts for the engine, tranny, and differential. These were generally fabricated with leftover angle-iron and stiffened up with some square tubing.
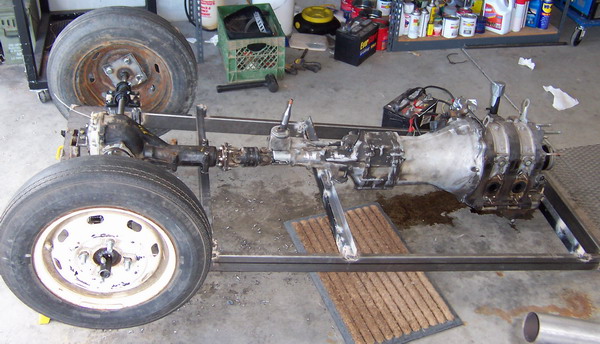
Here’s what the frame looked like at the end of week 1:
Next, I had to create a rear suspension (or in my case, a lack of a rear-suspension). I fabricated axles from 1″ cold-rolled steel round stock. Each end of the axle fit into a home-made hub assembly (a little “hub” to mate with the differential, and a big hub to mate with the wheel). The axles are supported by a couple of “pillow blocks” purchased from a local bearing store for about $7 each. Here’s a detail view of the rear end:
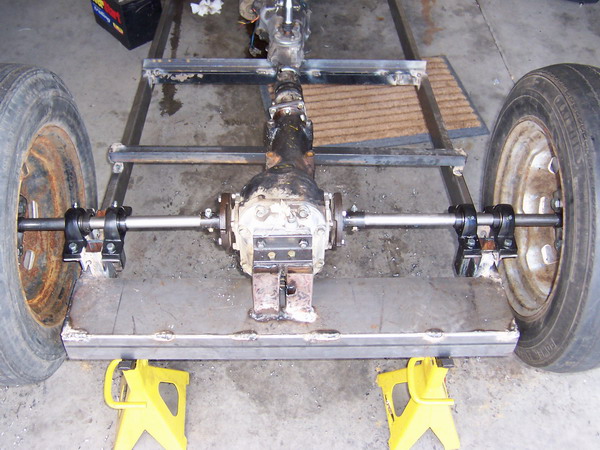
The hubs were constructed from a steel plate and a piece of 1″ black pipe. The pipe fits as a sleeve around the 1″ cold-rolled axle, and a grade-8 bolt locks it together. Here’s a few views of the wheel hub:

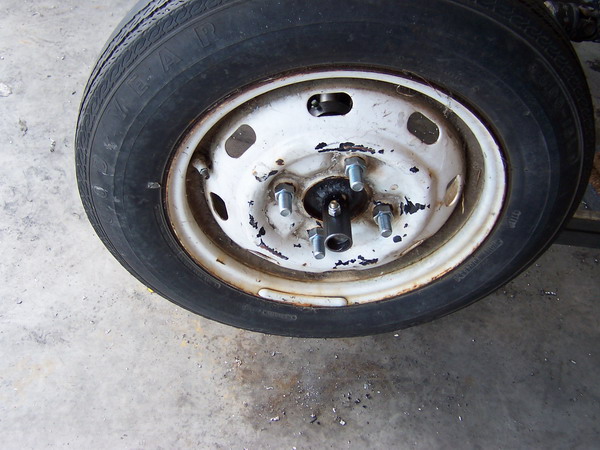
The biggest task of all the rear-end work was getting everything lined up correctly. The hubs had to be precisely centered on the axle, otherwise things will wobble or do even worse things. This is the reason why I sleeved the with the iron pipe, rather than just welding the plate down — so there was a little play in the system and everything didn’t have to be absolutely perfectly centered.
Week 2:
Week 2 saw the introduction of the somewhat lacking front suspension. The front suspension was composed from some leftover hinges, some round stock, some tubing, and a couple of large wheelbarrow tires from harbour freight:
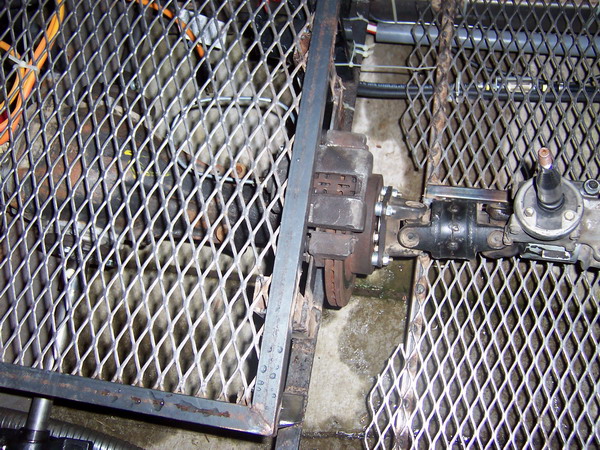
Somewhere around this time was where I came up with the ingenious single brake idea. Too cheap to purchase two sets of brake components, I found a single disc brake from the junkyard. What good is a single brake? … Well, you install it on the driveshaft! Of course, if you were to brake at any significant speed, you’d probably destroy the differential, but we’ll promise to just not do that… 🙂
Week 3:
The project was completed in the third week. The main accomplishments were finishing up the steering, fabricating the seat, and rigging all of the controls.
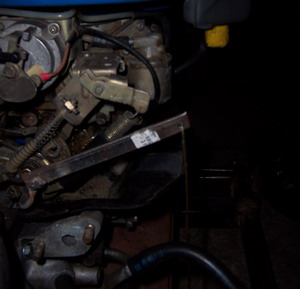
I used a VW-style pedal assembly from my old sandrail (which was converted to CNC hydraulic pedals some time ago…) The VW pedal assembly is easy to use, but required a bit of work to get working in the go kart. The first issue was the VW clutch cable, which was designed to work with a rear engine. To get it to work with my front engine, I had to use a cable-and-pulley system.

The throttle linkage was thrown together out of spare parts, and was built from a chunk of diamondplate and a hinge. I welded a short extension onto the mazda carb. A section of clothes-hanger wire connected the pedal to the carb.
We also had to deal with the radiator. The radiator was a dodge caravan radiator leftover from my Mazda Sandrail (the caravan radiator turned out to be much too small). Nevertheless, it was enough to get the go-kart working. Since I was missing the water pump for the engine, I used an old 110V waterbed pump. How do you use a 110V pump with a 12V battery — with an inverter, of course!
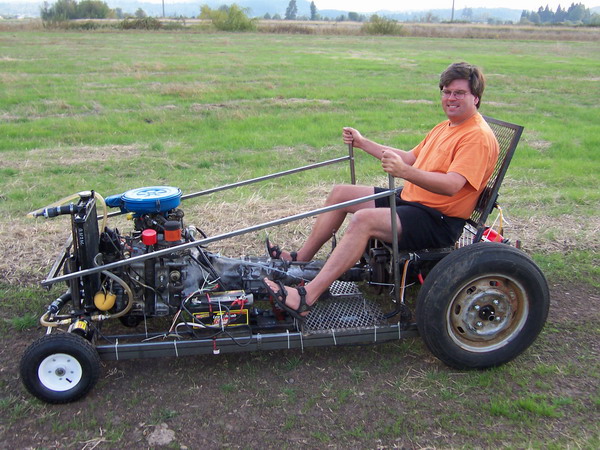
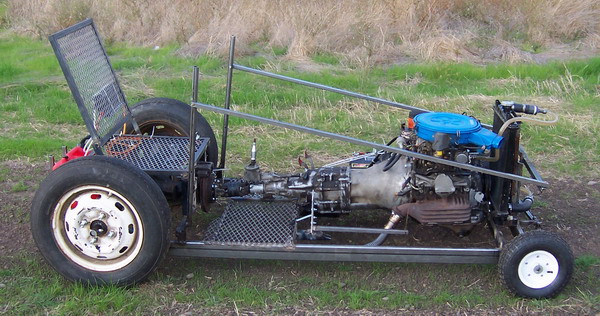
Here is a picture of the completed go-kart:
Test Run:
The test run was a great success…. At least for a while. I powered up the go-kart and drove through my neighborhood to the nearest empty field. Along the way, there were lots of started looks from the neighbors wondering what that ugly noisy machine was rumbling down the street.
When we got to the field, I made a couple of high-speed (well about 20-40mph) passes down the grass before all hell broke loose. The first thing was to happen was the hub on the front “wheelbarrow tire” broke, and the tire fell off. Not a real good thing….
Replaced the tire, and the next thing that happened was kaboom! a large jet of superheated steam from the radiator (rule #1: If you use an inverter to run your 110V water pump, make sure to turn it on!)
Okay, got that fixed and promptly got stuck in a ditch… Finally managed to limp to gokart home before yet another radiator steam episode (rule #2: make sure to follow rule #1 about turning on the water pump; it really is important)
So, the junkyard dog go-kart is currently awaiting a heavier front end with some better tires, and a mechanical water pump.